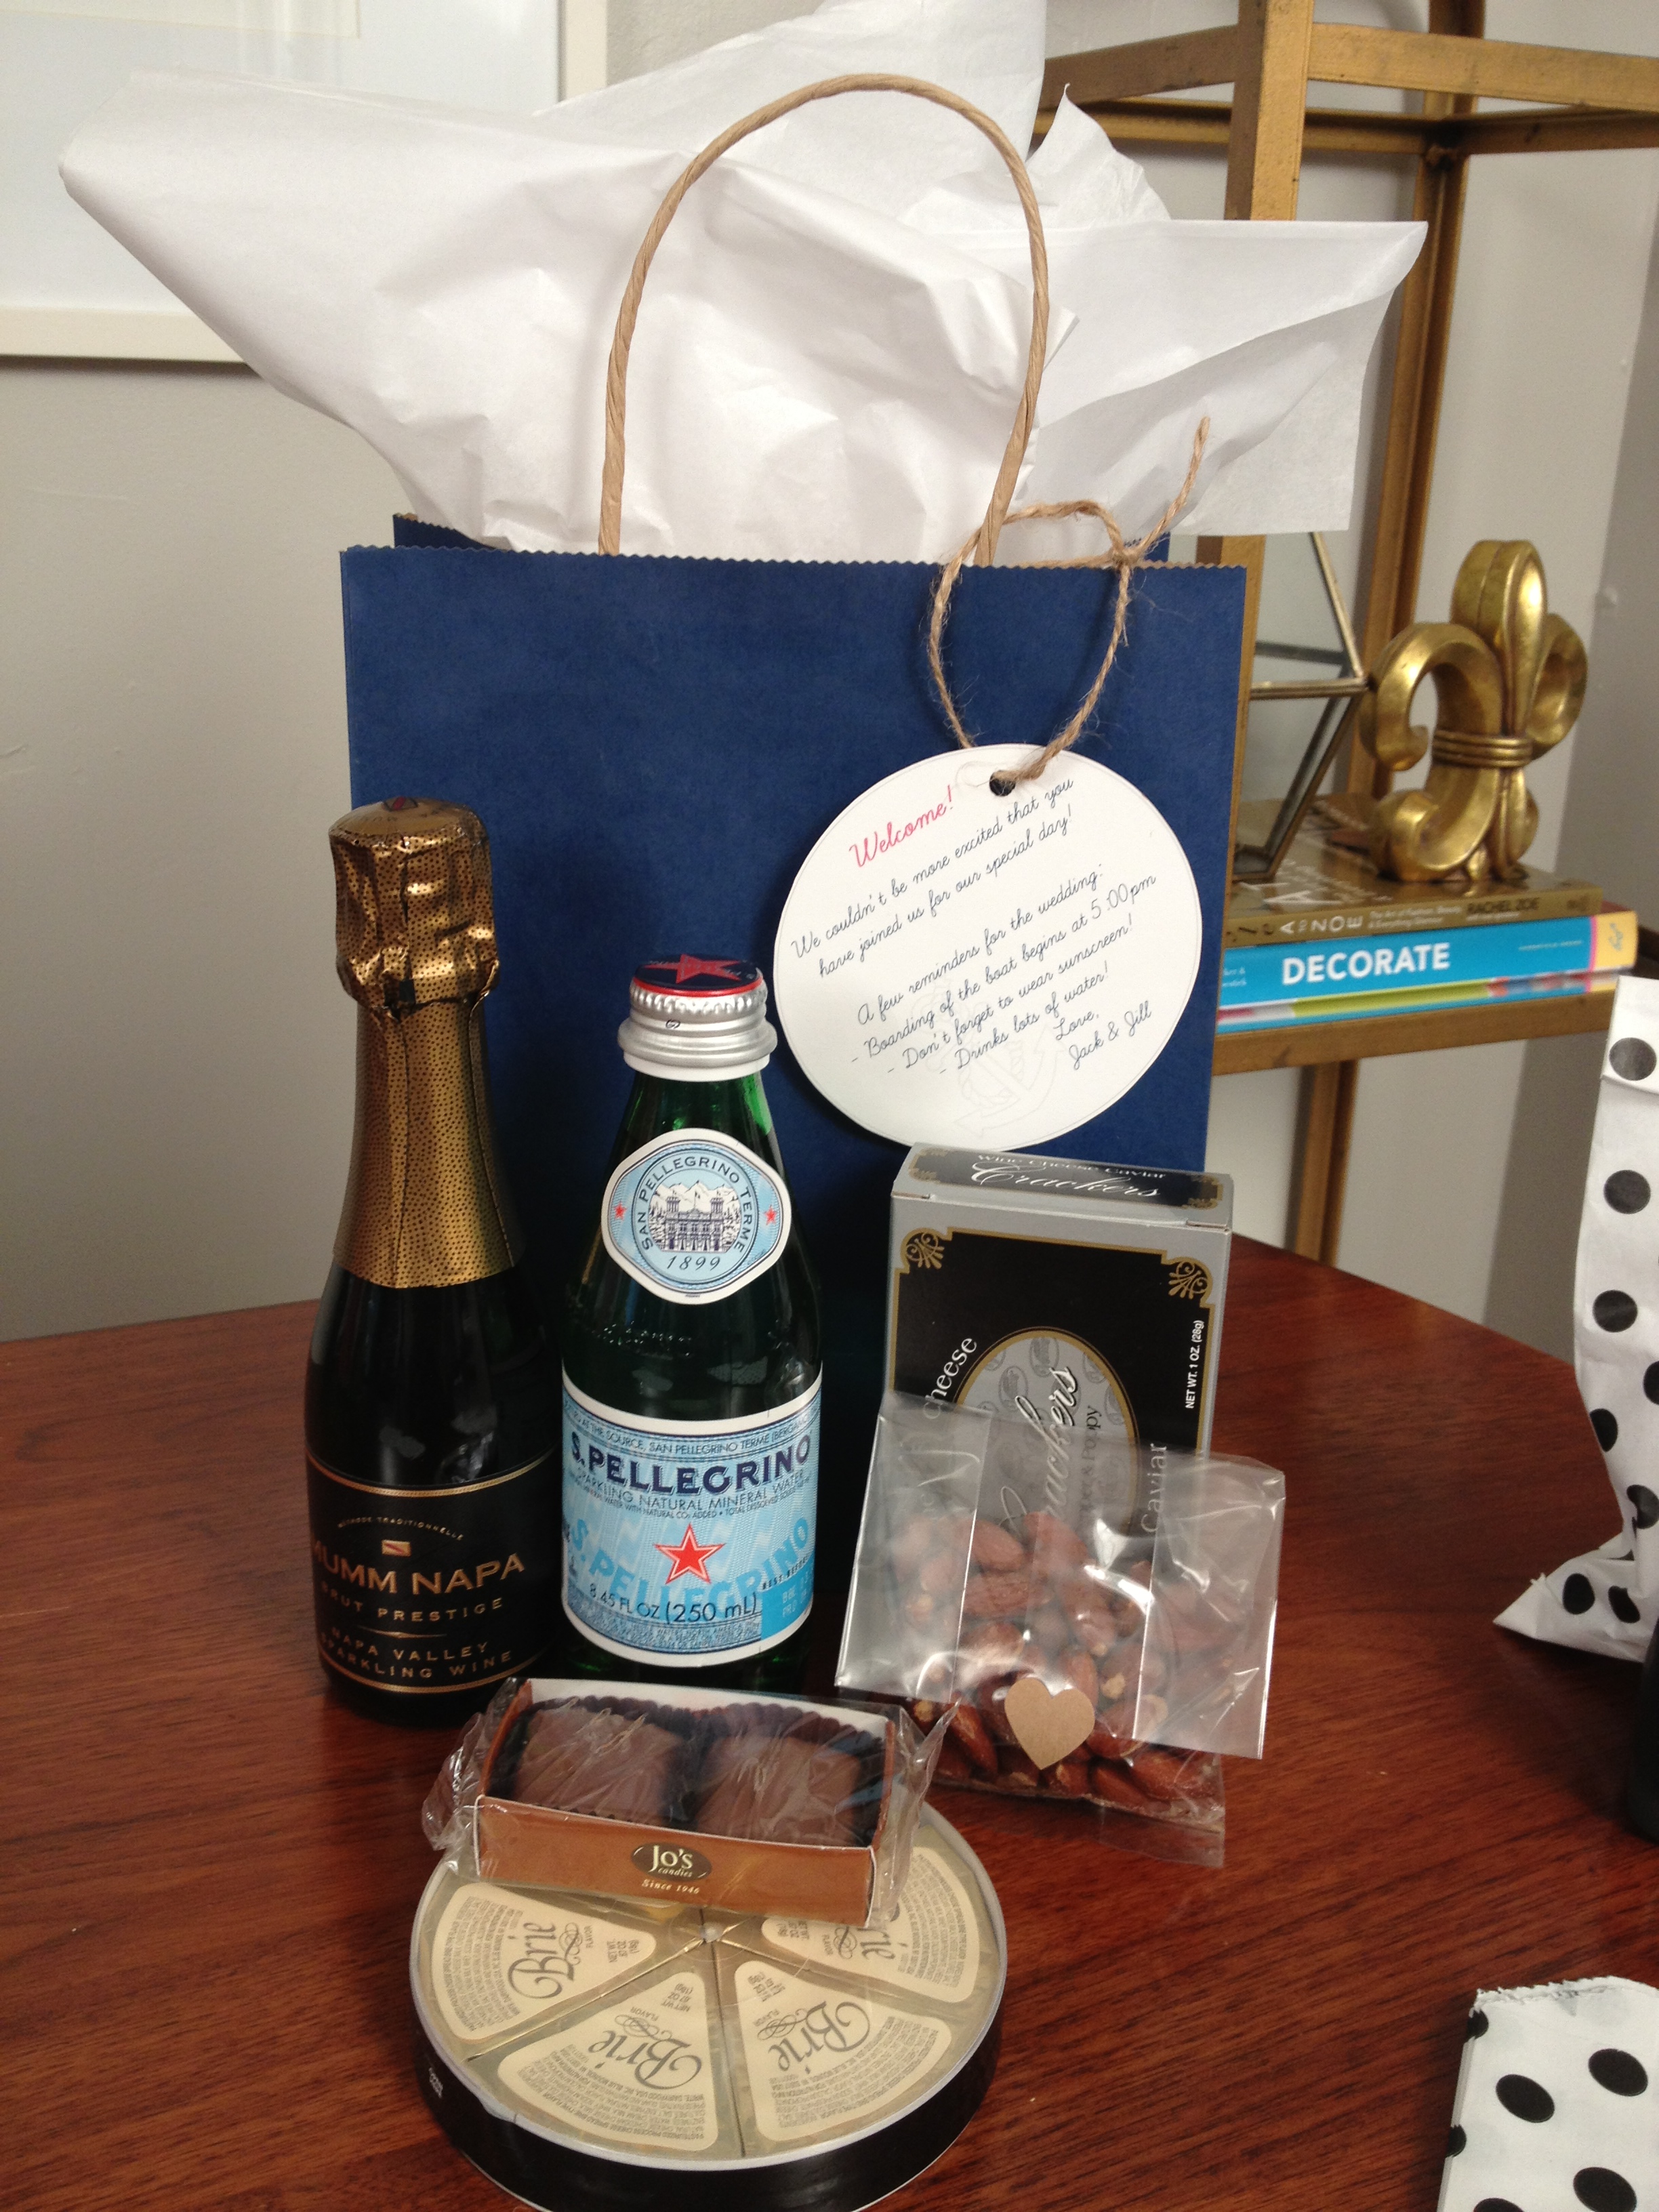
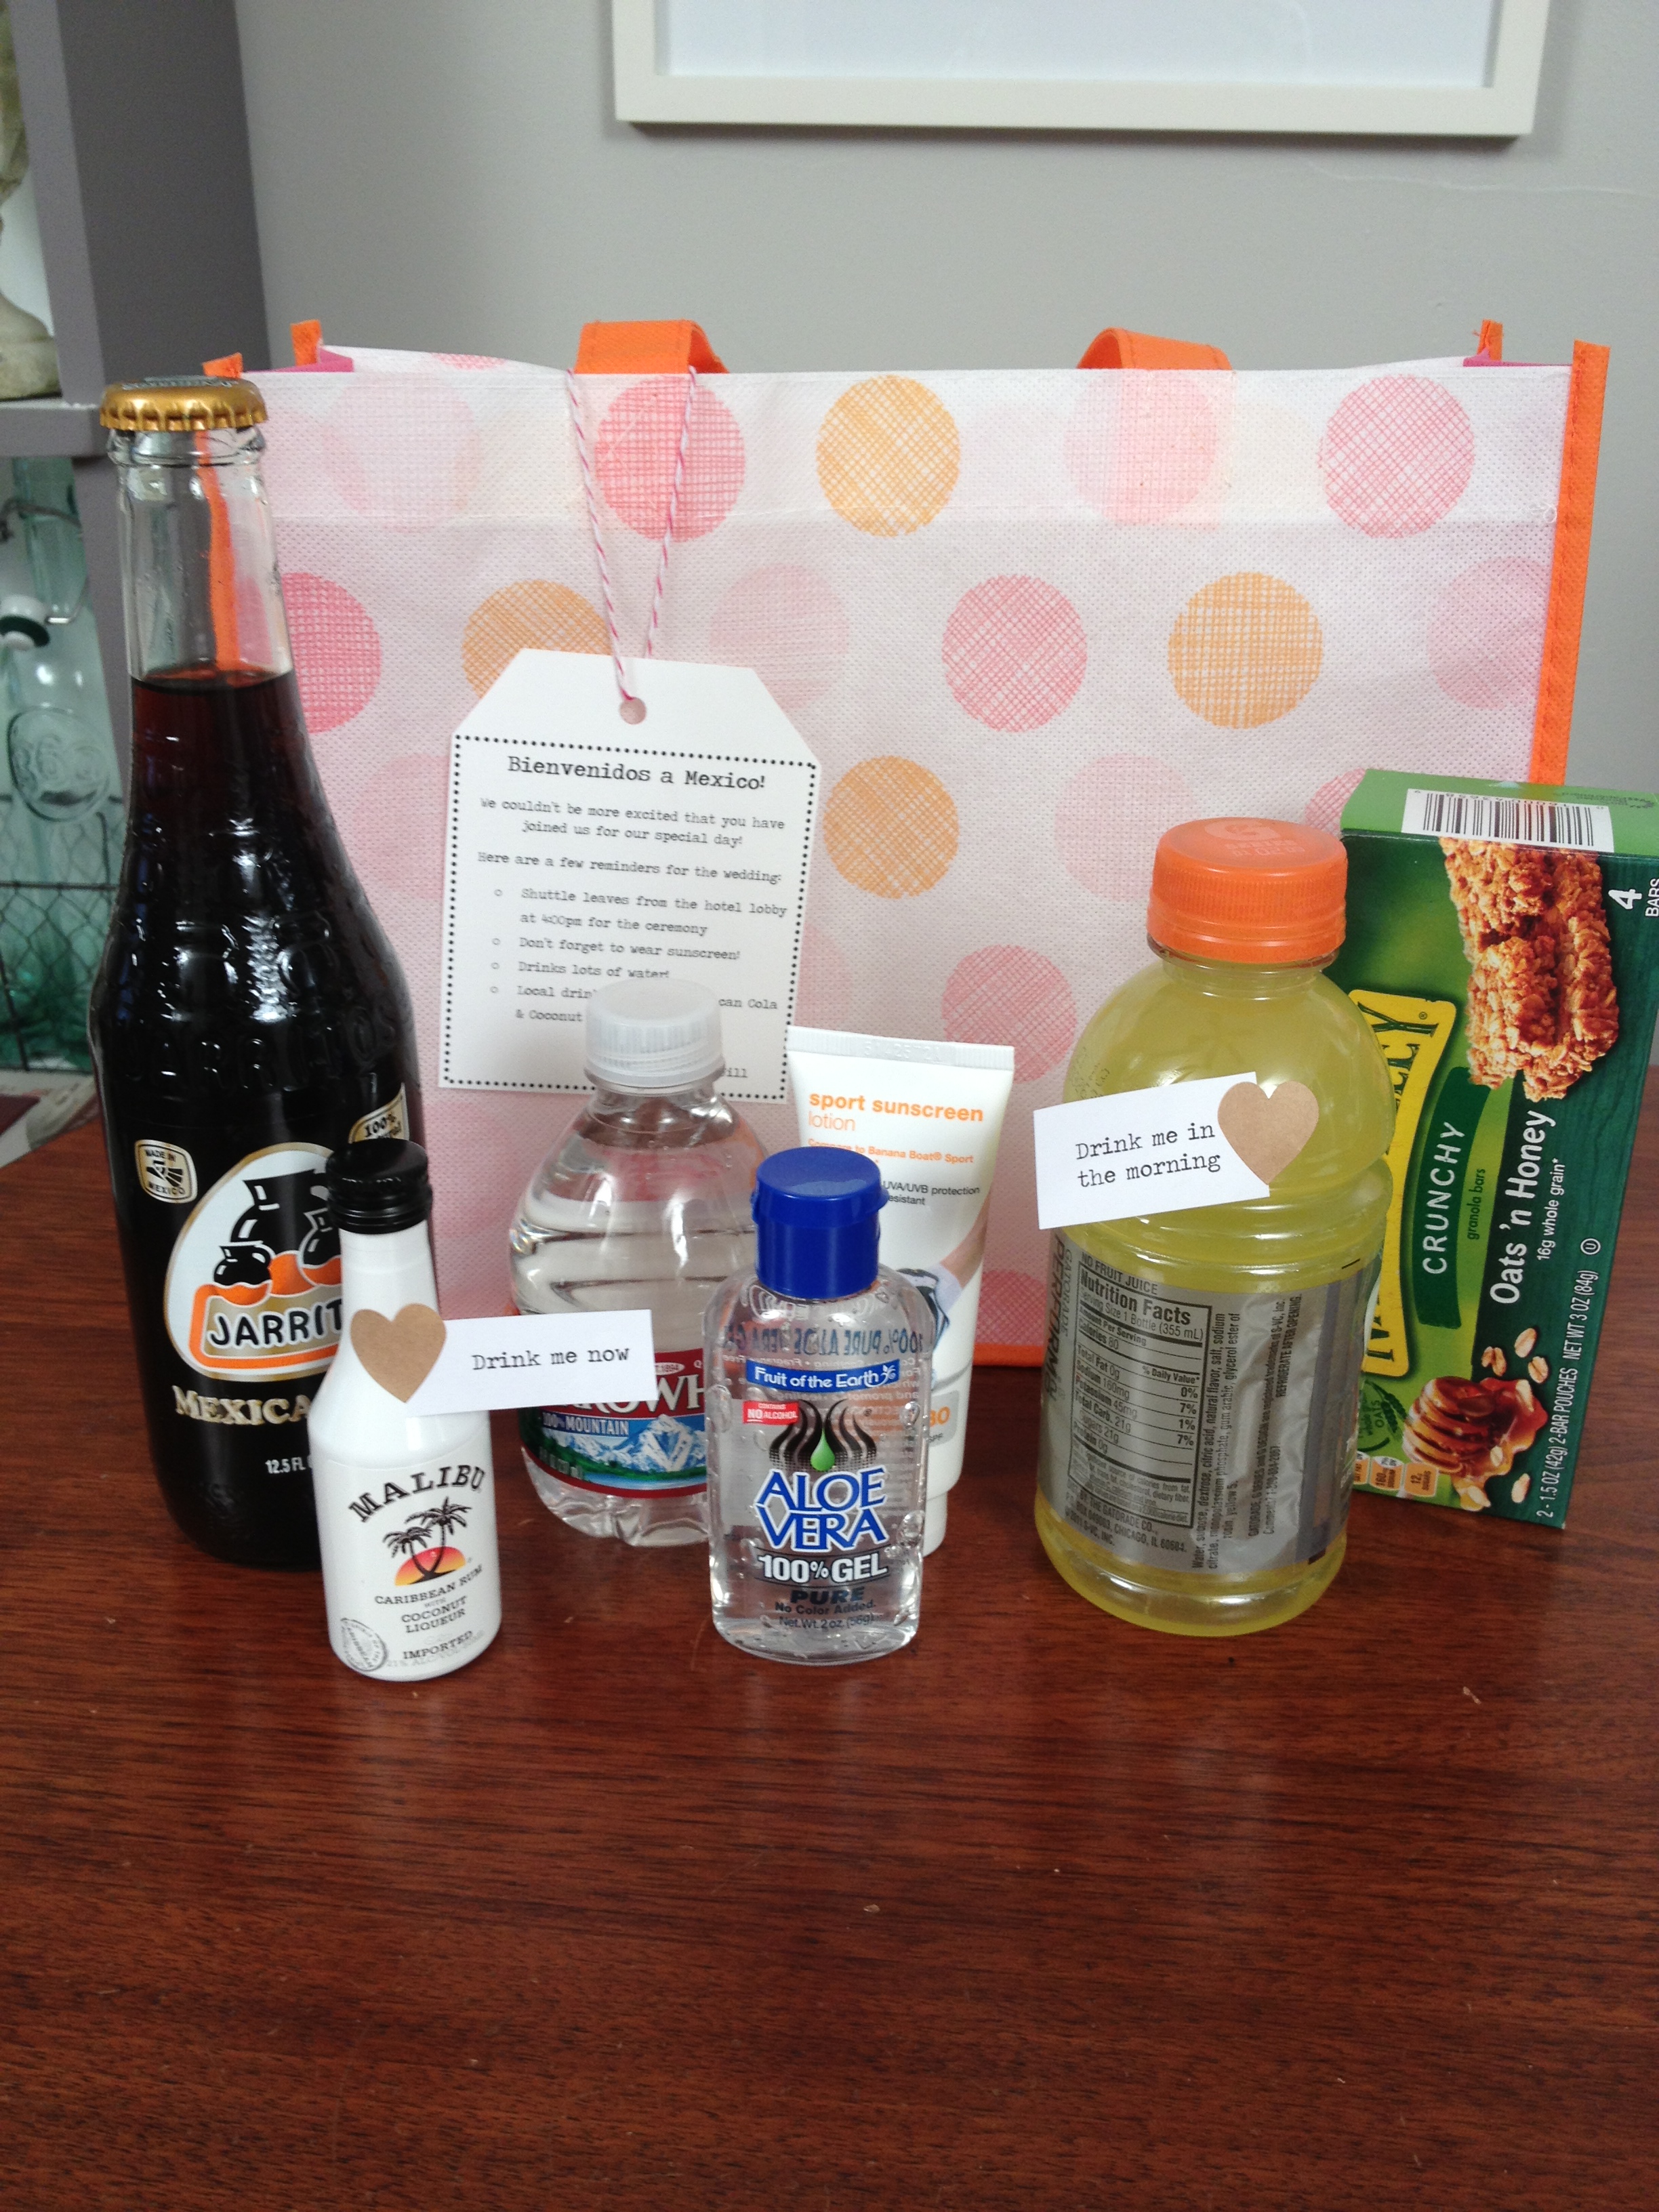
I can’t think of a better way to thank guests for sharing in your big day then to create a welcome bag upon their arrival. This week’s video will show you some easy ways to customize the bags based on your wedding’s theme or destination.
Tip: Include specific notes for your guests such as a weekend itinerary, area attractions, transportation details or other visitor information.
Resources:
Target – $1 section for toiletries
World Market – miniature versions of food and drinks
I got some requests to do more wedding DIY tutorials and I was super happy to comply!
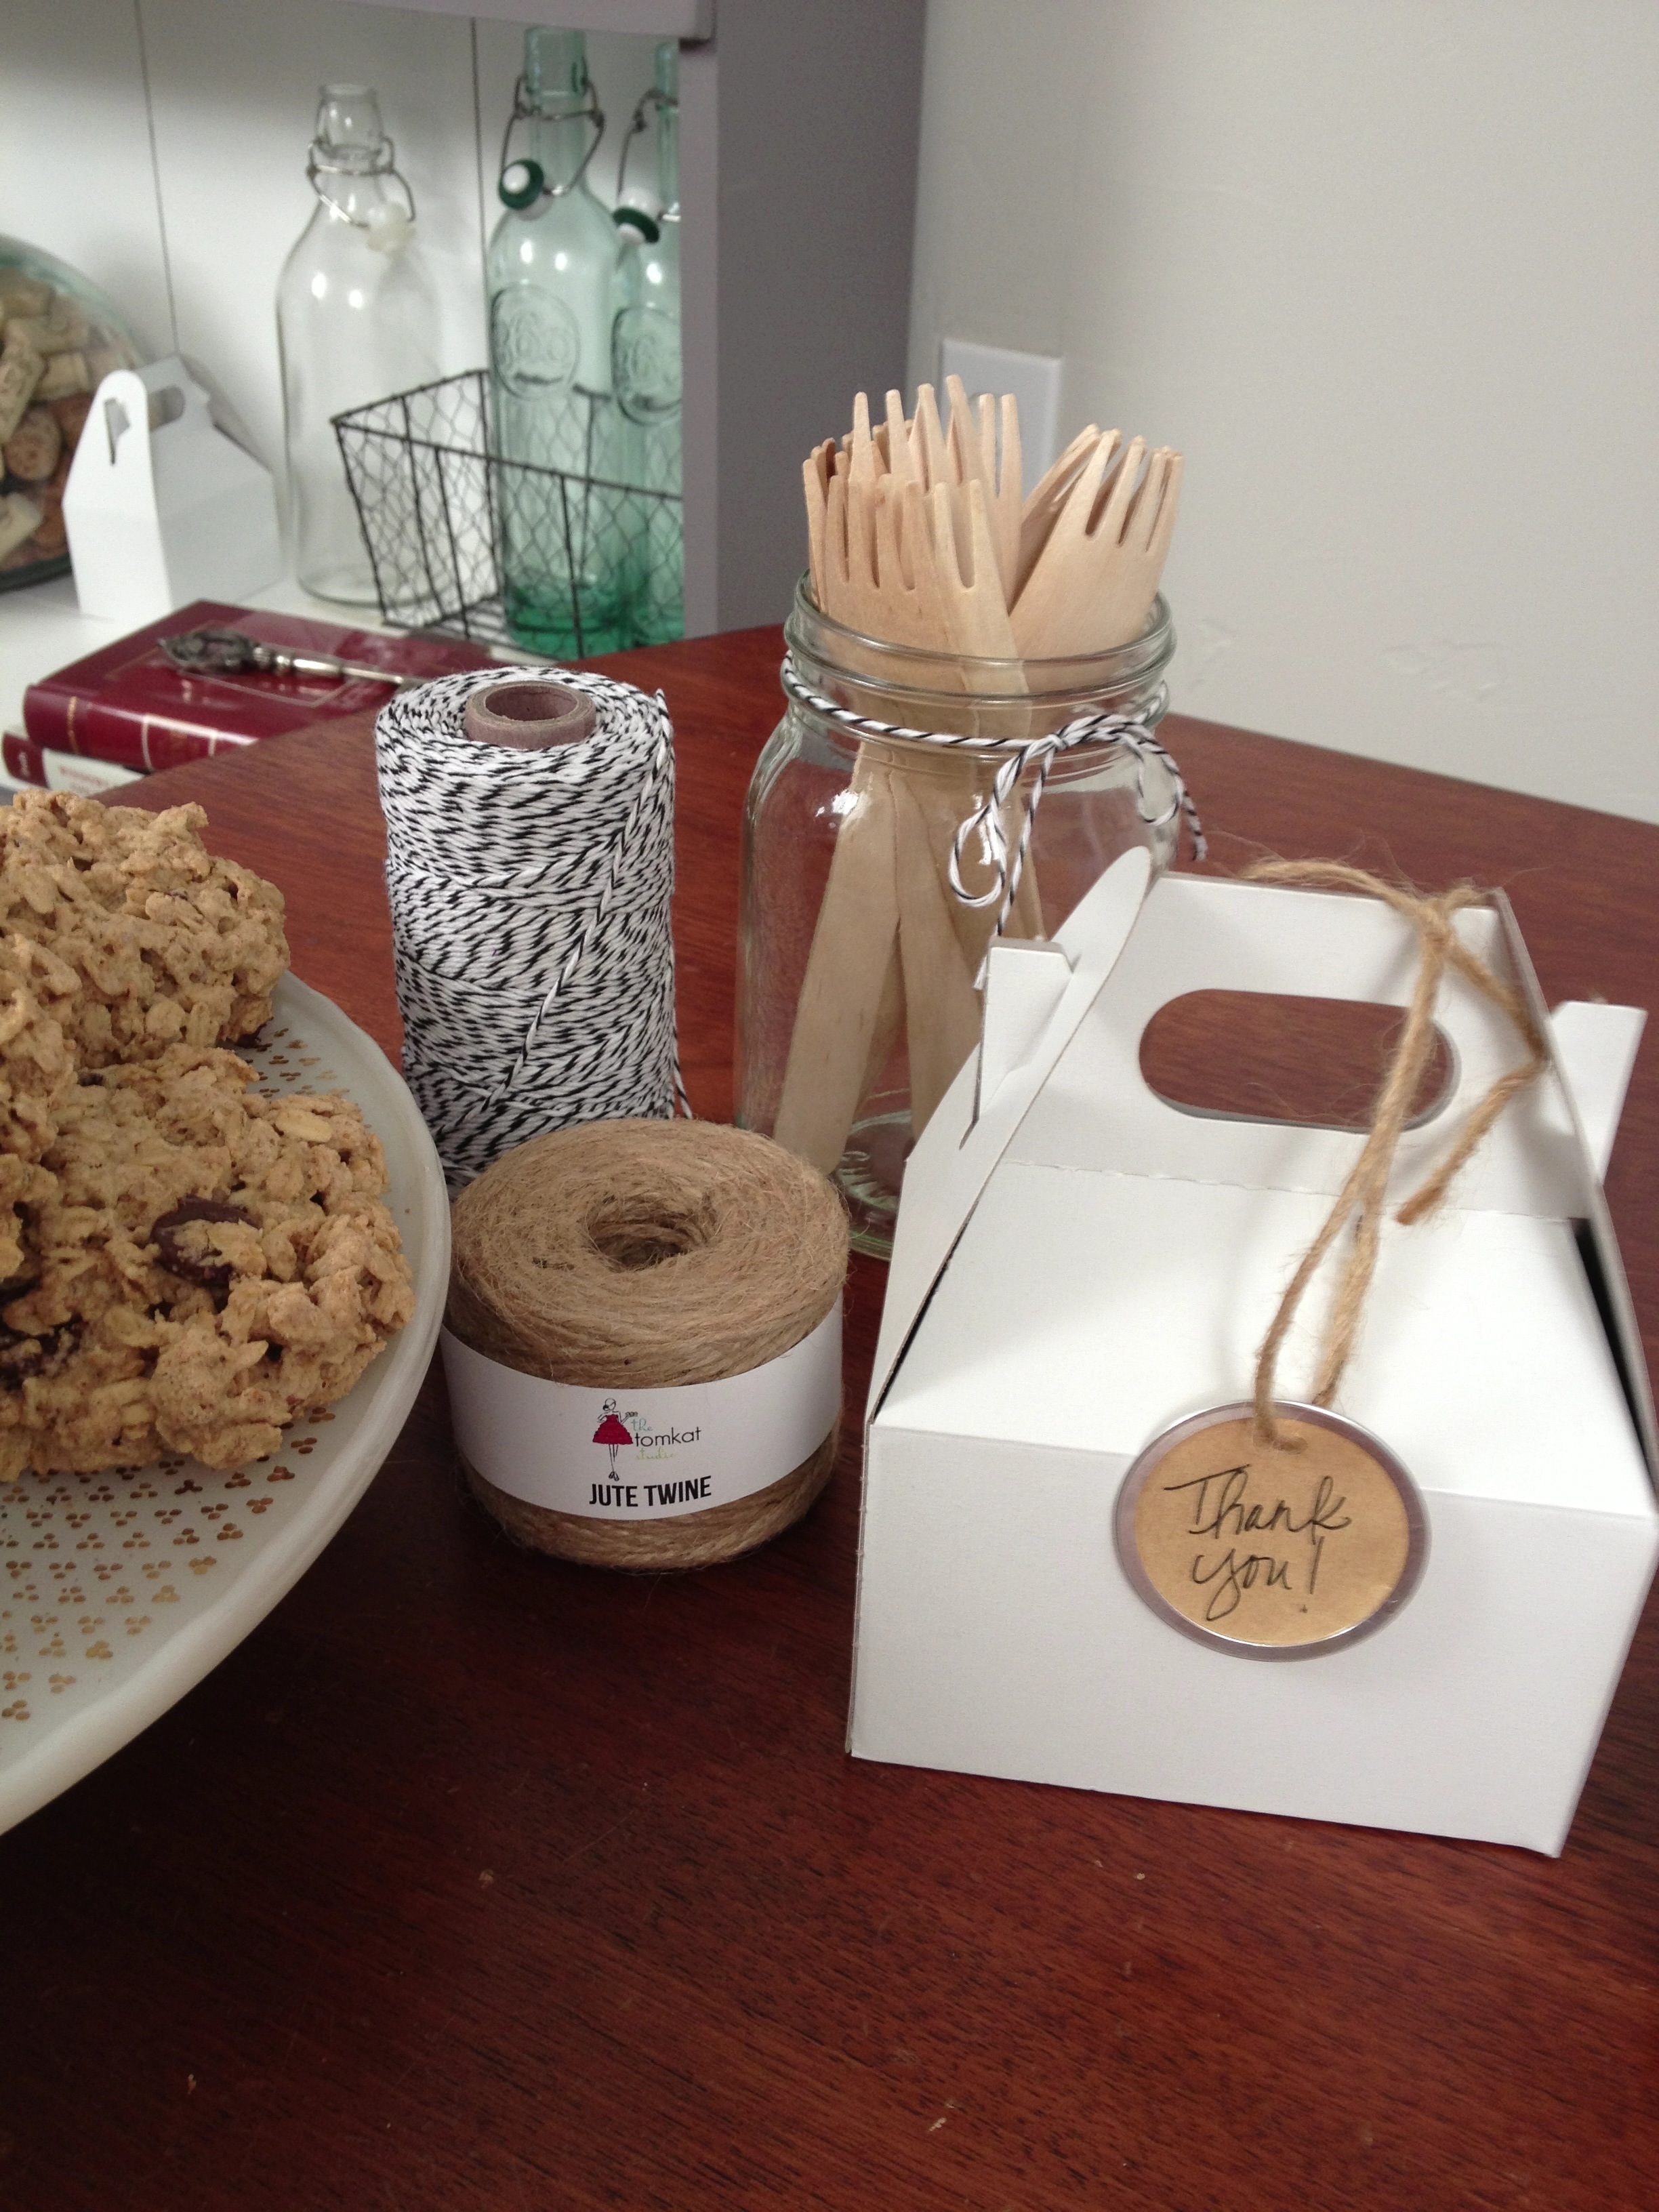
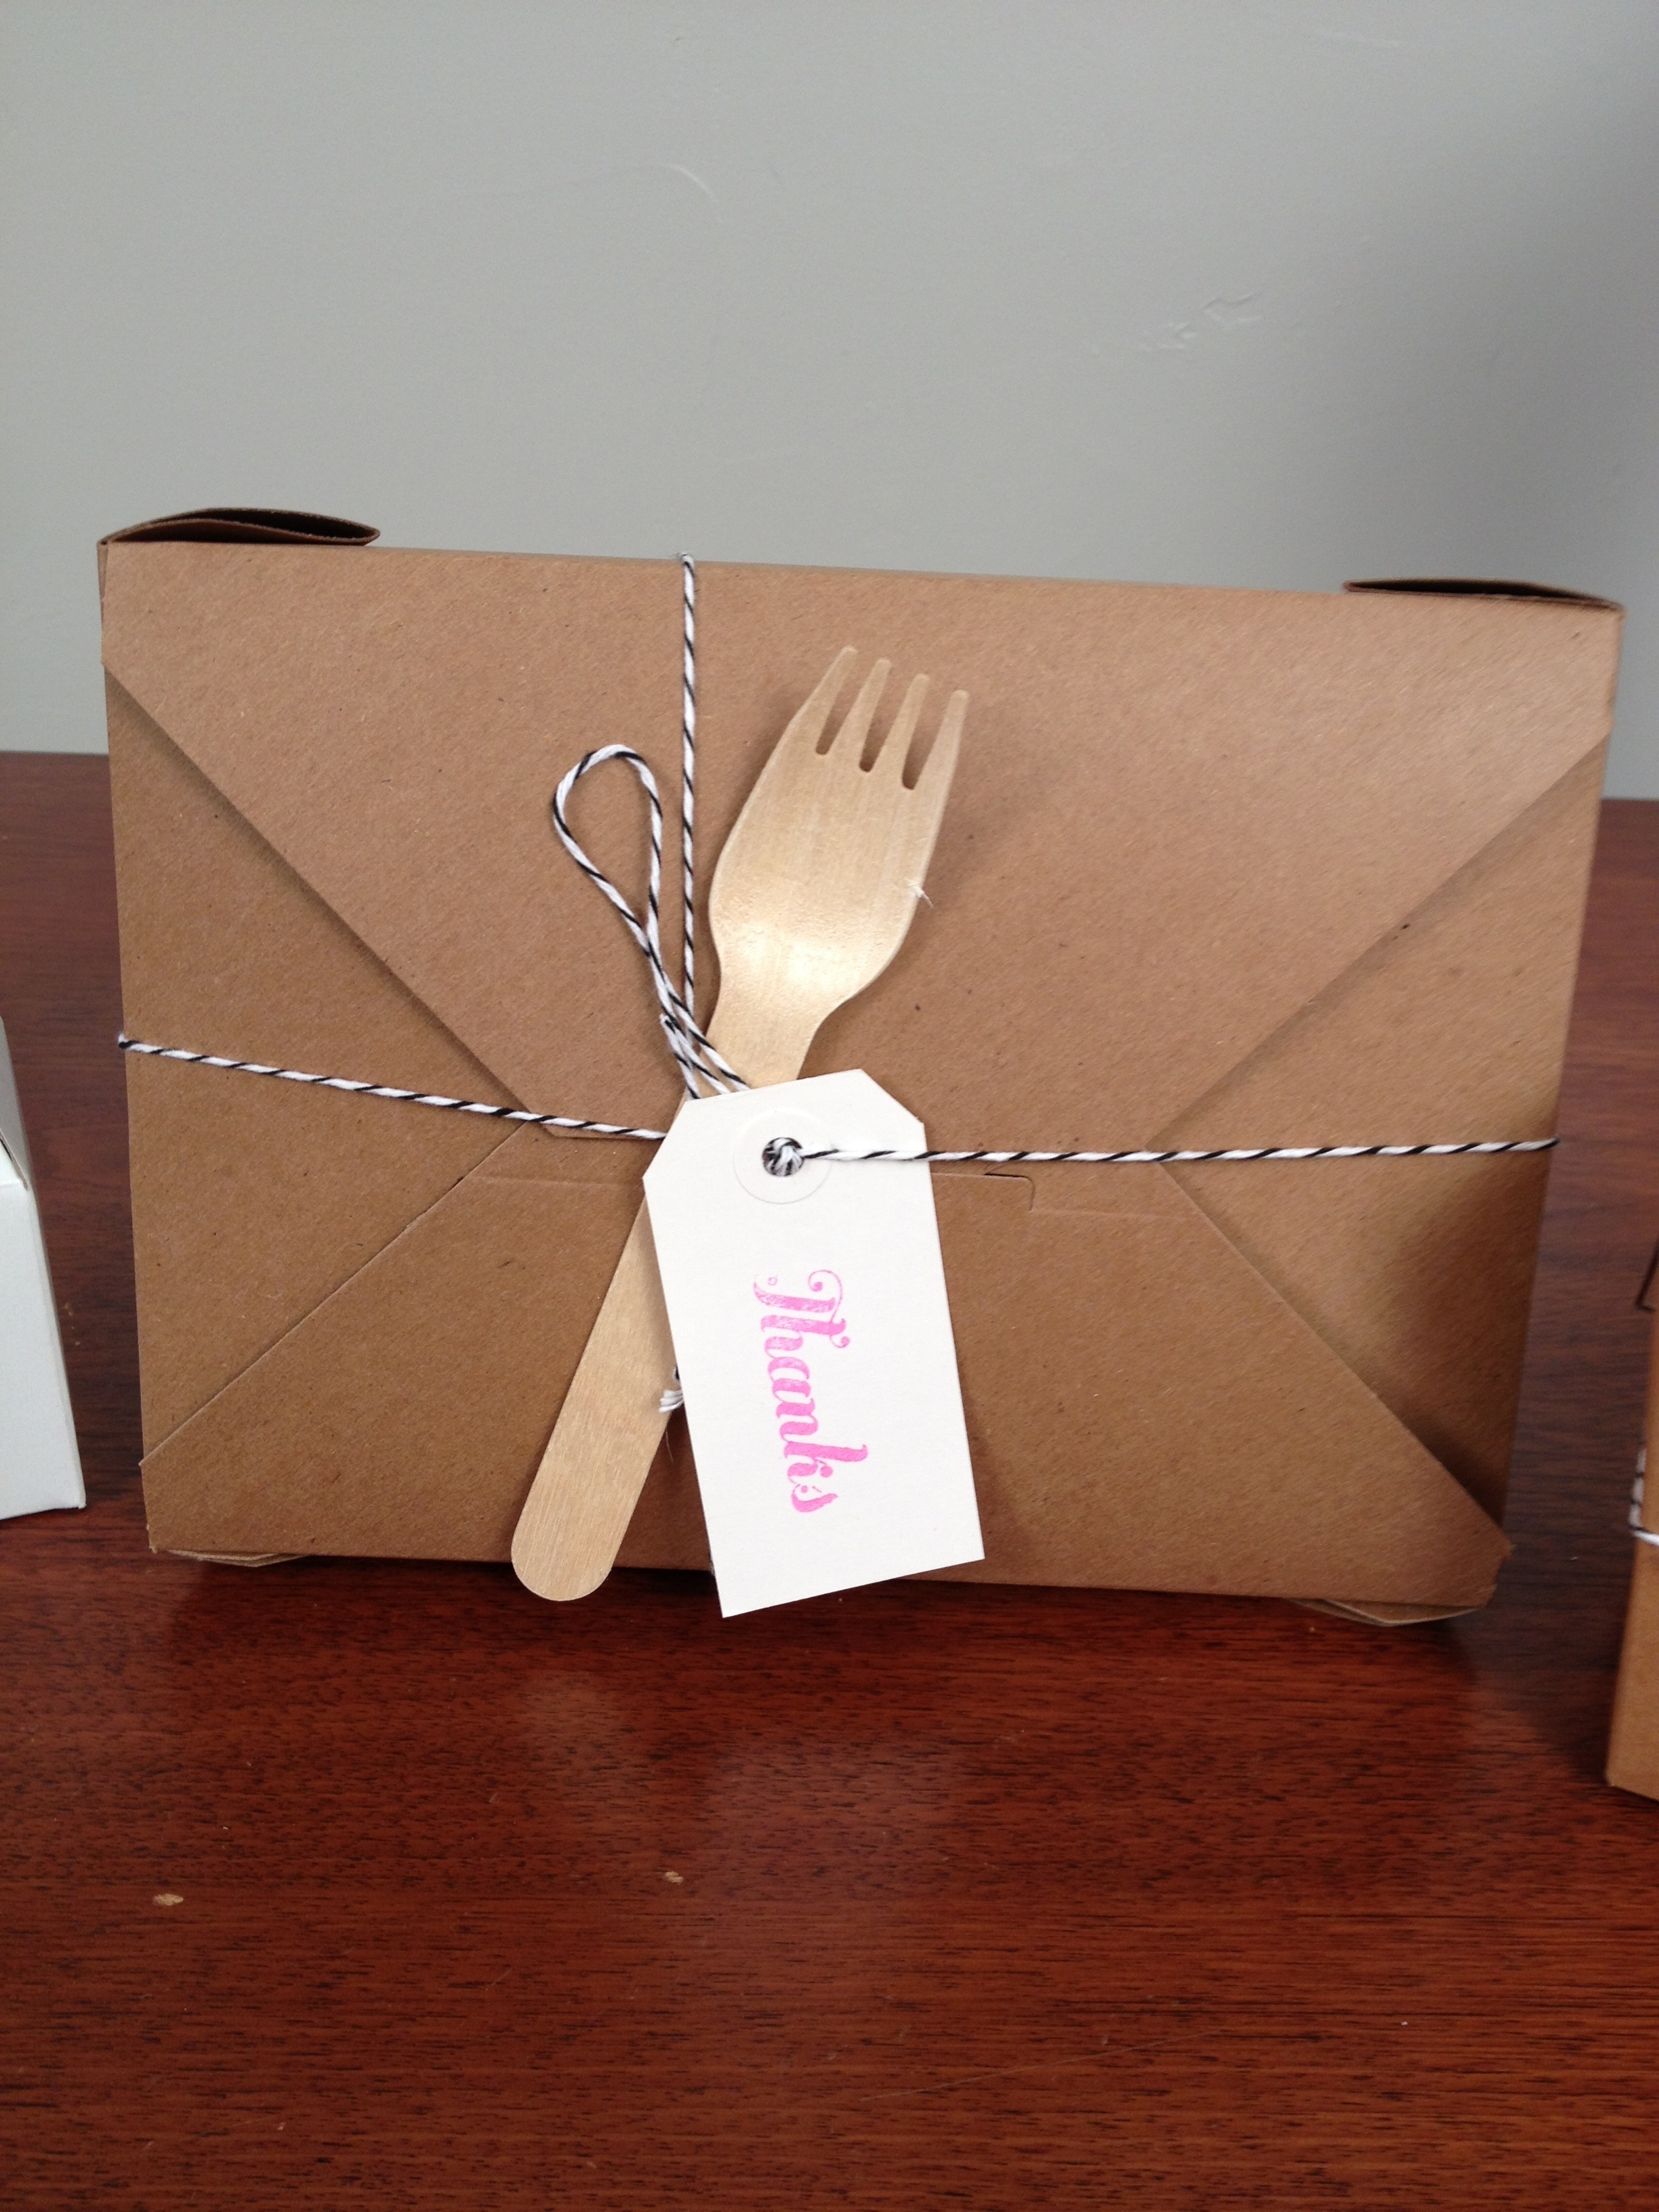
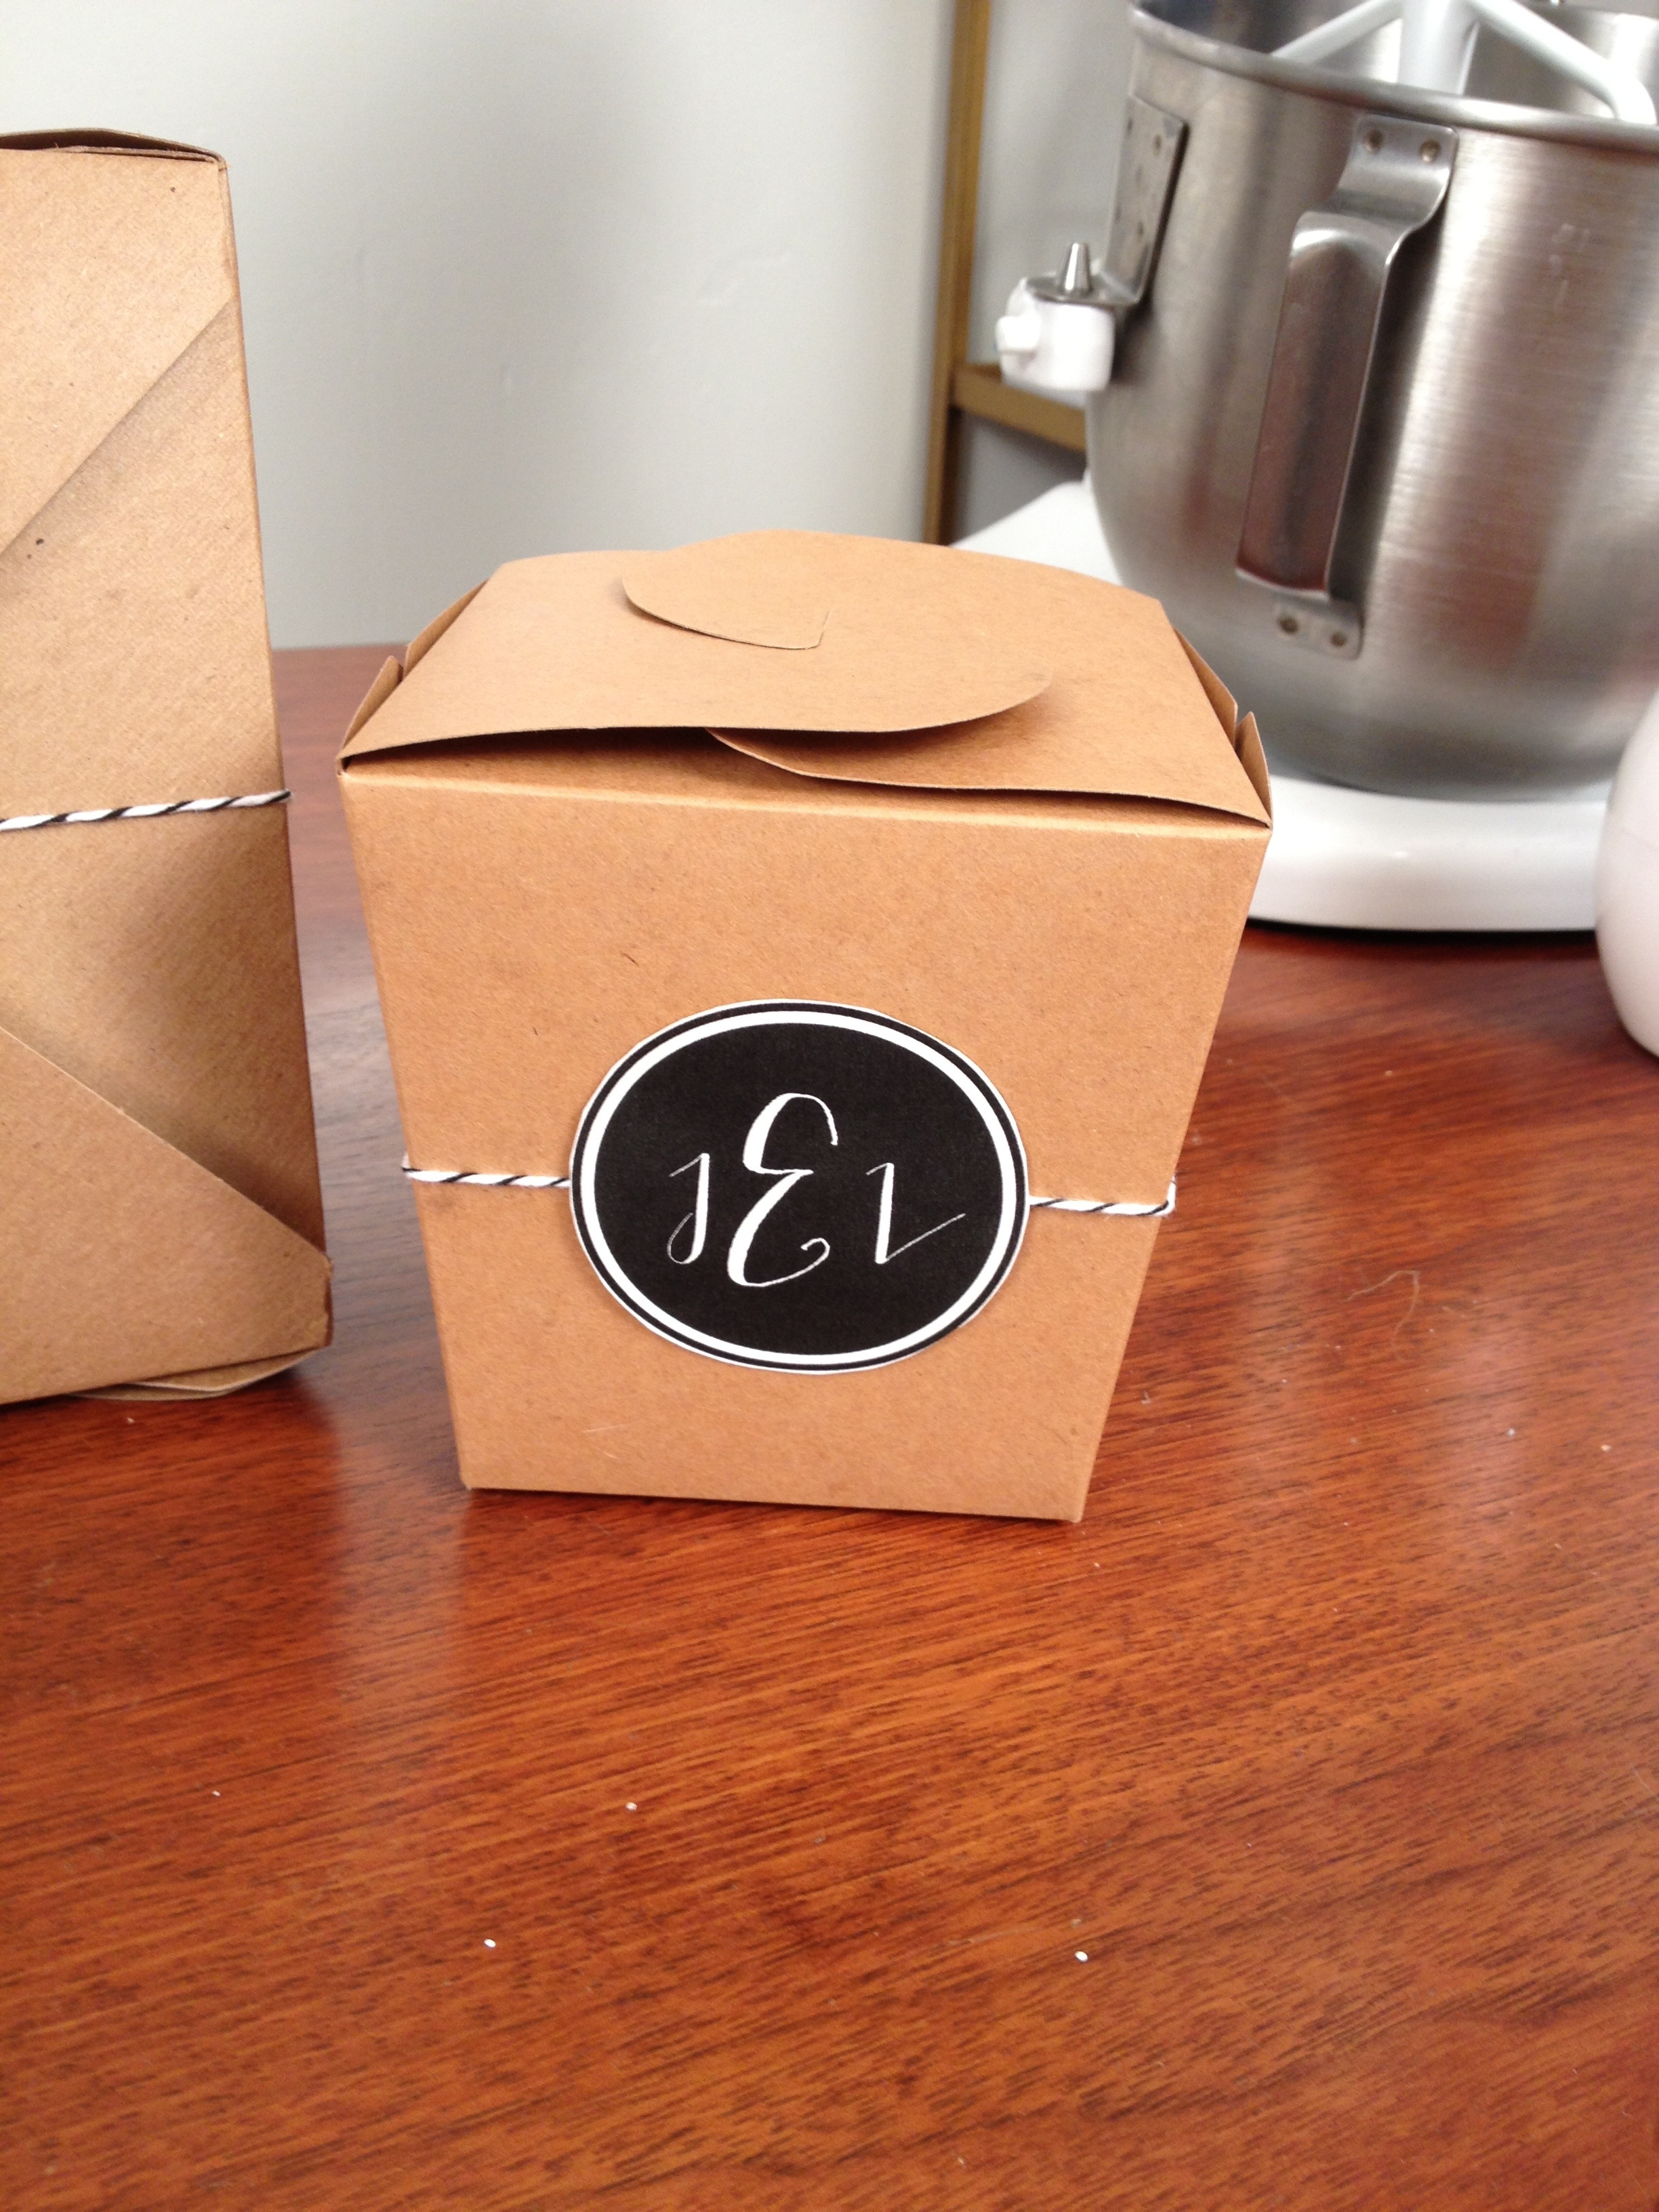
I’m a big advocate on trying to make weddings greener and not have as much waste. For this week’s video, I saw these biodegradable kraft takeout boxes and thought they were a great way to send guests home with leftover wedding cake. How many times have you seen uneaten slices just sitting on the tables!?!
These takeout boxes are not only for weddings, use them at dinner parties to send guests home with leftovers so that you never have to worry about getting your Tupperware returned to you.
I’ve also included a recipe for my signature Gluten Free Oatmeal Cookies that you can use to fill your boxes and turn them into wedding favors.
Don’t forget to SUBSCRIBE to the YouTube channel, so close to the 1,000 goal!
Thank you to my cousin Courtney for requesting this DIY tutorial! Courtney is finishing up her freshman year of college in North Carolina and her friends are moving out of the dorms in May. She wanted to know some easy and inexpensive ways to decorate her new apartment. I think a lot of college students already own a cork board, so in this video I’ll show you a few ideas on how to give it a face lift with paint, fabric and rope.
Leave a comment below or post a photo on instagram and tag @likehearted to show other ways you have re-purposed your cork board.
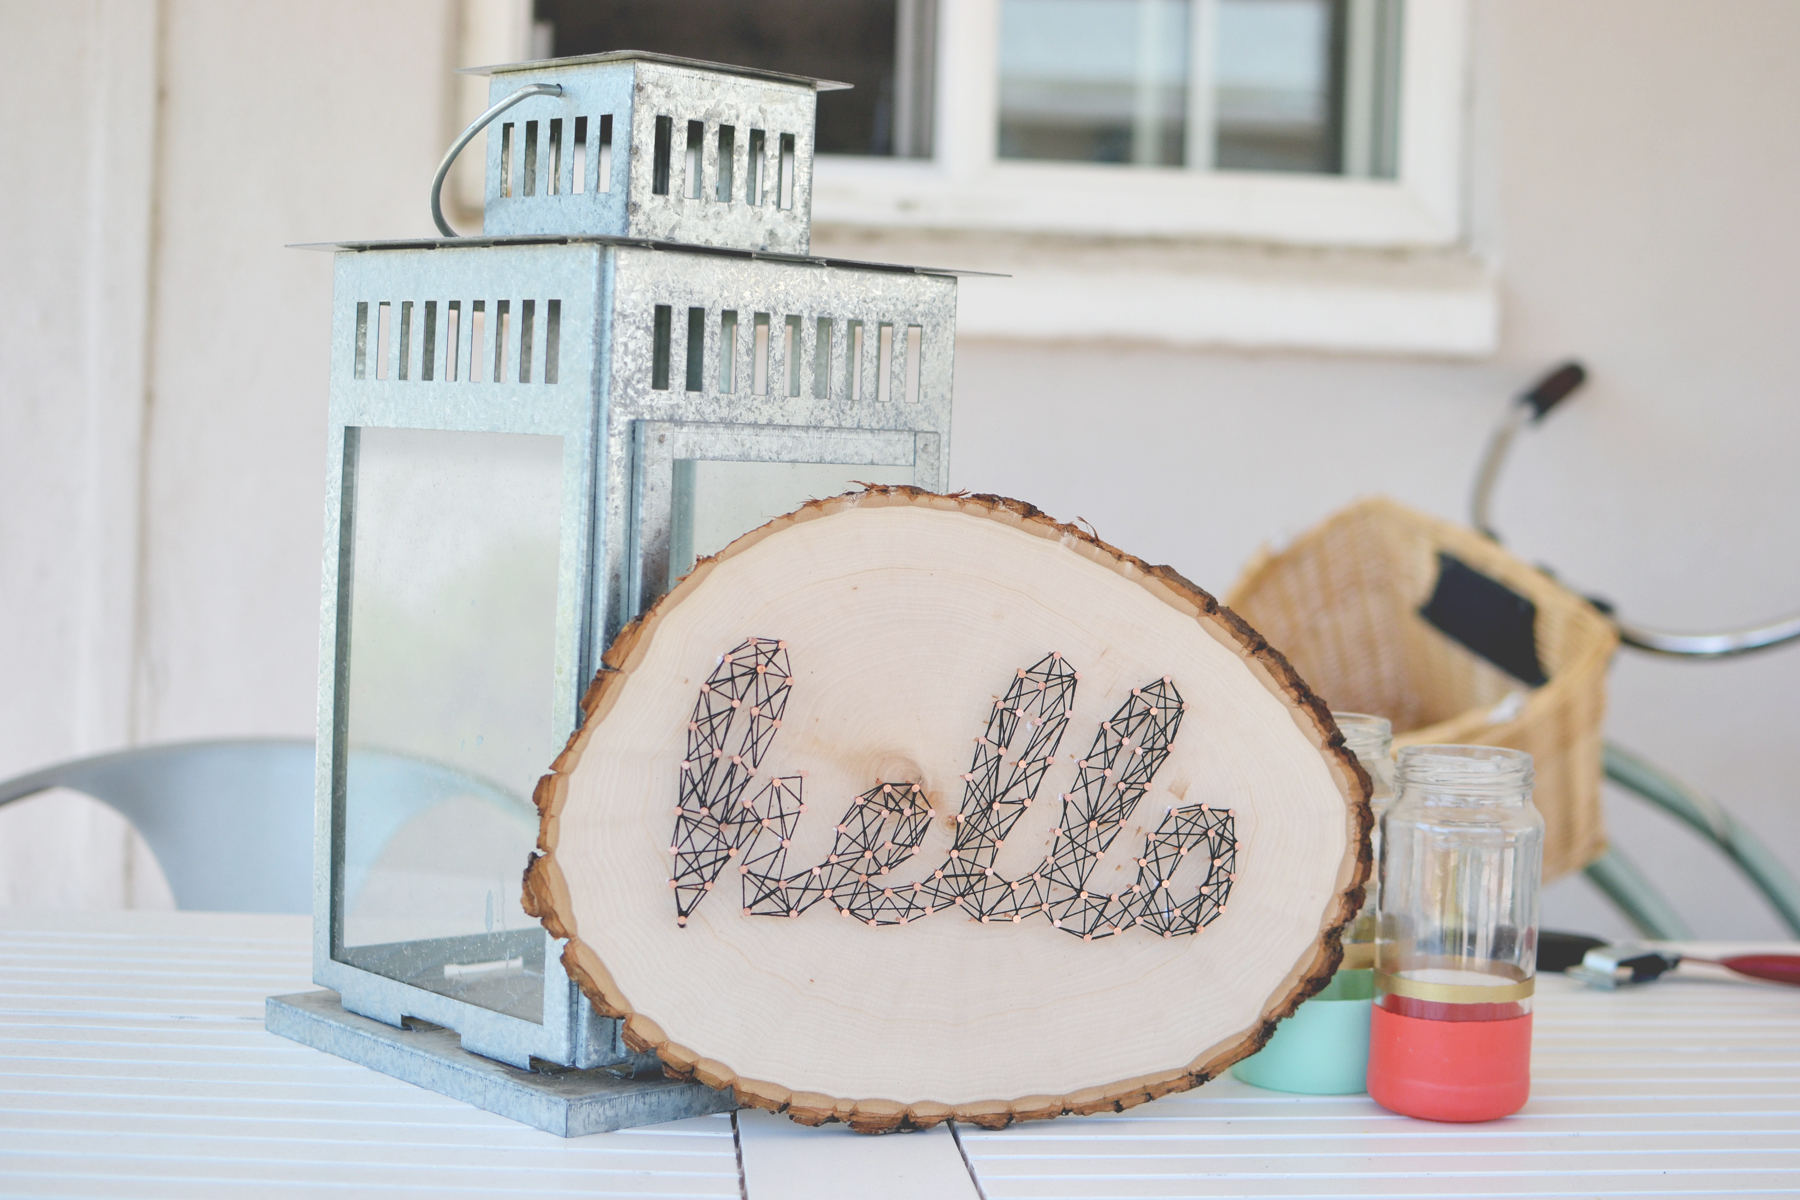
String art is popping up in a lot of different places lately. It first became popular as decorative art in the late 60′s, but I love the modern twists on it these days. This simple craft can easily be customized to make unique art for your home. If for some reason you don’t feel like tackling this project on your own, you can purchase the one I made in the video on my Etsy Store. But I would really love to see what you all create, so instagram a photo and tag @likehearted!
Also, want to send a thank you to The Gentlemen Ether for new music in the video!
Other creative ways to utilize the craft: decorative signage for a wedding, table numbers or even a name sign for a nursery.
Make a template on your computer of the word or shape you plan on using. I downloaded Pacifico and made the template in a word doc using a font size of 375.
Cut out the template and align on wood board, use scotch tape to keep it in place.
Begin to outline the word/shape with nails, placing them about 1/2” apart.
To start threading tie one end of the string to a nail, then outline the word/shape. Wrapping around the nail head as you go.
Tear away the paper template.
Start wrapping the string around the nails creating a zigzag pattern. Continue to do this until you have filled in the entire word/shape.
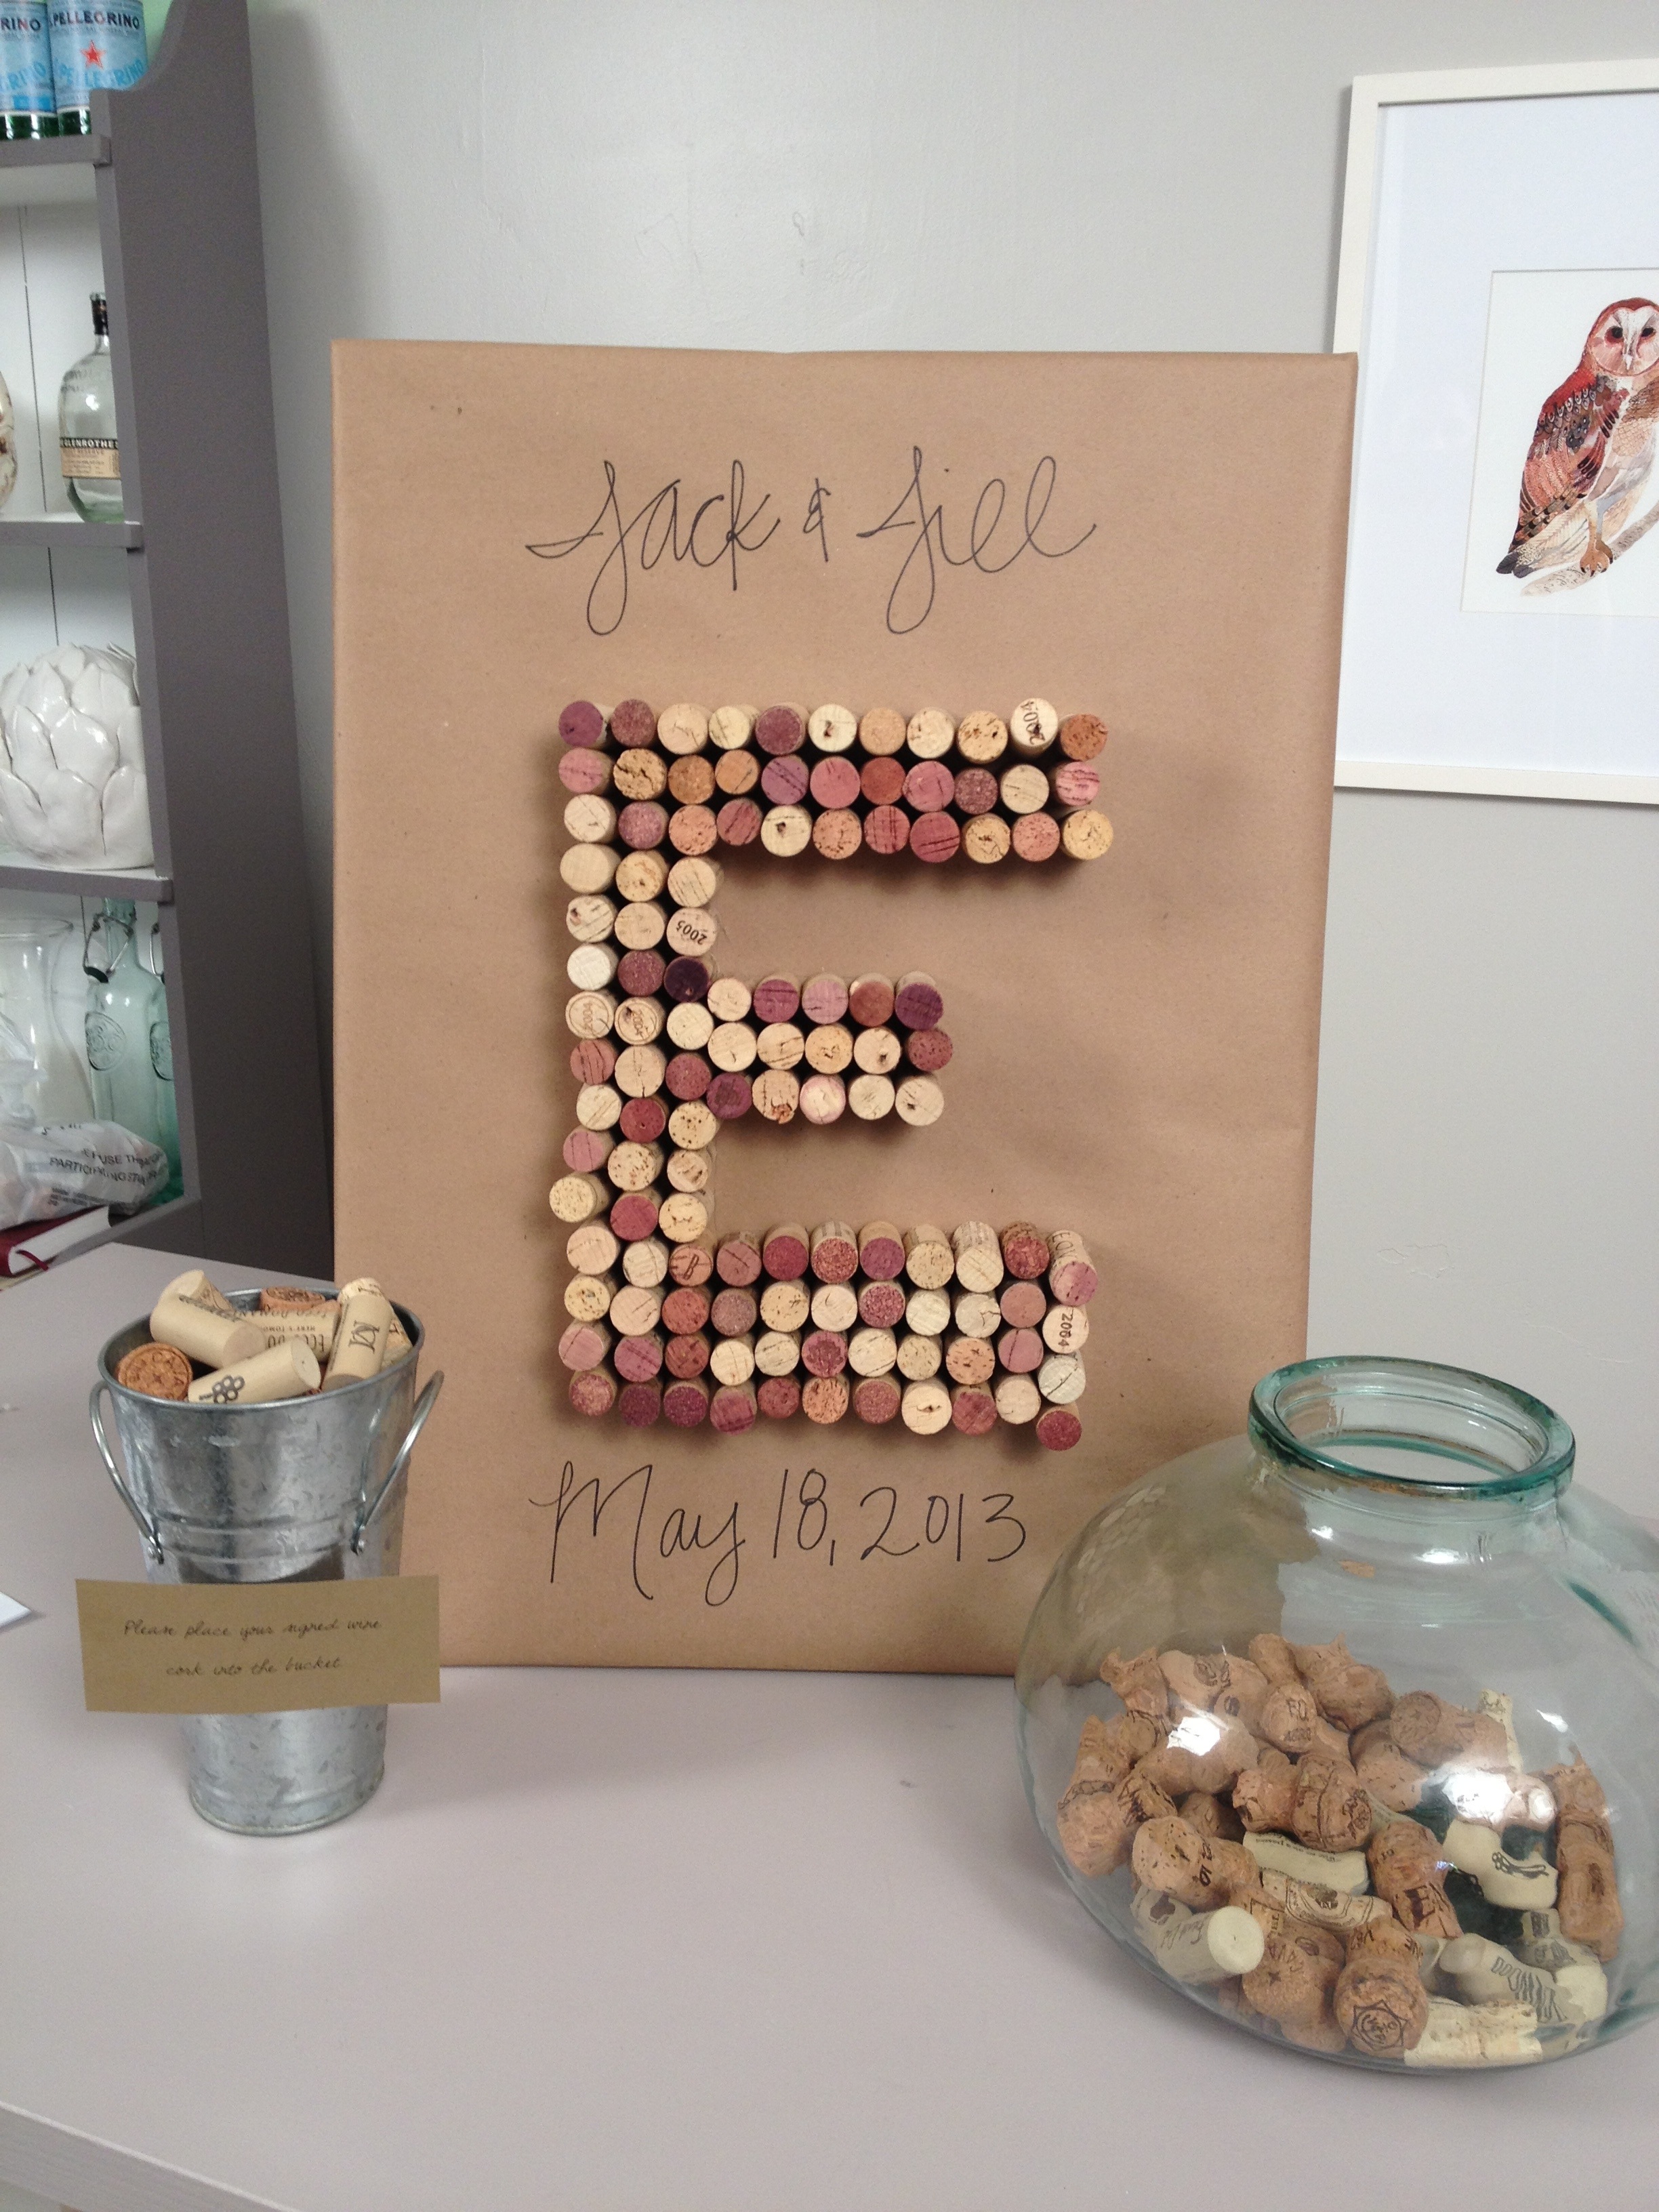
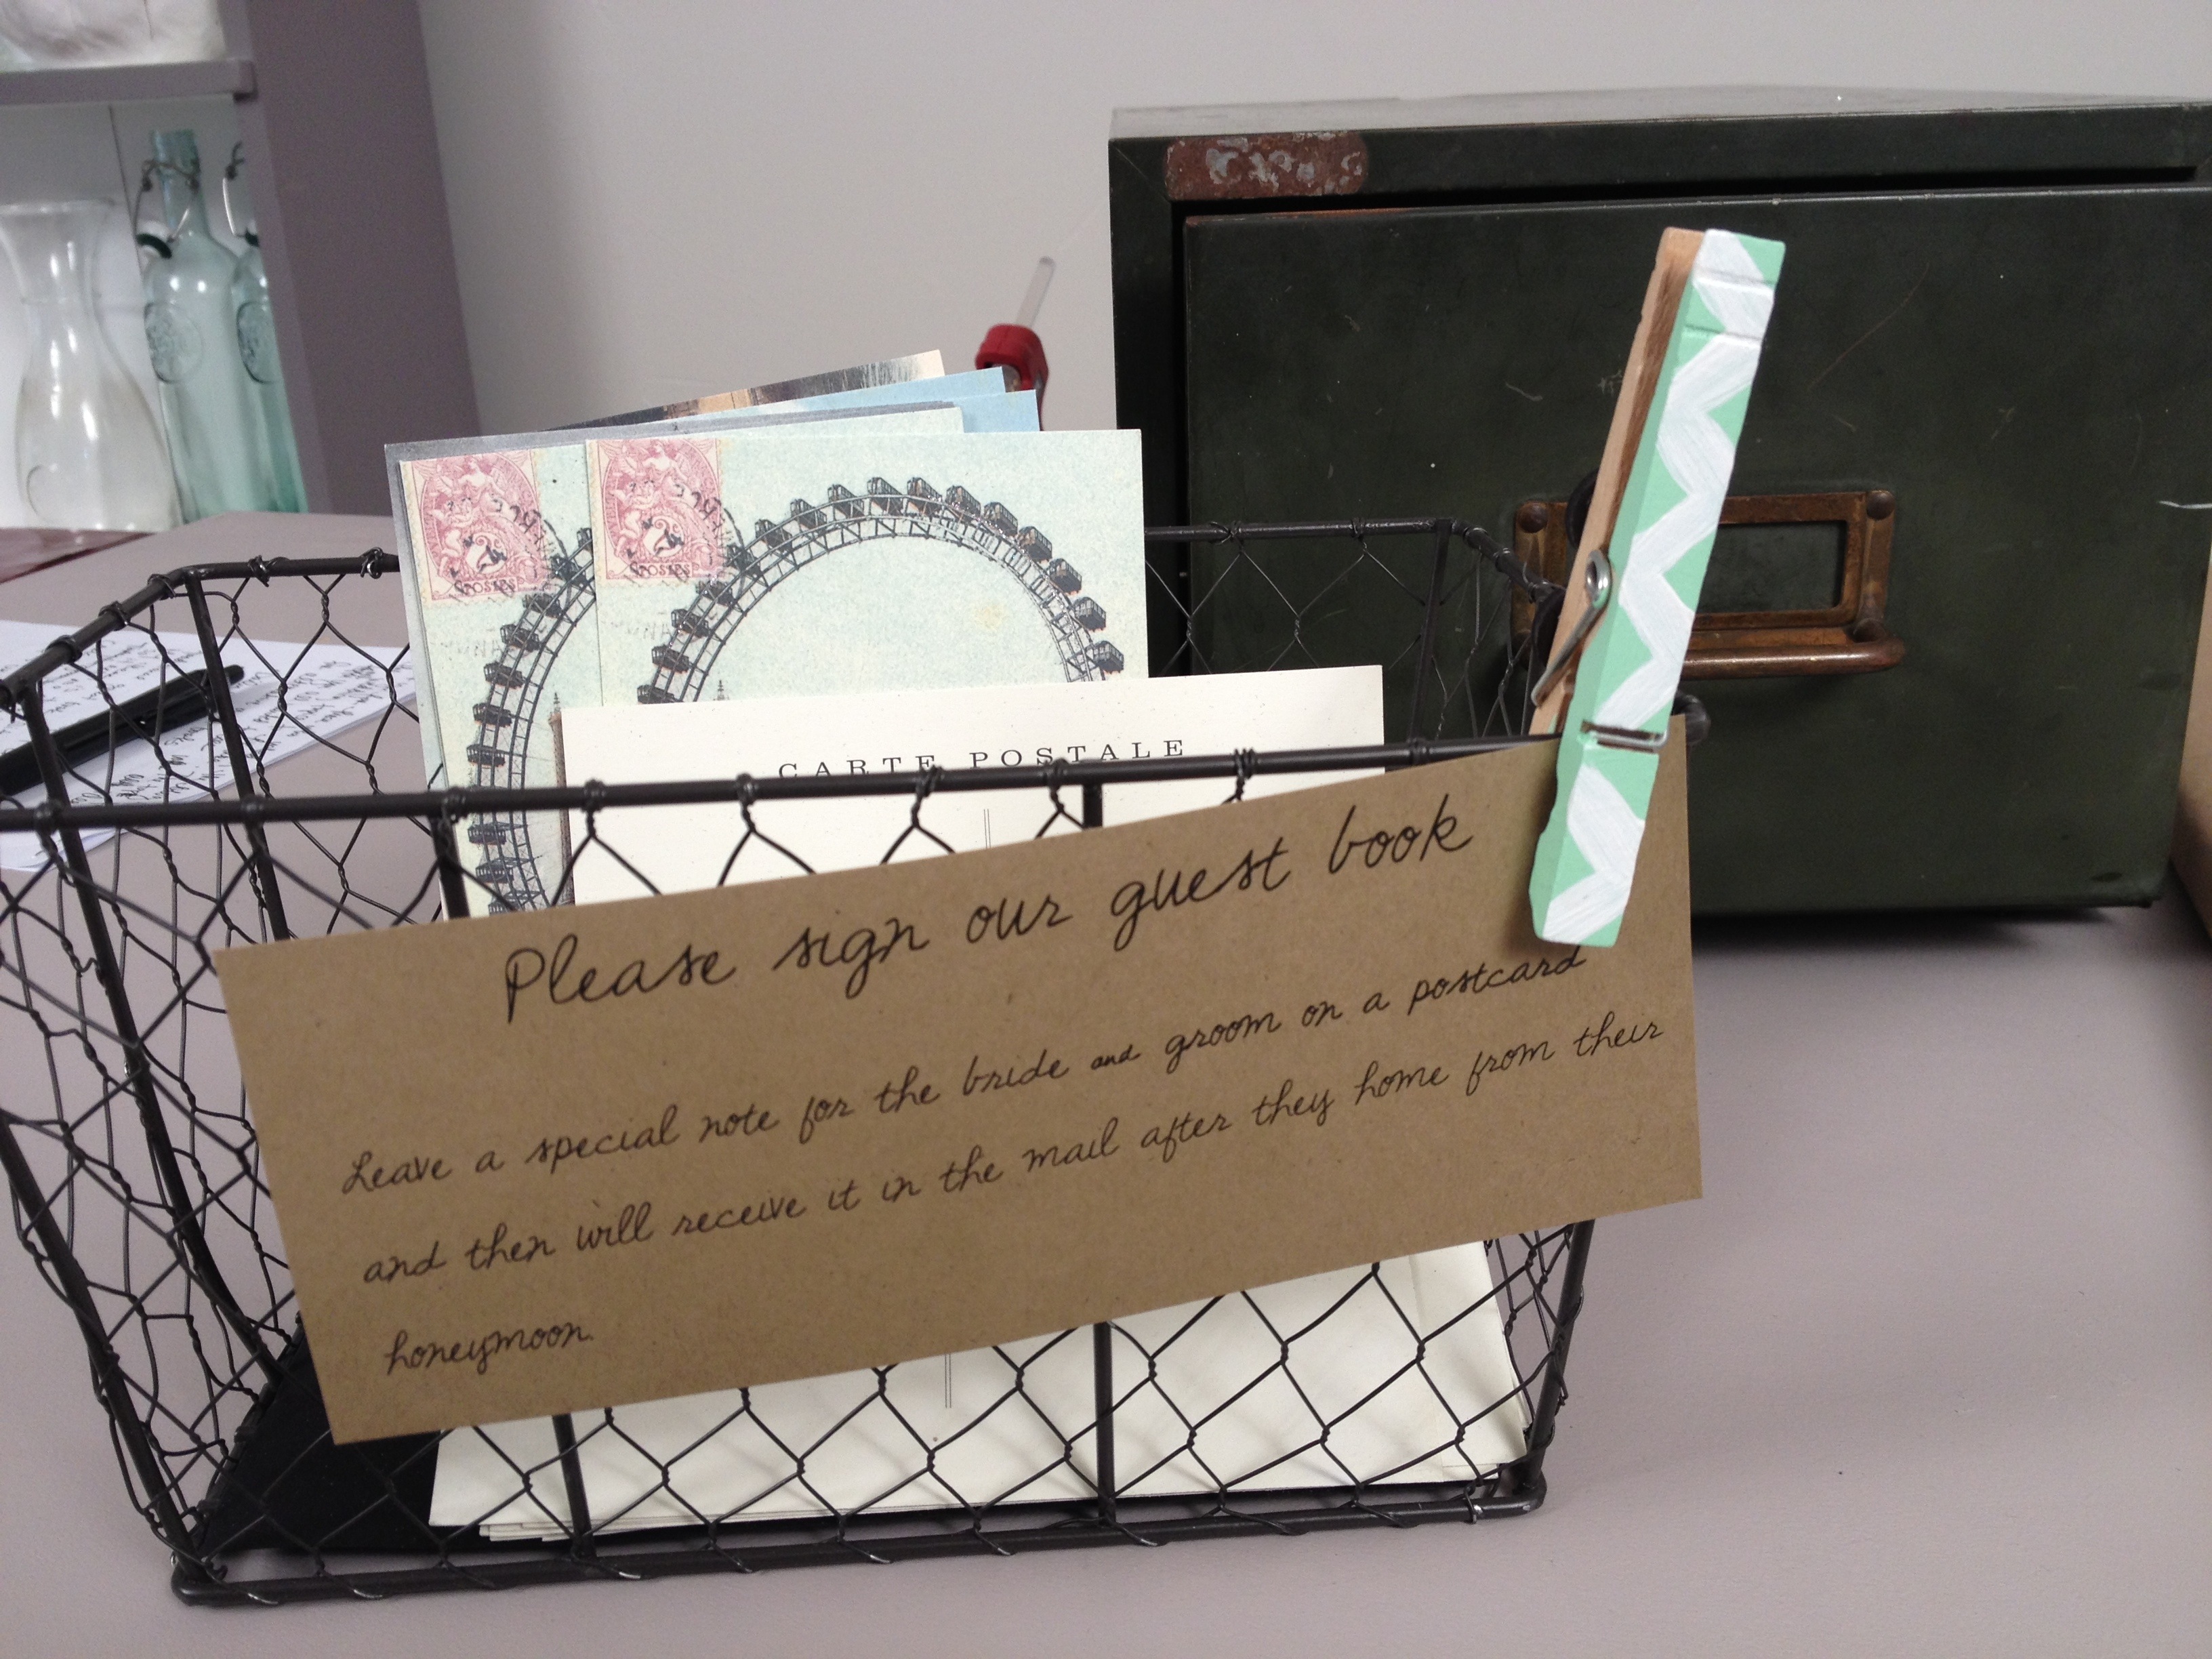
Instead of having a traditional guestbook that is going to sit on a bookshelf and collect dust, my theory is to turn it into something that can be on display and viewed daily. Hopefully these ideas will inspire you to do something unique for your big day.
Option 1: Lip & Mustache Silhouettes
Check out the photo booth tutorial on how to make the lip and mustache silhouettes, you can do any shape that matches the wedding theme: bow ties, hearts, birds, leaves, flowers, etc. Arrange the shapes in an interesting pattern to create a piece of custom artwork for the bride and groom’s home.
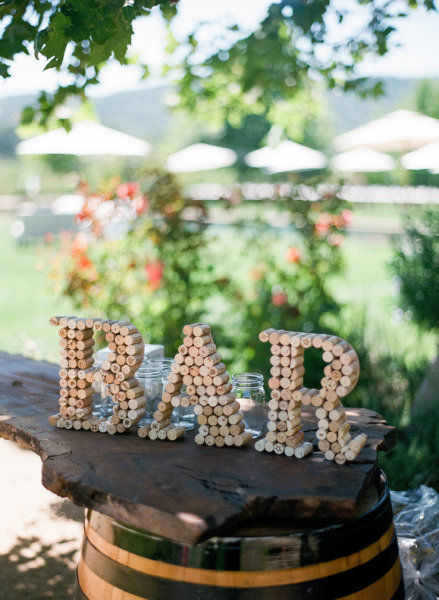
Option 2: Wine Corks
If the bride and groom are wine lovers or the wedding is taking place at a vineyard, have the guests sign wine corks. I wrapped a canvas in kraft paper and then hot glued wine corks into the first letter of the bride & groom’s last name or make free standing letters. Either way it’s a great decorative accent to the home.
If the theme of the wedding is more rustic, consider having your guests sign vintage postcards. After the wedding have your maid-of-honor drop them off at the post office so that when the bride & groom return from the honeymoon their mailbox is filled with well wishes from the guests. Plus, who doesn’t love snail mail? If you are looking for vintage postcards then check out this awesome Etsy shop.
With wedding season fast approaching, many brides-to-be are looking for unique ways to customize their big day. In this tutorial I’ll show you how to create a Tulle Headpiece that can either be worn by the bride, flower girls or wedding party. This is a great way to call out the bride for a bachelorette party as well (especially if you aren’t into the typical bachelorette decor).
Scissors (find a similar leopard pair of scissors here)
Hot Glue Gun
Ruler
Total cost: Under $10
Time: 20 minutes
Steps:
Cut 12 pieces of tulle into 8 inch strips.
Cut 6 inch piece of twine and set aside.
Layer pieces of tulle on top of each other, alternating directions.
Fold tulle in half and pinch the bottom together, secure with twine.
Secure tulle to headband with a drop of hot glue and hold in place until dry.
Tips:
I prefer to use tulle with texture like the birdcage type or I mixed regular tulle with a swiss dot style in the video.
If you are going to use a comb you will only need 6-8 pieces of tulle depending on the fullness you want.
Using a straight edge/square shape tulle will give you a more avant garde look, using rounded edge/circle shape tulle will give you more of a rosette style.
Have the bride where it the Bachelorette party and/or bridal shower in order to call out the bride-to-be.
Consider making versions for the bridesmaids or flower girls, tulle comes in various colors that will match the wedding color palette.
Leave a comment and let me know if there are other tutorials you would like to see!
Here is the last video from the first set of DIY entertaining tutorials – check out the many uses for a chalkboard platter. Warning: this was the very first one that we shot, so clearly I had some warming up to do! It got a little easier the second time around, I just reviewed the rough cuts of the wedding tutorials and can’t wait for you all to see them.
Paint the inner edge of the plate. Be sure to follow the directions of the chalkboard paint you are using, The Martha Stewart chalkboard paint requires you to wait at least 1 hour before doing the second coat.
Write with the chalk to describe what you are displaying.
Various uses for the chalkboard platter:
Cheese Serving Plate
Beer (or your alcohol of choice) Tasting Platter
Perfume Display
Tip:
Turn it into a housewarming gift by including cheese knives, a monogrammed dish towel and a chalkboard pen. I also like the idea of writing the last name of the new home owner on the bottom of the platter, for example “The Brown House Est. 2013.”
I love hosting dinner parties but with food allergies on the rise it can often create a challenge for the host and the guest (I know from experience). If you are unsure, it’s not uncommon to ask your guests ahead of time if their diets have changed. Your guests will appreciate you going the extra mile to make them feel welcomed in your home. Check out my tutorial video on ways you can easily label the food for guests who have allergies. For more entertaining tips, subscribe to the Likeheared channel: http://www.youtube.com/iamlikehearted
The Likehearted YouTube Channel is live! I had a blast being a content contributor and getting to share my craft ideas. I’m so grateful for the opportunity that Sitewire has given me, and the beautiful work Snapfactory did on the videos. It’s definitely nerve-racking being on camera for the first time but I’m really proud of the videos and hopefully you all enjoy them too!! More videos to come, so make sure to check out all the tutorials by subscribing to my channel: http://www.youtube.com/iamlikehearted.
Fold one sheet of tissue paper in half width-wise, then fold it over length-wise.
With your scissors, cut strips of fringe about 1/4 inch wide along the unfolded long edge of your folded tissue, leaving about 2 inches of uncut tissue at the folded edge.
Unfold your paper and cut the tissue in the center, creating two halves. Set one aside.
You should have a sheet of tissue with fringe on either side and a solid section down the center. Using the solid center section, begin to roll the tissue paper up, being careful to keep the fringe untangled.
After the entire section is rolled, twist the center tightly. Then curl it in on itself to create a loop, and secure with a small dot of hot glue.
For a finishing touch, place a small dot of hot glue under the loop and wrap twine around the base, secure with another dot of hot glue. Trim the ends if desired, and string your tassel onto your cord.
Tips:
One sheet of tissue paper makes 2 tassels.
I suggest about 16 tassels for your average size garland = 8 sheets of paper.
To make tassels with longer fringe, during step 2 cut along the short edge of the unfolded tissue instead of the long edge.
Don’t have time to make your own? Purchase the one I made in the video on my Etsy shop.