DIY: String Art

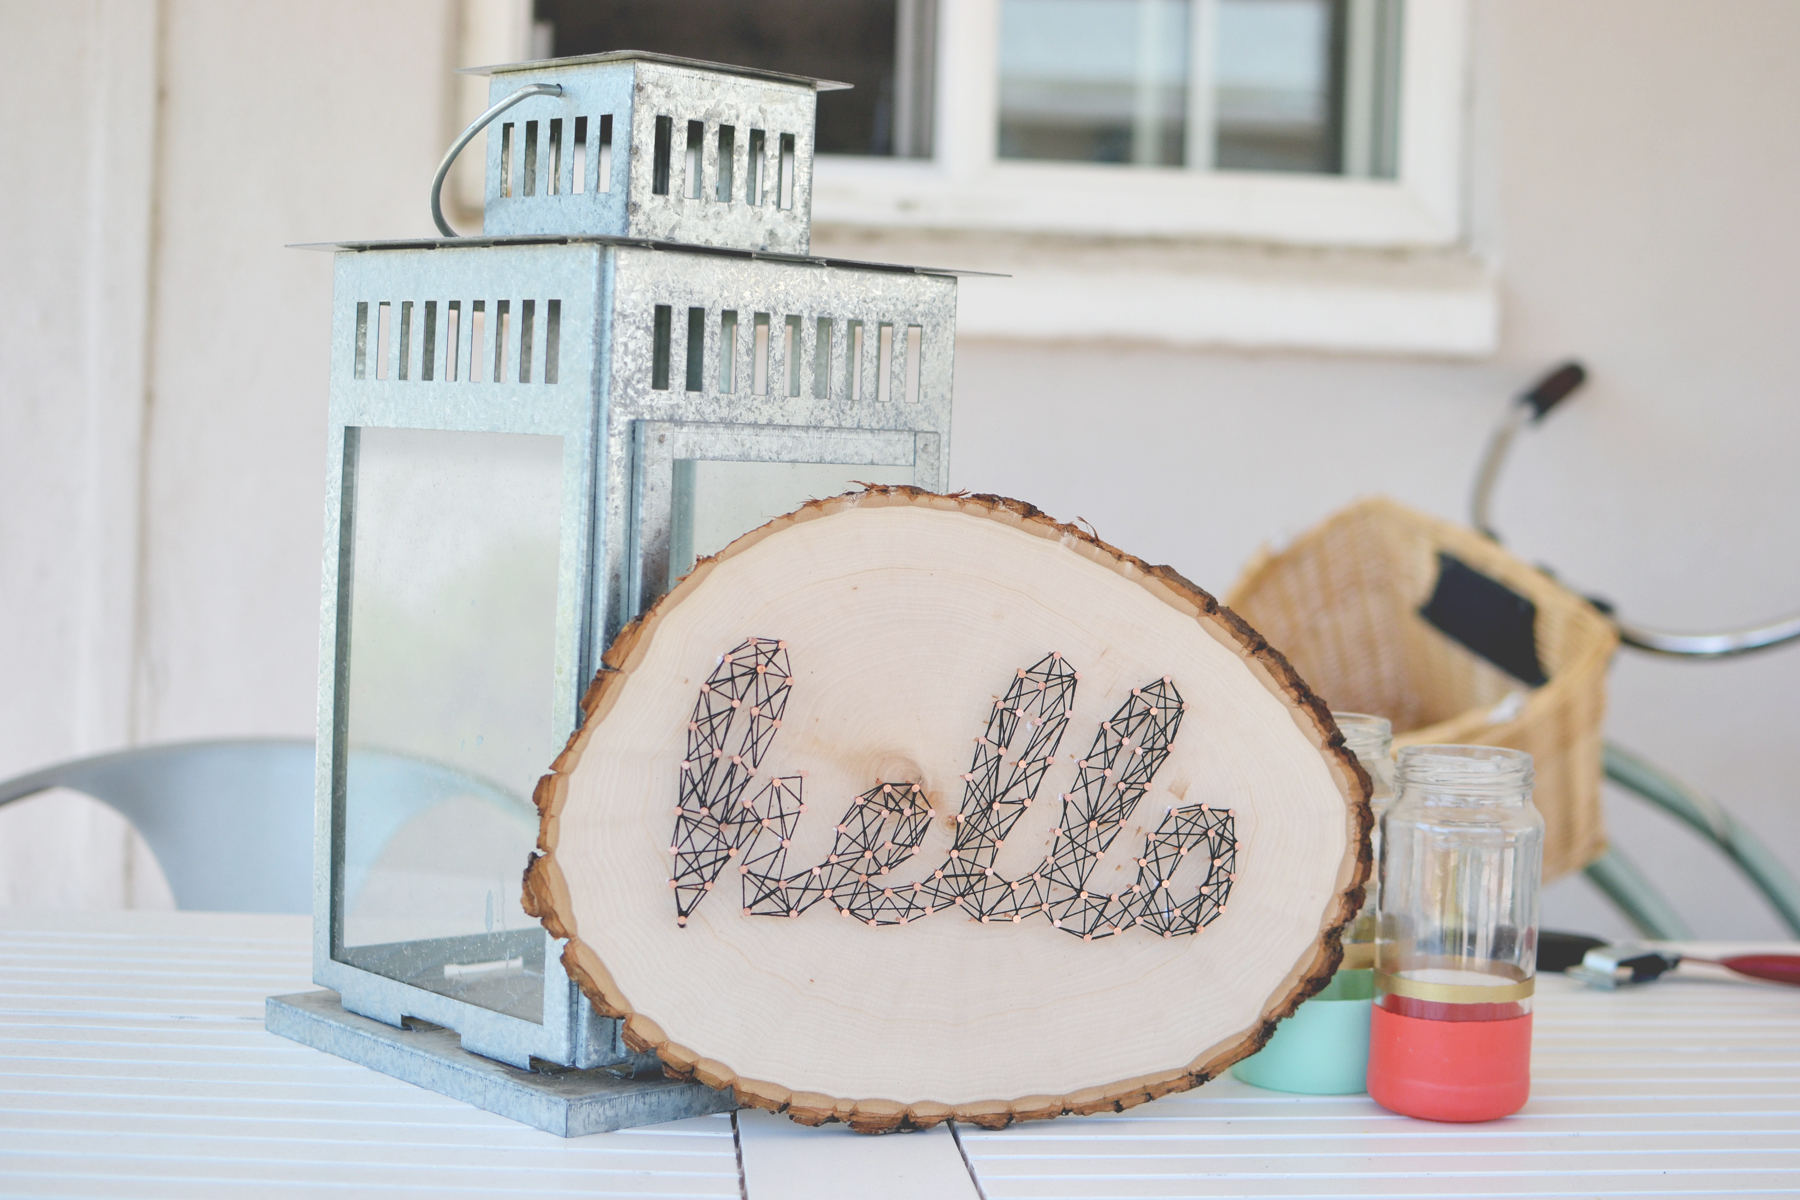
String art is popping up in a lot of different places lately. It first became popular as decorative art in the late 60′s, but I love the modern twists on it these days. This simple craft can easily be customized to make unique art for your home. If for some reason you don’t feel like tackling this project on your own, you can purchase the one I made in the video on my Etsy Store. But I would really love to see what you all create, so instagram a photo and tag @likehearted!

Also, want to send a thank you to The Gentlemen Ether for new music in the video!

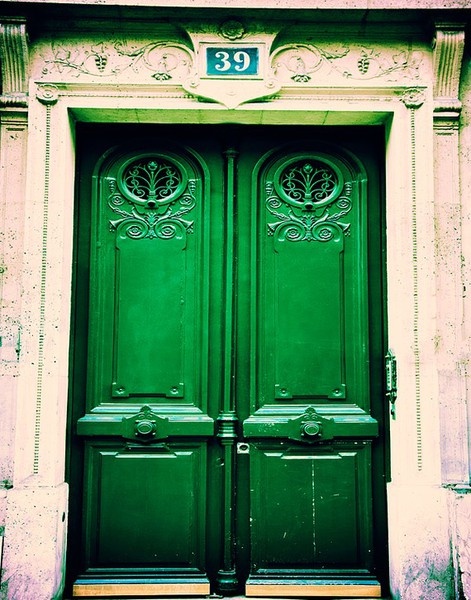
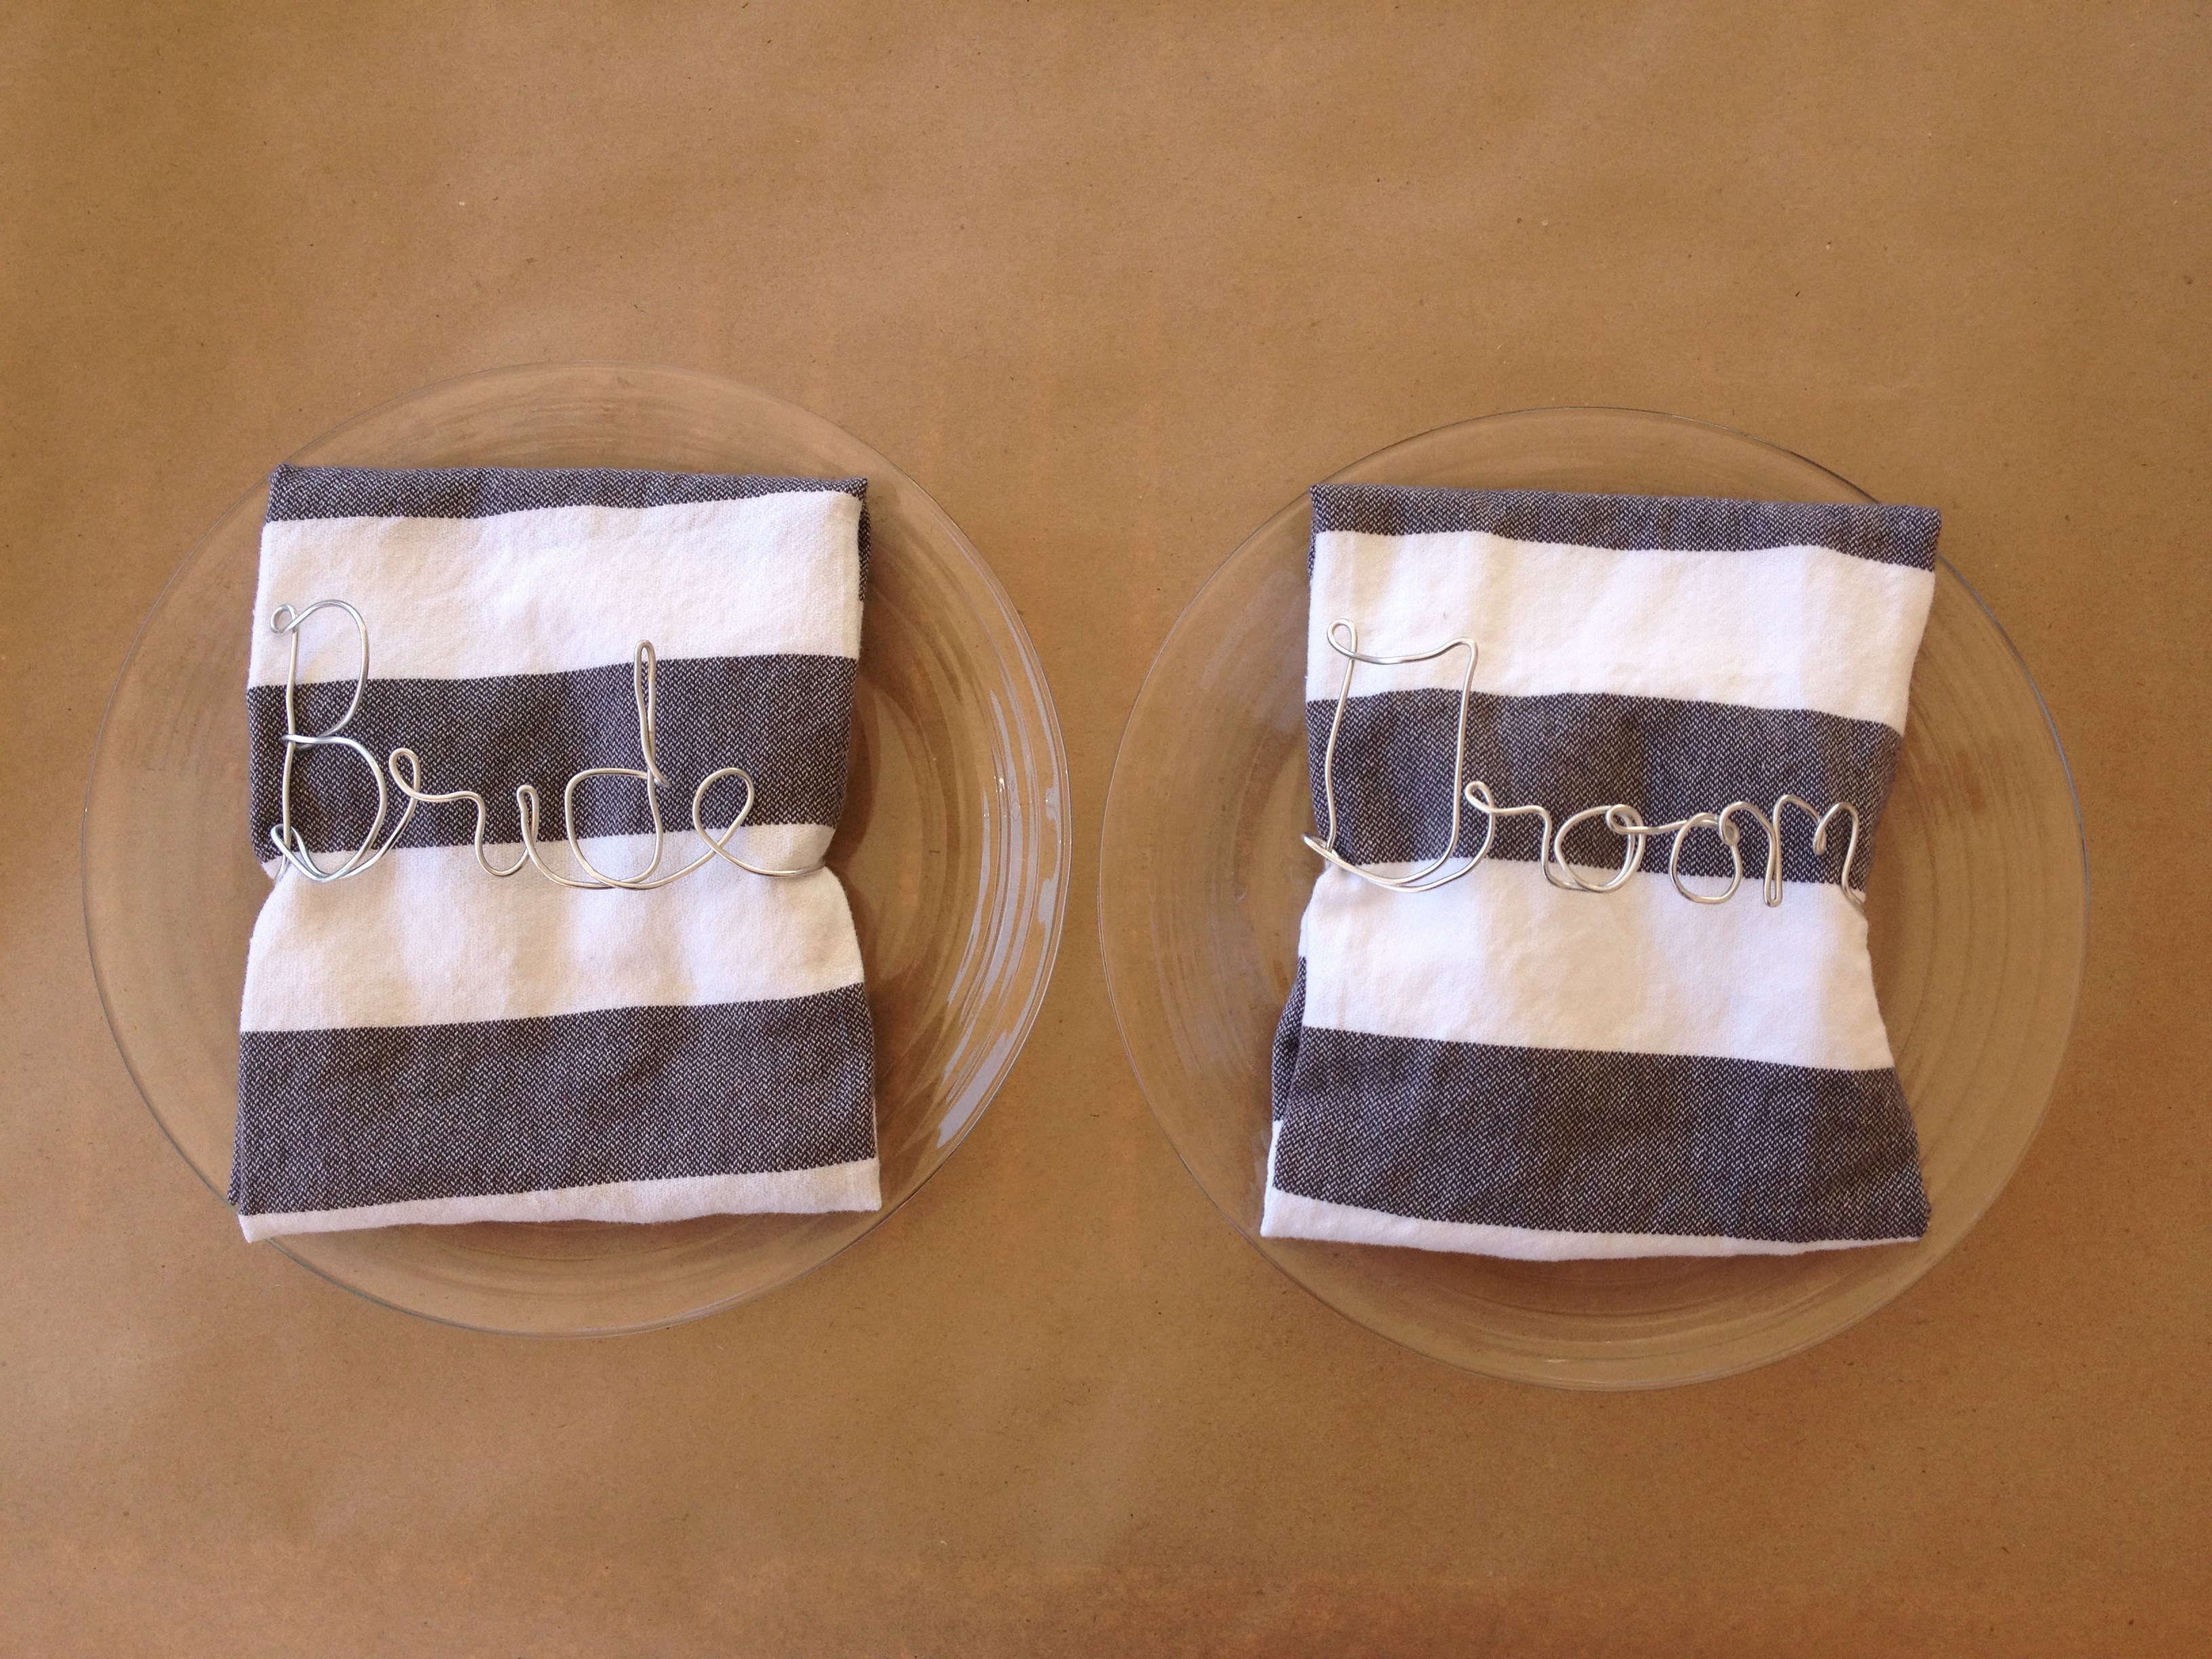
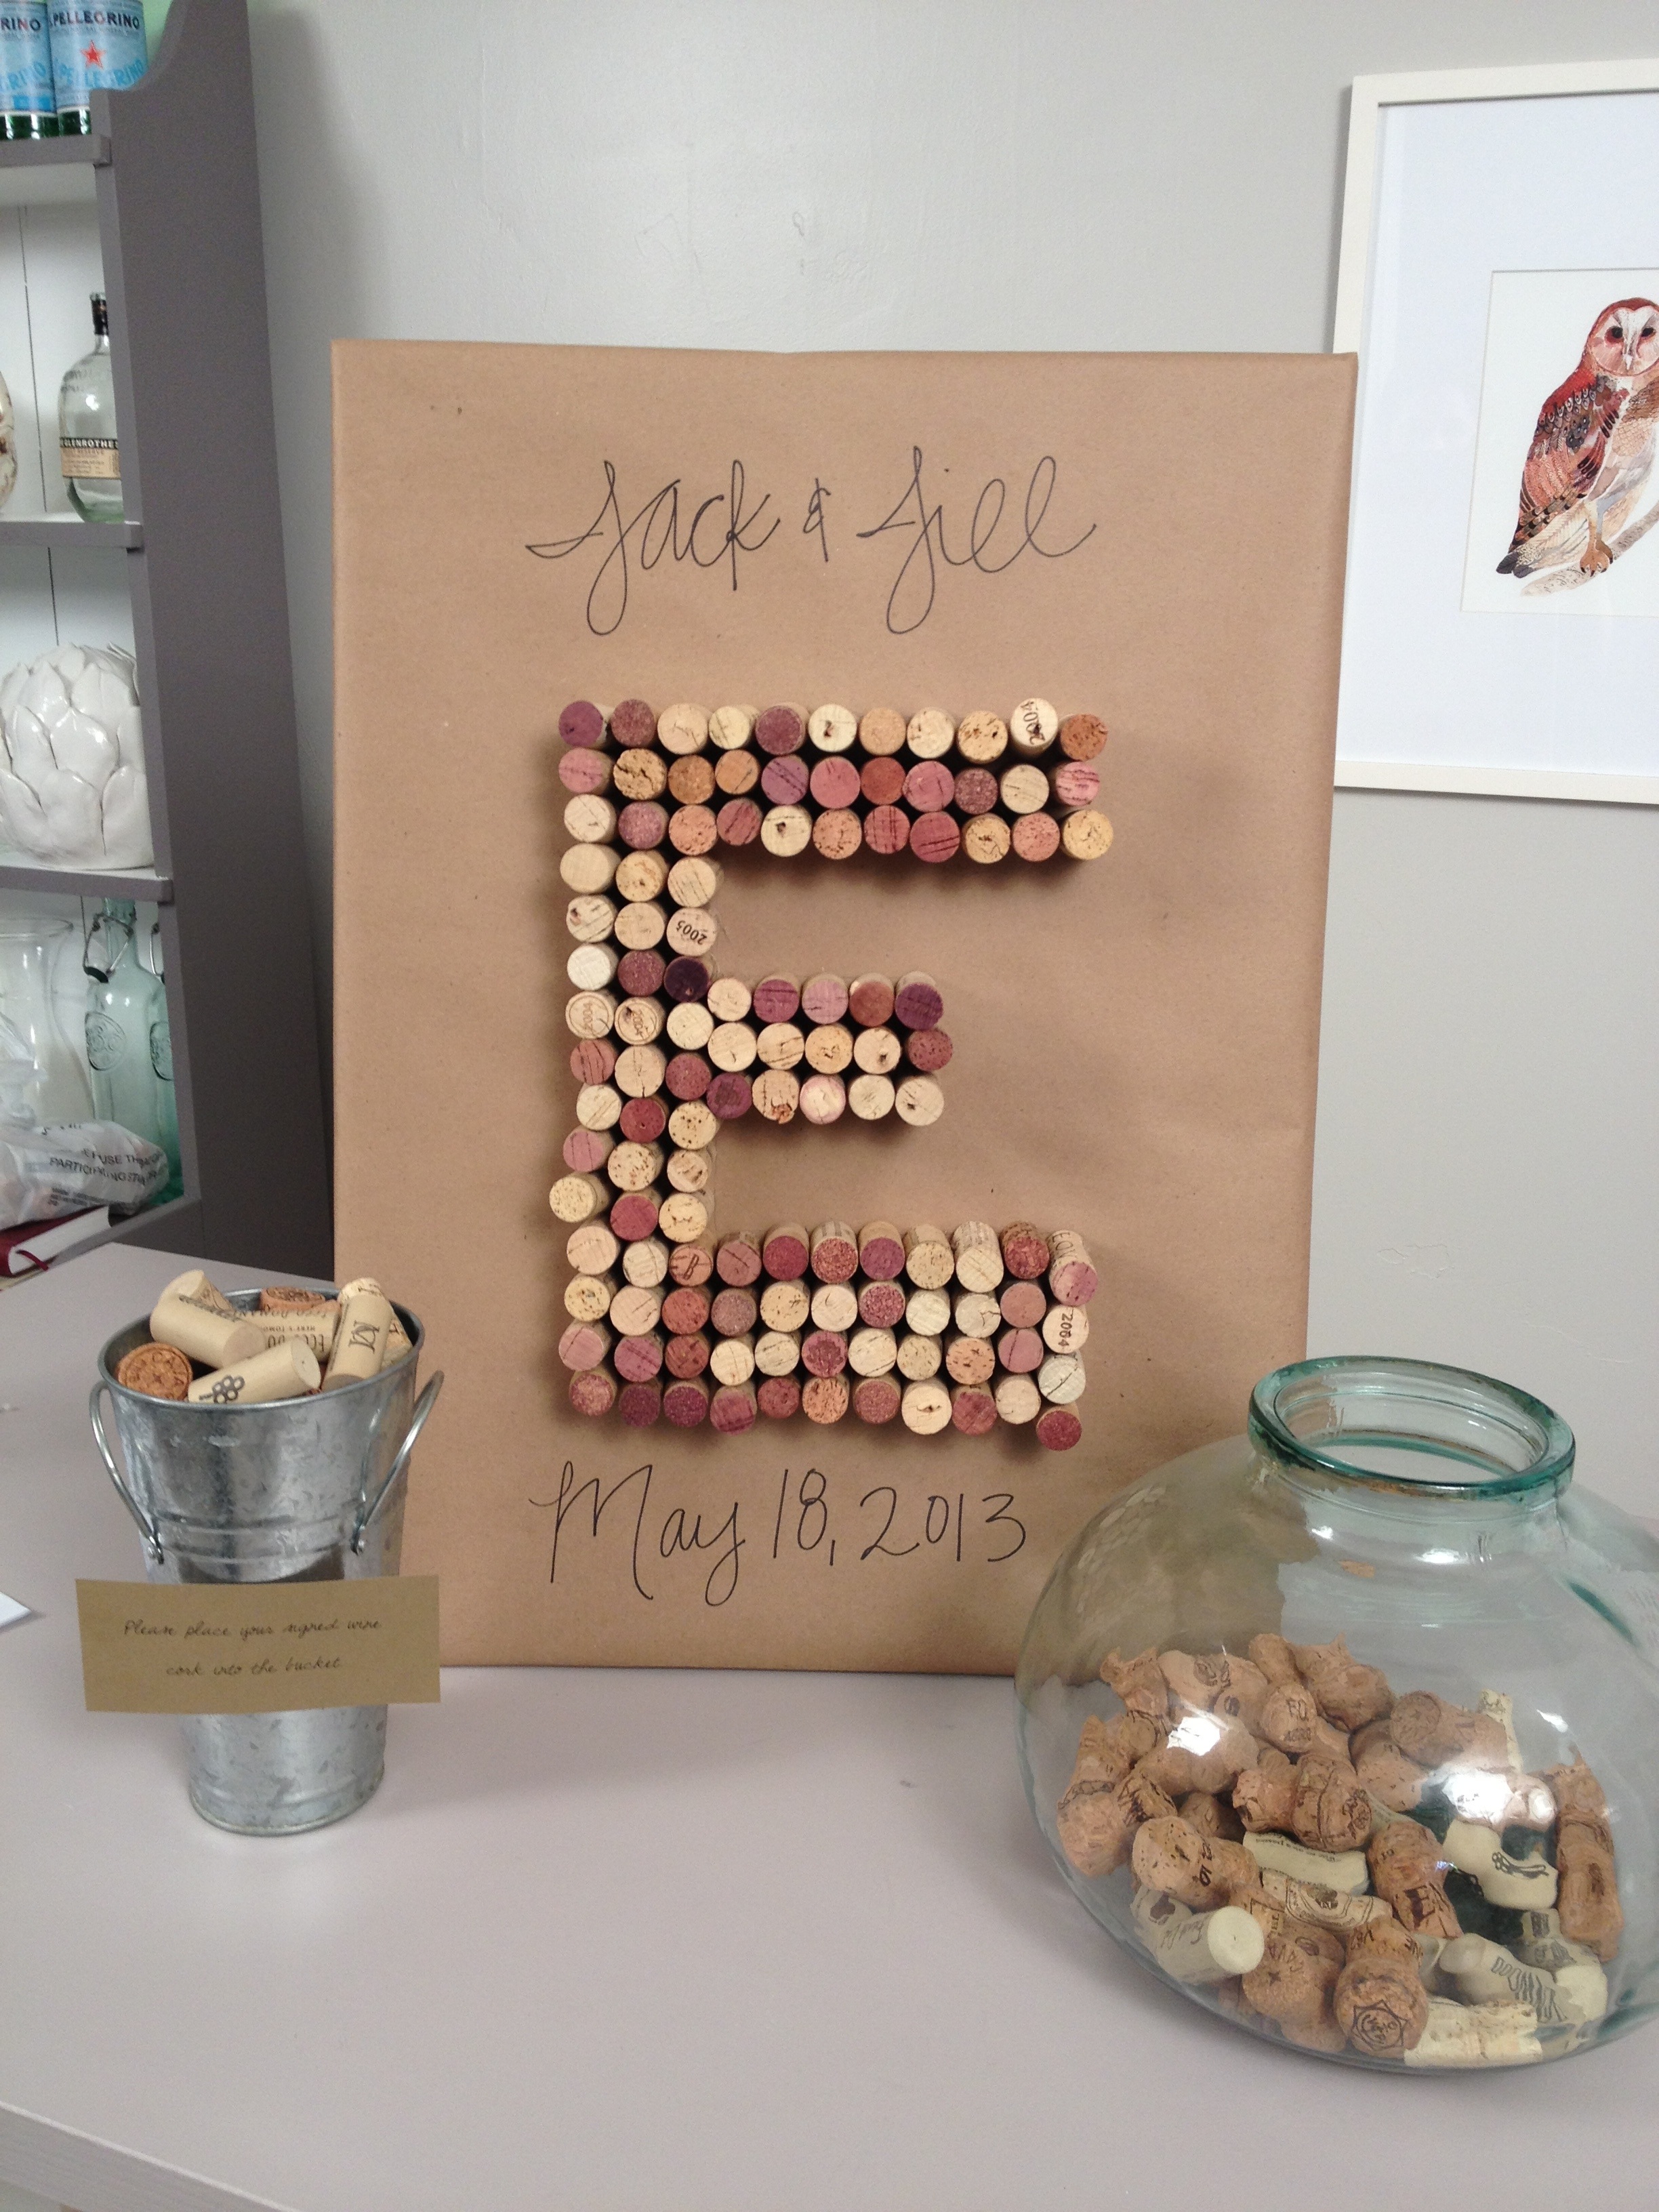
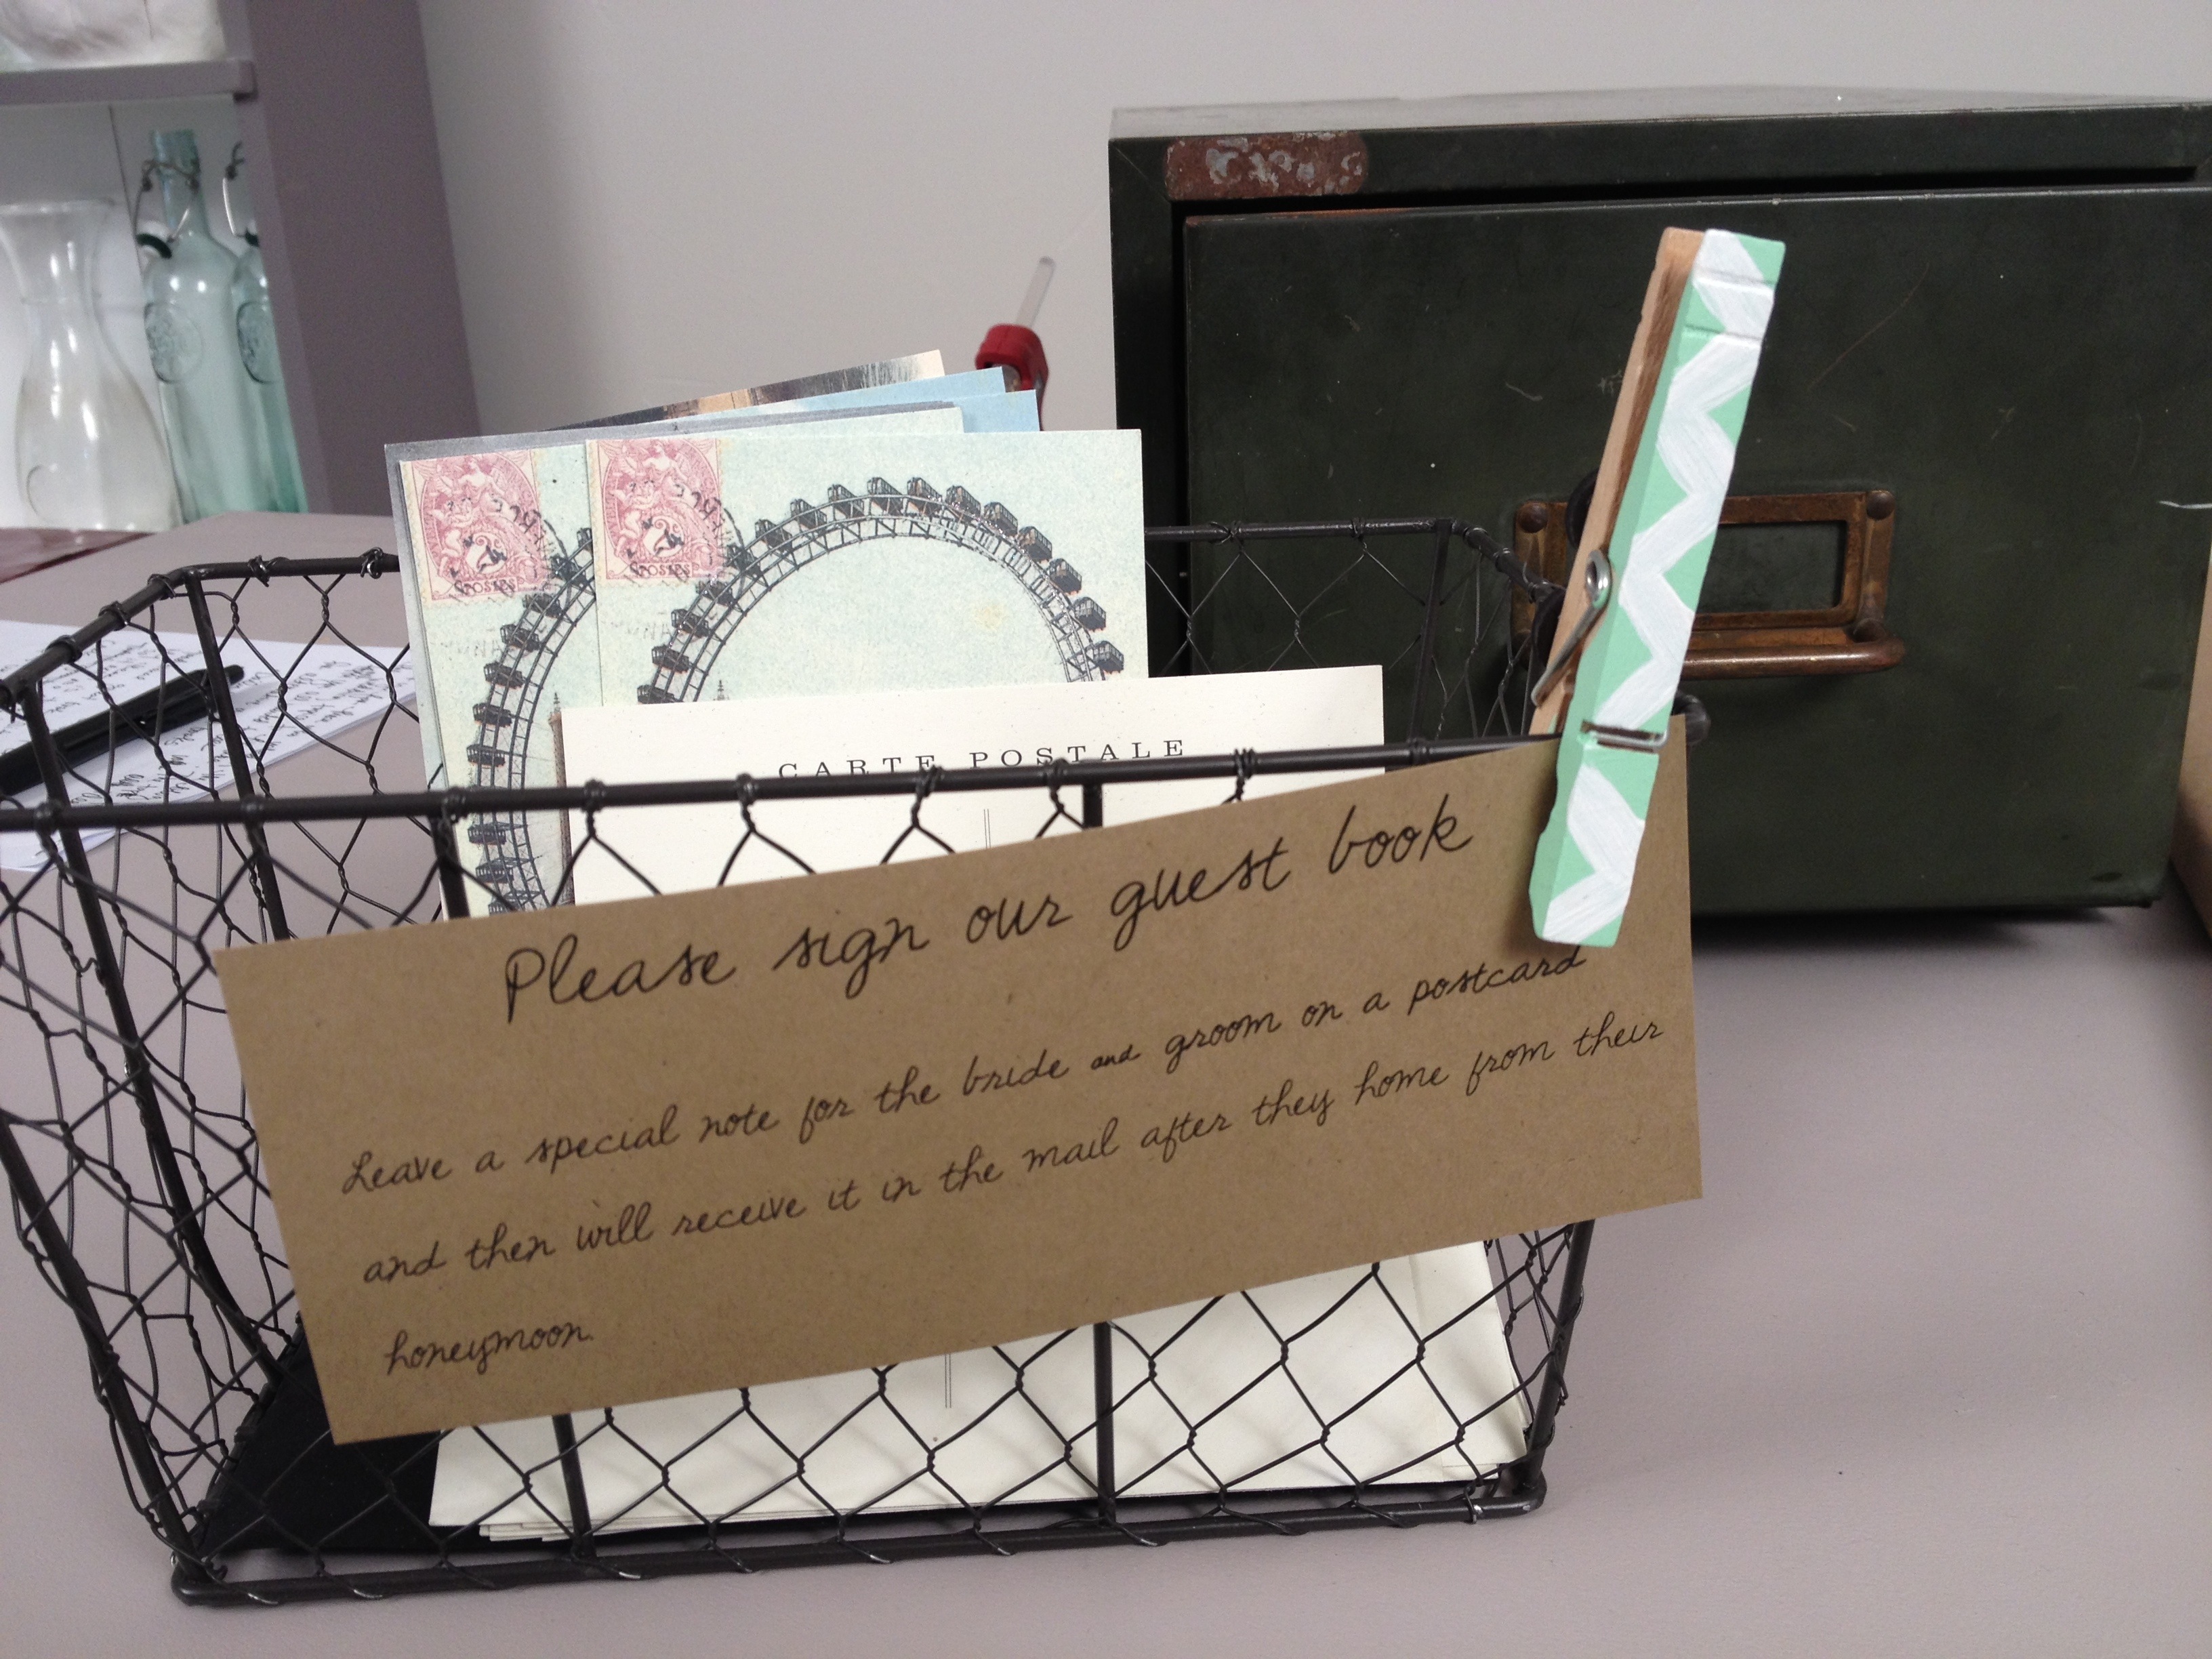
Other creative ways to utilize the craft: decorative signage for a wedding, table numbers or even a name sign for a nursery.

Photo Credits: I do, 6 Table Number, Harper Sign

Materials:

  • Wood

  • Yarn/String

  • 3/4” Nails (at least 2 boxes)

  • Download free font – Pacifico

Tools:

  • Hammer

  • Scissors

Total cost:  under $20

 Steps:

  1. Make a template on your computer of the word or shape you plan on using. I downloaded Pacifico and made the template in a word doc using a font size of 375.

  2. Cut out the template and align on wood board, use scotch tape to keep it in place.

  3. Begin to outline the word/shape with nails, placing them about 1/2” apart.

  4. To start threading tie one end of the string to a nail, then outline the word/shape. Wrapping around the nail head as you go.

  5. Tear away the paper template.

  6. Start wrapping the string around the nails creating a zigzag pattern. Continue to do this until you have filled in the entire word/shape.

  7. Secure end of string by tying a knot to a nail.

likehearted10

How to Graywash Furniture

I have a ranch style house and the decor can be described as modern rustic, with the primary colors being gray and white. I love Restoration Hardware, but it is totally out of my budget, so I mostly refer to the store for just inspiration. A lot of their living and dining pieces come in a Grey Acacia Finish (pictured below) and since I enjoy refinishing furniture I tried to take a stab at recreating the RH look. I think it is a handy painting technique to know how to do if you like rustic, shabby chic, vintage styles.

Restoration Hardware Inspiration

The best part about the graywash technique is that it can be used on any type of wood furniture. In the video I did it on a frame to create accessory displays. I’ll do another post of how to create the accessory displays with chicken wire or twine.

Materials:

Tools:

Steps:

  1. If needed sand the frame to take away any varnish.

  2. To create the graywash – mix together 1 part gray paint and 1 part glaze.

  3. Use a bristle (chip) brush apply the gray paint to the frame. Use a different dry bristle (chip) brush to remove excess paint. Keeping with the rustic look the paint doesn’t need to fully cover the frame, just depends on how much of the oak wood you want to show through. Personally, I didn’t want much of the light wood to show through. Let is dry and apply second layer if needed.

  4. To really create the weathered look add a white glaze mixture: mix 1 part white paint to 1/4 part glaze. Using your regular paint brush paint on the white glaze mixture then remove excess with a damp rag. Continue this process until you achieve your desired look.

Graywash Steps

Sneak Peek – DIY Home Decor Tutorials coming this month!

This past Wednesday I shot a series of tutorials on items to create for your home. I’m all about bargain shopping, recreating high end looks at affordable prices and giving a face lift to things you currently own. Hopefully you all will enjoy my ideas and it will give you inspiration to create something of your own. Subscribe to the channel to be one of the first to see the series, new videos up every Friday! 72905_10102357417812701_1201842327_n

Long Lasting Red Lips & Winged Eye Liner

Mad Men has a new season premiering this Sunday and I couldn’t be more excited! It inspired me to do a series on beauty classics – red lips and winged eye liner. Red lips never go out of style but this season it’s all about a matte finish (just like how Christina Hendricks and Adele are wearing it). Also, try complementing the lip color with a red nail color that is 1 or 2 shades darker. Watch the video tutorial to learn how to keep those red lips lasting all night long.

Please SUBSCRIBE to the channel to see new videos every Friday- sign in with your gmail account and hit the “subscribe” button in the header. Share your comments below on other beauty, lifestyle or DIY tips you’d like to see!

Christina Henricks Red LipsJessica Red Lipsadele-grammy-g-sum_2137417b

Steps for Winged Eye Liner:

  1. Start in the middle of the lid and draw your line to your outer corner. I did more of a subtle look, but you can extend the line out further for a more dramatic winged eyeliner.

  2. Re-apply product to brush, starting the middle again and working your way to the inner corner.

  3. Curl lashes and finish with coat of mascara.

Tips:

  • Make sure your elbow is on a steady surface.

  • Use a dashing method to draw the line and fill in the spots as you go.

  • Don’t start on the inner corner, you don’t know how much product is on the brush.


Steps for Long-Lasting Red Lips:

  1. Fill in entire lips with liner.

  2. Apply lipstick, pressing it into the lip, blend with a brush.

  3. Blot with tissue.

  4. Apply another layer of lipstick, pressing it into the lip.

  5. Lightly dust on transparent powder (I used MAC’s translucent powder)

  6. Apply another layer of lipstick and use liner to sharpen edges.

Tips:

  • Prep lips with a scrub, apply lip balm and let it set, do your normal foundation rountine, then wipe away excess lip balm before doing the steps above.
  • Skip steps 5-8 if using a long lasting lipstick like Covergirl lipperfection.

  • Add blush after you have applied the red lipstick.
  • Add false lashes to finish the look.

Products I used:

Inexpensive Alternatives (all for under $20):

Tools:

DIY Rosette Necklace – Emerald Color of Year Inspiration

Emerald is the Pantone color of the year (color swatch 17-5641 to be exact). The color is dripping into all fields: home décor, accessories, clothes, weddings, etc. If Emerald isn’t your thing, other shades of green are also in this season like Mint (big trend in bridal), Pistachio and Army Green. It’s about being on trend, so try something new on the green color wheel but it’s also about sticking to what you are comfortable with. The best thing about Emerald is that is looks great on blondes, red heads and brunettes. You can ease the color into your style by just painting your nails or go all out with a bright dress. My style is traditional with some drama/edge mixed in, so I’m more likely to work the color in with my accessories. In this tutorial I’ll show you how to make a rosette necklace using Emerald colored fabric for a standout accessory. Directions and materials needed are located at the bottom of the post.

Here are my top picks for incorporating Emerald into your everyday style:

e51e3366b0129a7c33468c630dc9ec70

913487331ad87b893f8e51cc93e3bbcea62b542a4e3adb96b5d0971be4bf96bb7e30cce808a074657a141c73d9350be1

96cc1ed68239f412e3a45f3ac0e8a81d

How to make DIY Rosette Chain Necklace:

Materials:

  • ½ yard of fabric
  • 1 sheet of felt
  • Good Chain
  • 2 Large Gold Hoops

Tools:

  • Pilers
  • Scissors
  • Hot Glue Gun
  • Sharpie
  • 1 piece of 8.5 x 11 paper

Steps:

  1. Cut a strip of fabric about 1.5″ wide and 20″ long.  This makes a rosette about a 1.5” in diameter. The longer the fabric the bigger the rosette.
  2. Tie a knot at one end (if there is excess, trim off close to the knot).
  3. Tuck the knot back on itself and begin to roll the fabric around it, folding and twisting the fabric strip in, towards the center of the rosette. Keep folding and twisting in circles. Use a little dab of glue every now and then to secure the fabric twists.
  4. When you have a rosette of desired size, leave about 1” of fabric at the end and twist to underneath the rosette and secure with glue. For the rosette that is going to attach to the large gold hoop, loop the end through the hoop  and secure fabric strip with glue to the back of the rosette.
  5. Once you have made the amount of rosettes you want arrange them on a piece of paper and create a pattern by drawing  an outline of your rosettes. Cut out the pattern.
  6. Trace pattern onto felt and cut out along the inside of the edges.
  7. Dab glue underneath of your flowers and press heavily onto the felt.
  8. Attach the chain.

Tips:

  • Dont worry about the rough edges of the fabric, I think it adds a good texture to the rosette.
  • I bought the felt before I decided to use green fabric; I would suggest choosing a piece of felt close to the color of fabric you are using so that it is less noticeable.

DIY Custom Name Hangers

I’ve seen so many brides purchase these personalized hangers lately, so I decided to take a stab at creating my own. The craft is easier then you think, check out the tutorial and let me know how yours turns out. Thank you to my bride-to-be friends for letting me use their names for the hangers! Oh, don’t forget to subscribe to the YouTube Channel, the goal is to get to 1,000 subscribers!

Materials:

Tools:

  • Wood Glue (Gorilla)
  • Power Drill w/ 3/16 drill bit
  • Ruler
  • Pliers
  • Wire Cutters
  • (1) 8 x 11 piece of paper
  • Sharpie

Total cost: $5 for each custom hanger

Time: 1 hour

Steps:

  1. Create a template. Measure out the length of the hanger and then leave 2.0 inches of space on each end. This will act as your guide as you create the name when wrapping the wire.
  2. Take you wire and measure out 2.5 inches on the start end.
  3. Start to shape the letters. This wire is really flexible so you can just use your hands. If additional help is needed, then use the pliers. I suggest using lowercase script for beginners. 
  4. Drill hold bout 1 inch from each end of the hanger.
  5. Trim access wire, add glue to hole in hanger and secure wire into place.

Tips:

  • Your first time trying this craft will take you about 1 hour. Once you get the hang of shaping the wire, you will cut down on your time tremendously. It’s okay if they craft has a more rustic/handmade feel, it doesn’t have to be perfect!
  • Paint the hanger (before you start the craft) to match the wedding colors.

Other Uses:

  • There was wire left over so I used it to make “place cards” for the bride and groom.  Leave a comment and let me know if you have any other ideas for how to use the wire to personalize your big day.

20130213-131220.jpg

Wedding DIY: Turn Your Guestbook Into Art

Instead of having a traditional guestbook that is going to sit on a bookshelf and collect dust, my theory is to turn it into something that can be on display and viewed daily. Hopefully these ideas will inspire you to do something unique for your big day.

Option 1: Lip & Mustache Silhouettes 

Check out the photo booth tutorial on how to make the lip and mustache silhouettes, you can do any shape that matches the wedding theme: bow ties, hearts, birds, leaves, flowers, etc. Arrange the shapes in an interesting pattern to create a piece of custom artwork for the bride and groom’s home.

20130208-140254.jpg

 Option 2: Wine Corks

If the bride and groom are wine lovers or the wedding is taking place at a vineyard, have the guests sign wine corks. I wrapped a canvas in kraft paper and then hot glued wine corks into the first letter of the bride & groom’s last name or make free standing letters. Either way it’s a great decorative accent to the home.

20130208-140206.jpg wine corks

image via Style Me Pretty

 Option 3: Vintage Postcards

If the theme of the wedding is more rustic, consider having your guests sign vintage postcards. After the wedding have your maid-of-honor drop them off at the post office so that when the bride & groom return from the honeymoon their mailbox is filled with well wishes from the guests. Plus, who doesn’t love snail mail? If you are looking for vintage postcards then check out this awesome Etsy shop.

20130208-140139.jpg

DIY Tulle Tutus

I think this may be the cutest craft ever. I seriously can’t get enough of these tutus. Watch the tutorial and you’ll see what I mean. Don’t forget to SUBSCRIBE to the YouTube Channel!!

Materials:

Tools:

  • Scissors (find a similar leopard pair of scissors here)
  • Tape Measure

Total cost: $12

Time: 30 minutes

Steps:

  1. Cut elastic 2 inches shorter than flower girls waist measurements.
  2. Use fabric glue to hold the elastic together.
  3. Cut tulle into 2 foot long pieces.
  4. Wrap the elastic around your leg to hold it into place.
  5. Take one piece of tulle and hold it in half. Thread the tulle under the elastic, leading with the folded end.
  6. Take the two ends of the tulle on top, pull them through the folded end (loop). Continue pulling down and use the index finger from your other hand to place the knot and tighten as you pull. Repeat this step until tutu is complete. Trim ends if needed.

Tips:

  • I also suggest doing a few cross stitches on the elastic for extra hold.
  • Adjust the length of the skirt but cutting longer stripes of tulle.
  • Perfect for flower girls, birthdays, baby showers, etc.
  • Tulle is available in a wide variety of colors so it is easy to match the wedding color palette. I used the glitter tulle for one of the tutus I made and I need to warn you, that the glitter gets EVERYWHERE. If you do want to use it, I suggest doing the craft outside, or avoiding using the glitter tulle altogether so that you aren’t constantly cleaning it up.

Also, if you like working with tulle check out my other tutorial on how to make a tulle headpiece.

DIY Bridal Tulle Headpiece

With wedding season fast approaching, many brides-to-be are looking for unique ways to customize their big day. In this tutorial I’ll show you how to create a Tulle Headpiece that can either be worn by the bride, flower girls or wedding party. This is a great way to call out the bride for a bachelorette party as well (especially if you aren’t into the typical bachelorette decor).

Materials:

Tools:

  • Scissors (find a similar leopard pair of scissors here)
  • Hot Glue Gun
  • Ruler

Total cost: Under $10

Time: 20 minutes

Steps:

  1. Cut 12 pieces of tulle into 8 inch strips.
  2. Cut 6 inch piece of twine and set aside.
  3. Layer pieces of tulle on top of each other, alternating directions.
  4. Fold tulle in half and pinch the bottom together, secure with twine.
  5. Secure tulle to headband with a drop of hot glue and hold in place until dry.

Tips: 

  • I prefer to use tulle with texture like the birdcage type or I mixed regular tulle with a swiss dot style in the video.
  • If you are going to use a comb you will only need 6-8 pieces of tulle depending on the fullness you want.
  • Using a straight edge/square shape tulle will give you a more avant garde look, using rounded edge/circle shape tulle will give you more of a rosette style.
  • Have the bride where it the Bachelorette party and/or bridal shower in order to call out the bride-to-be.
  • Consider making versions for the bridesmaids or flower girls, tulle comes in various colors that will match the wedding color palette.

Leave a comment and let me know if there are other tutorials you would like to see!

DIY Jewelry Display

I needed a break from the computer yesterday and did a quick DIY project in my guest room. I often forget the jewelry that I have because it is always tucked away in a drawer, so with just a hammer and some clear push pins I created a necklace display on the wall. This is going to make life easier when getting dressed.

20130214-121956.jpg