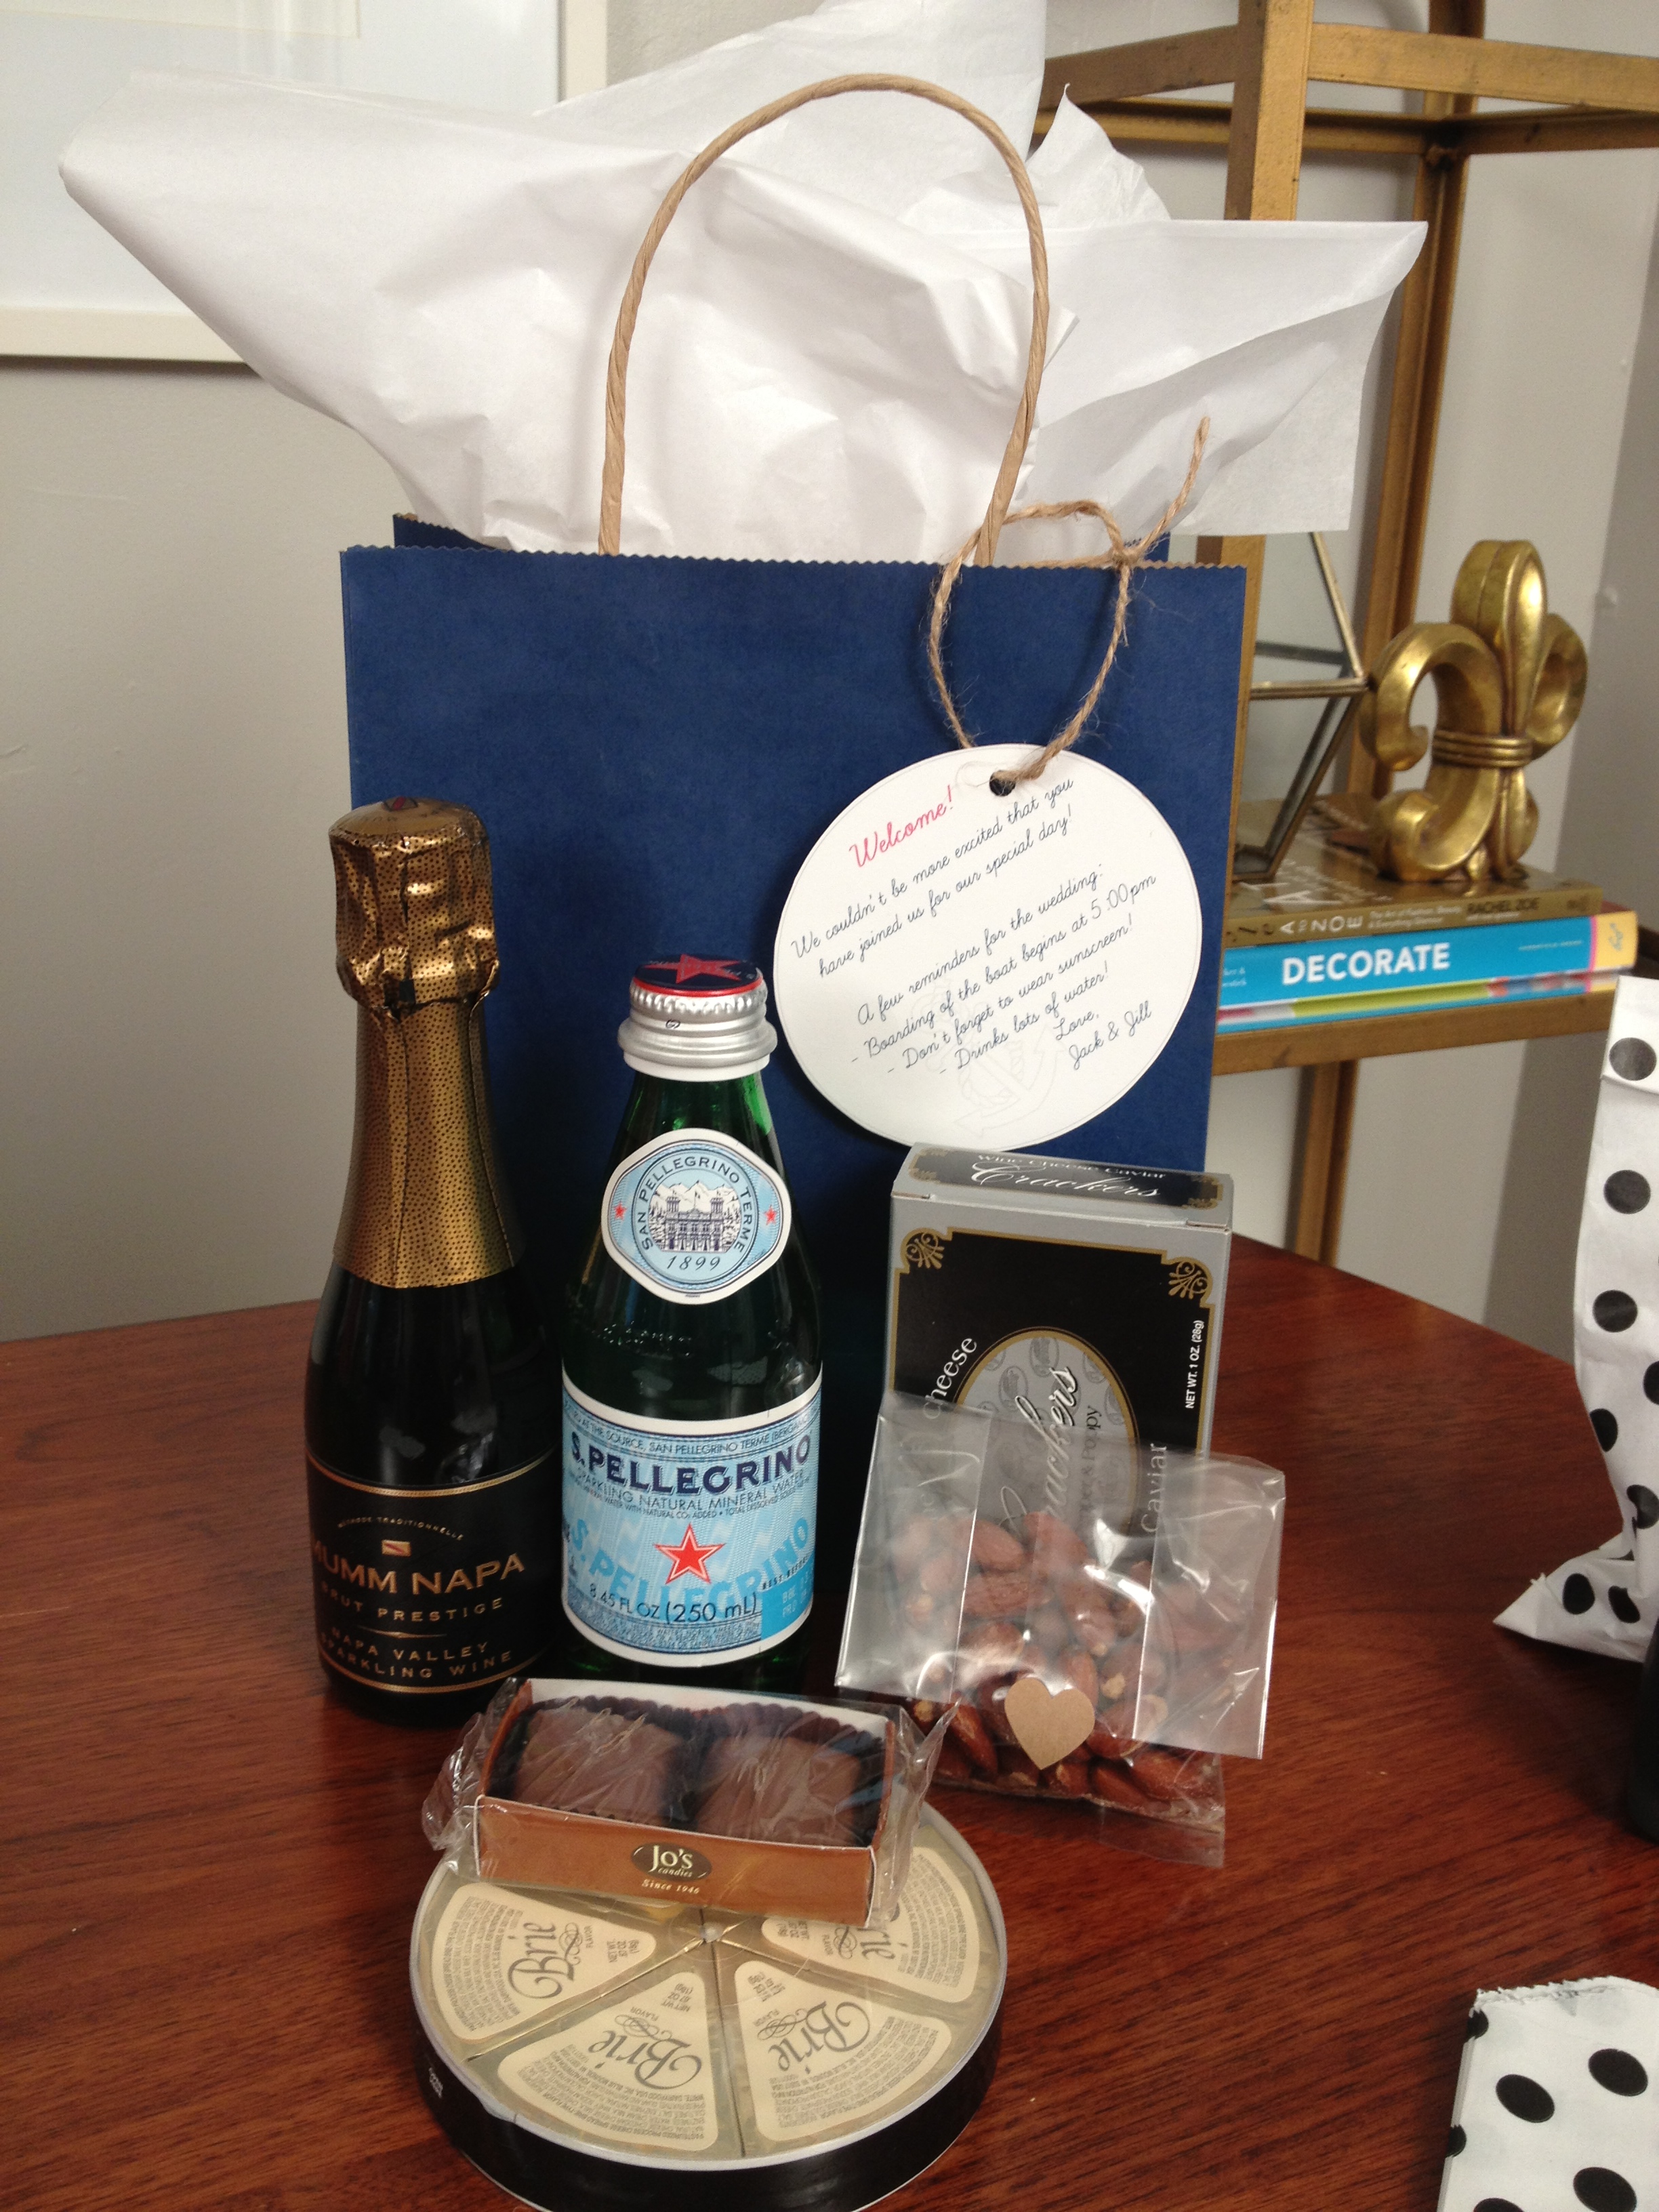
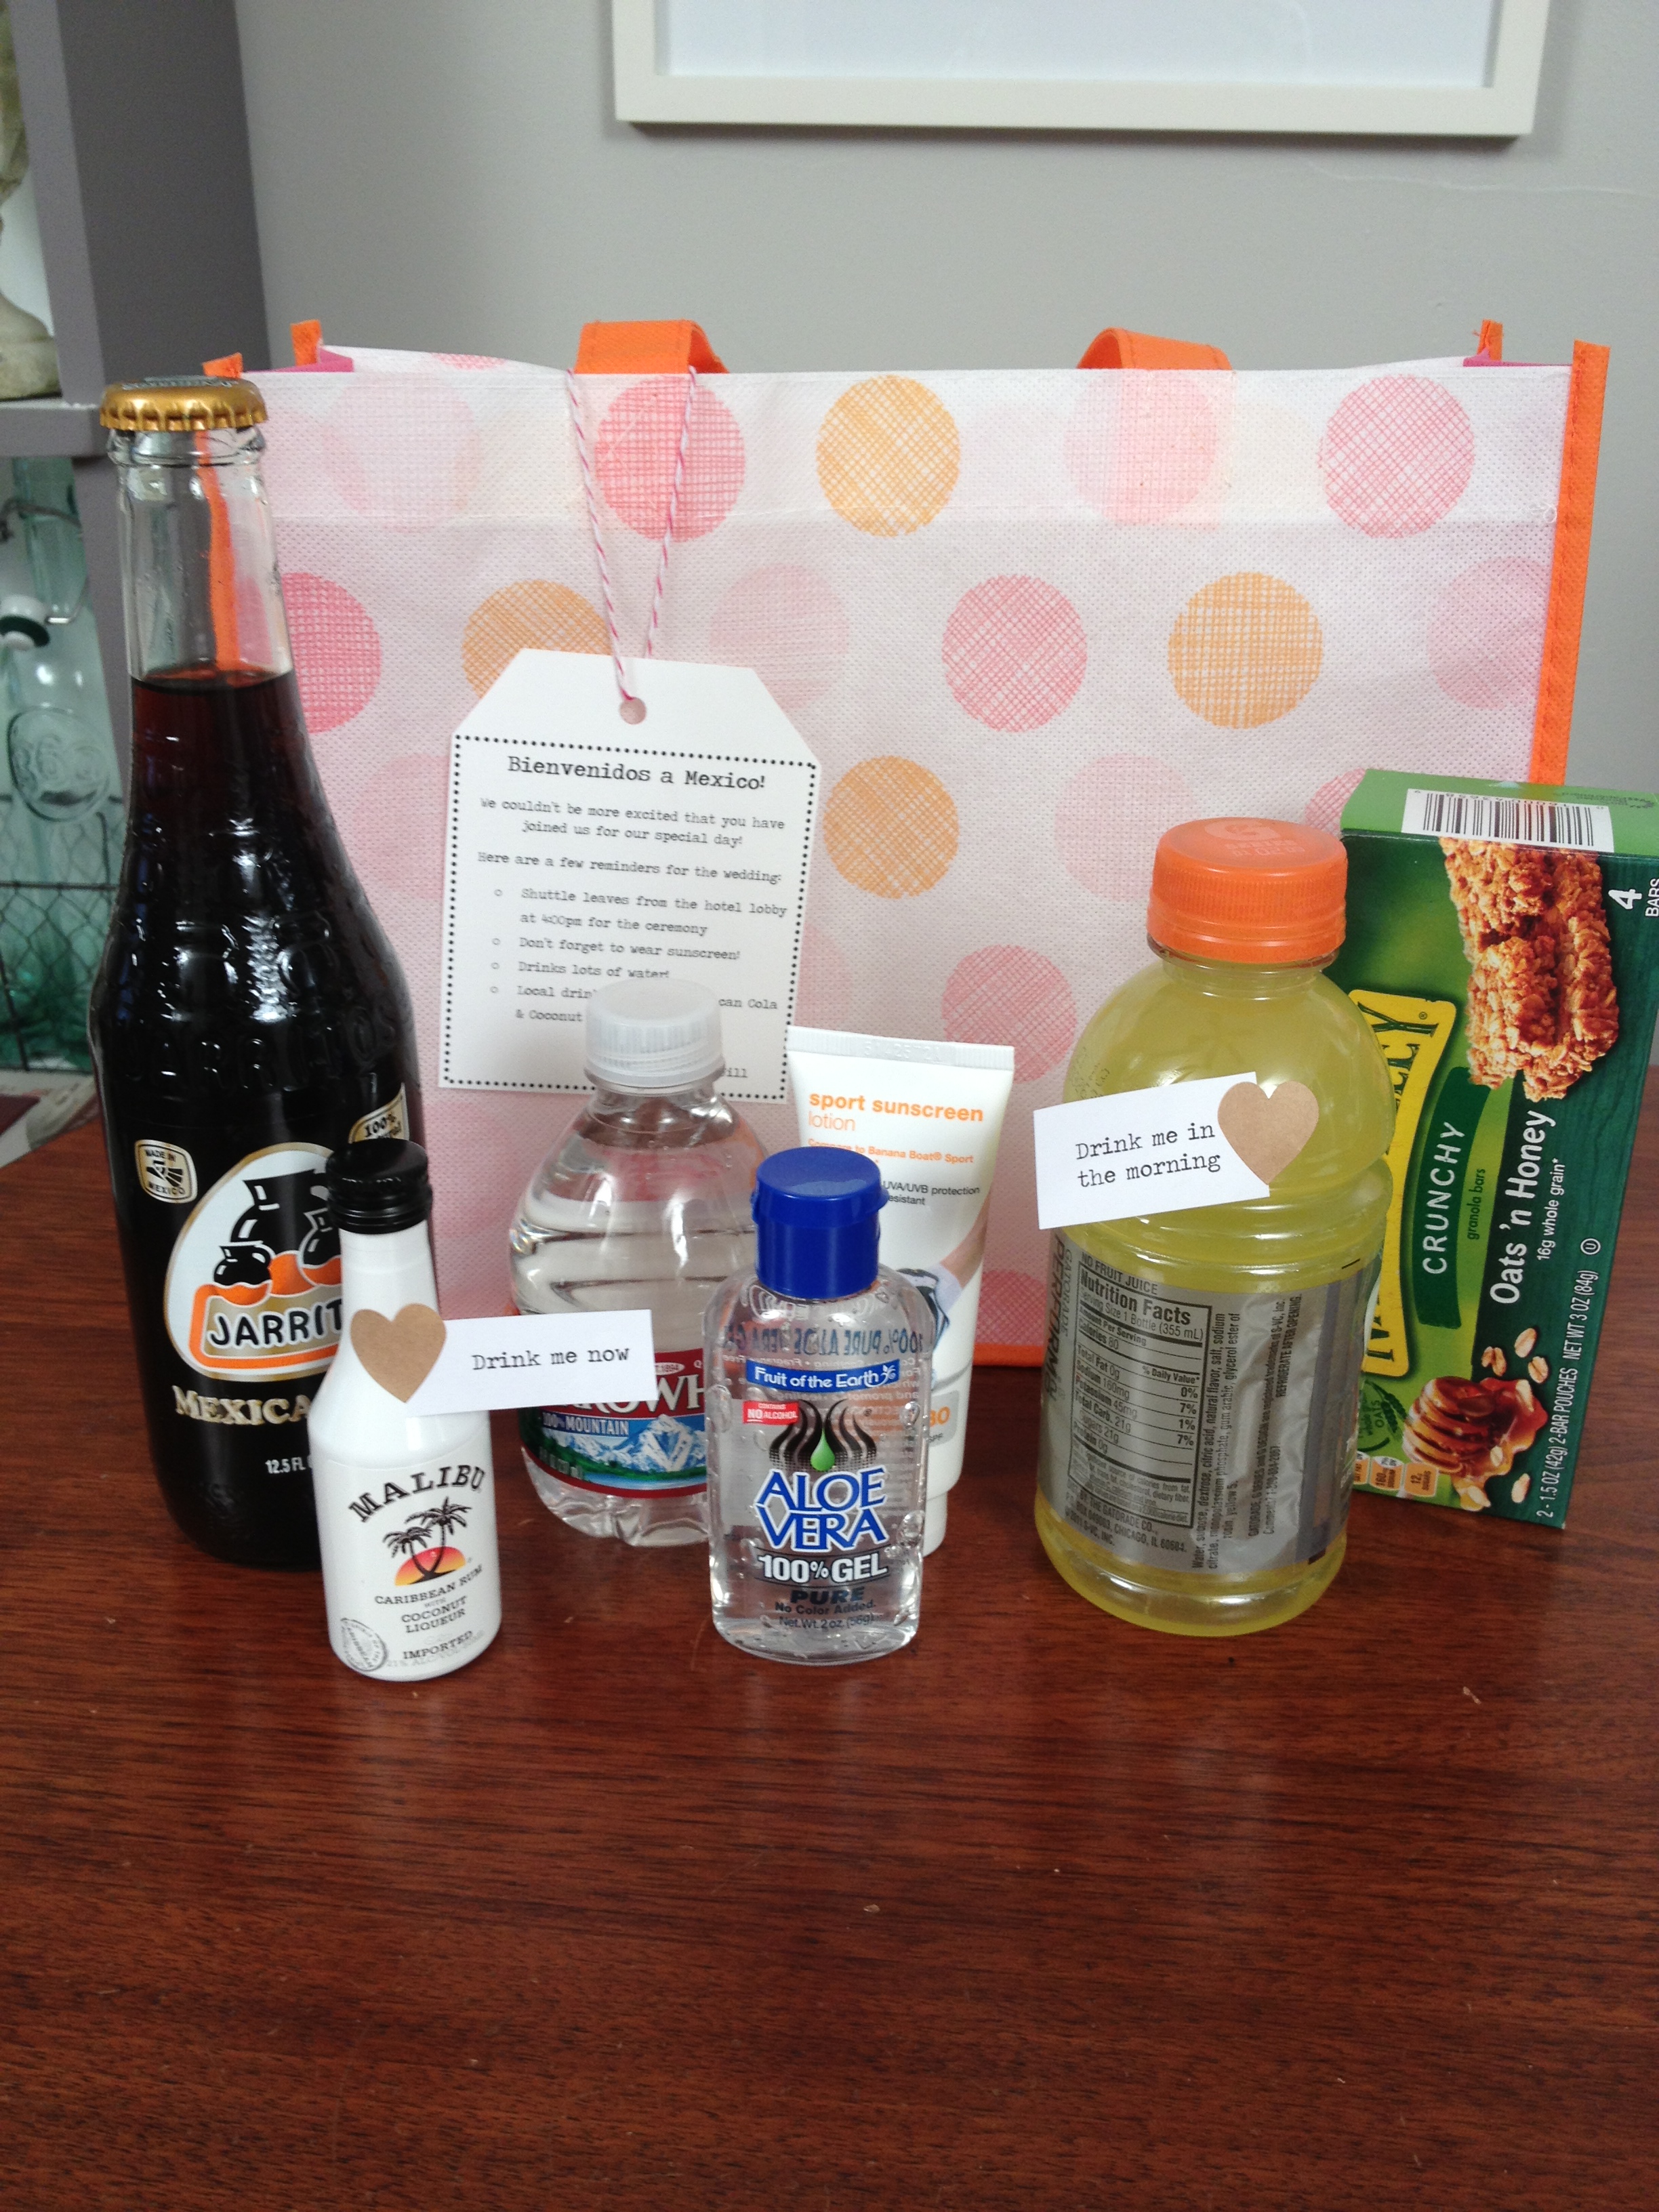
I can’t think of a better way to thank guests for sharing in your big day then to create a welcome bag upon their arrival. This week’s video will show you some easy ways to customize the bags based on your wedding’s theme or destination.
Tip: Include specific notes for your guests such as a weekend itinerary, area attractions, transportation details or other visitor information.
Resources:
Target – $1 section for toiletries
World Market – miniature versions of food and drinks
I got some requests to do more wedding DIY tutorials and I was super happy to comply!
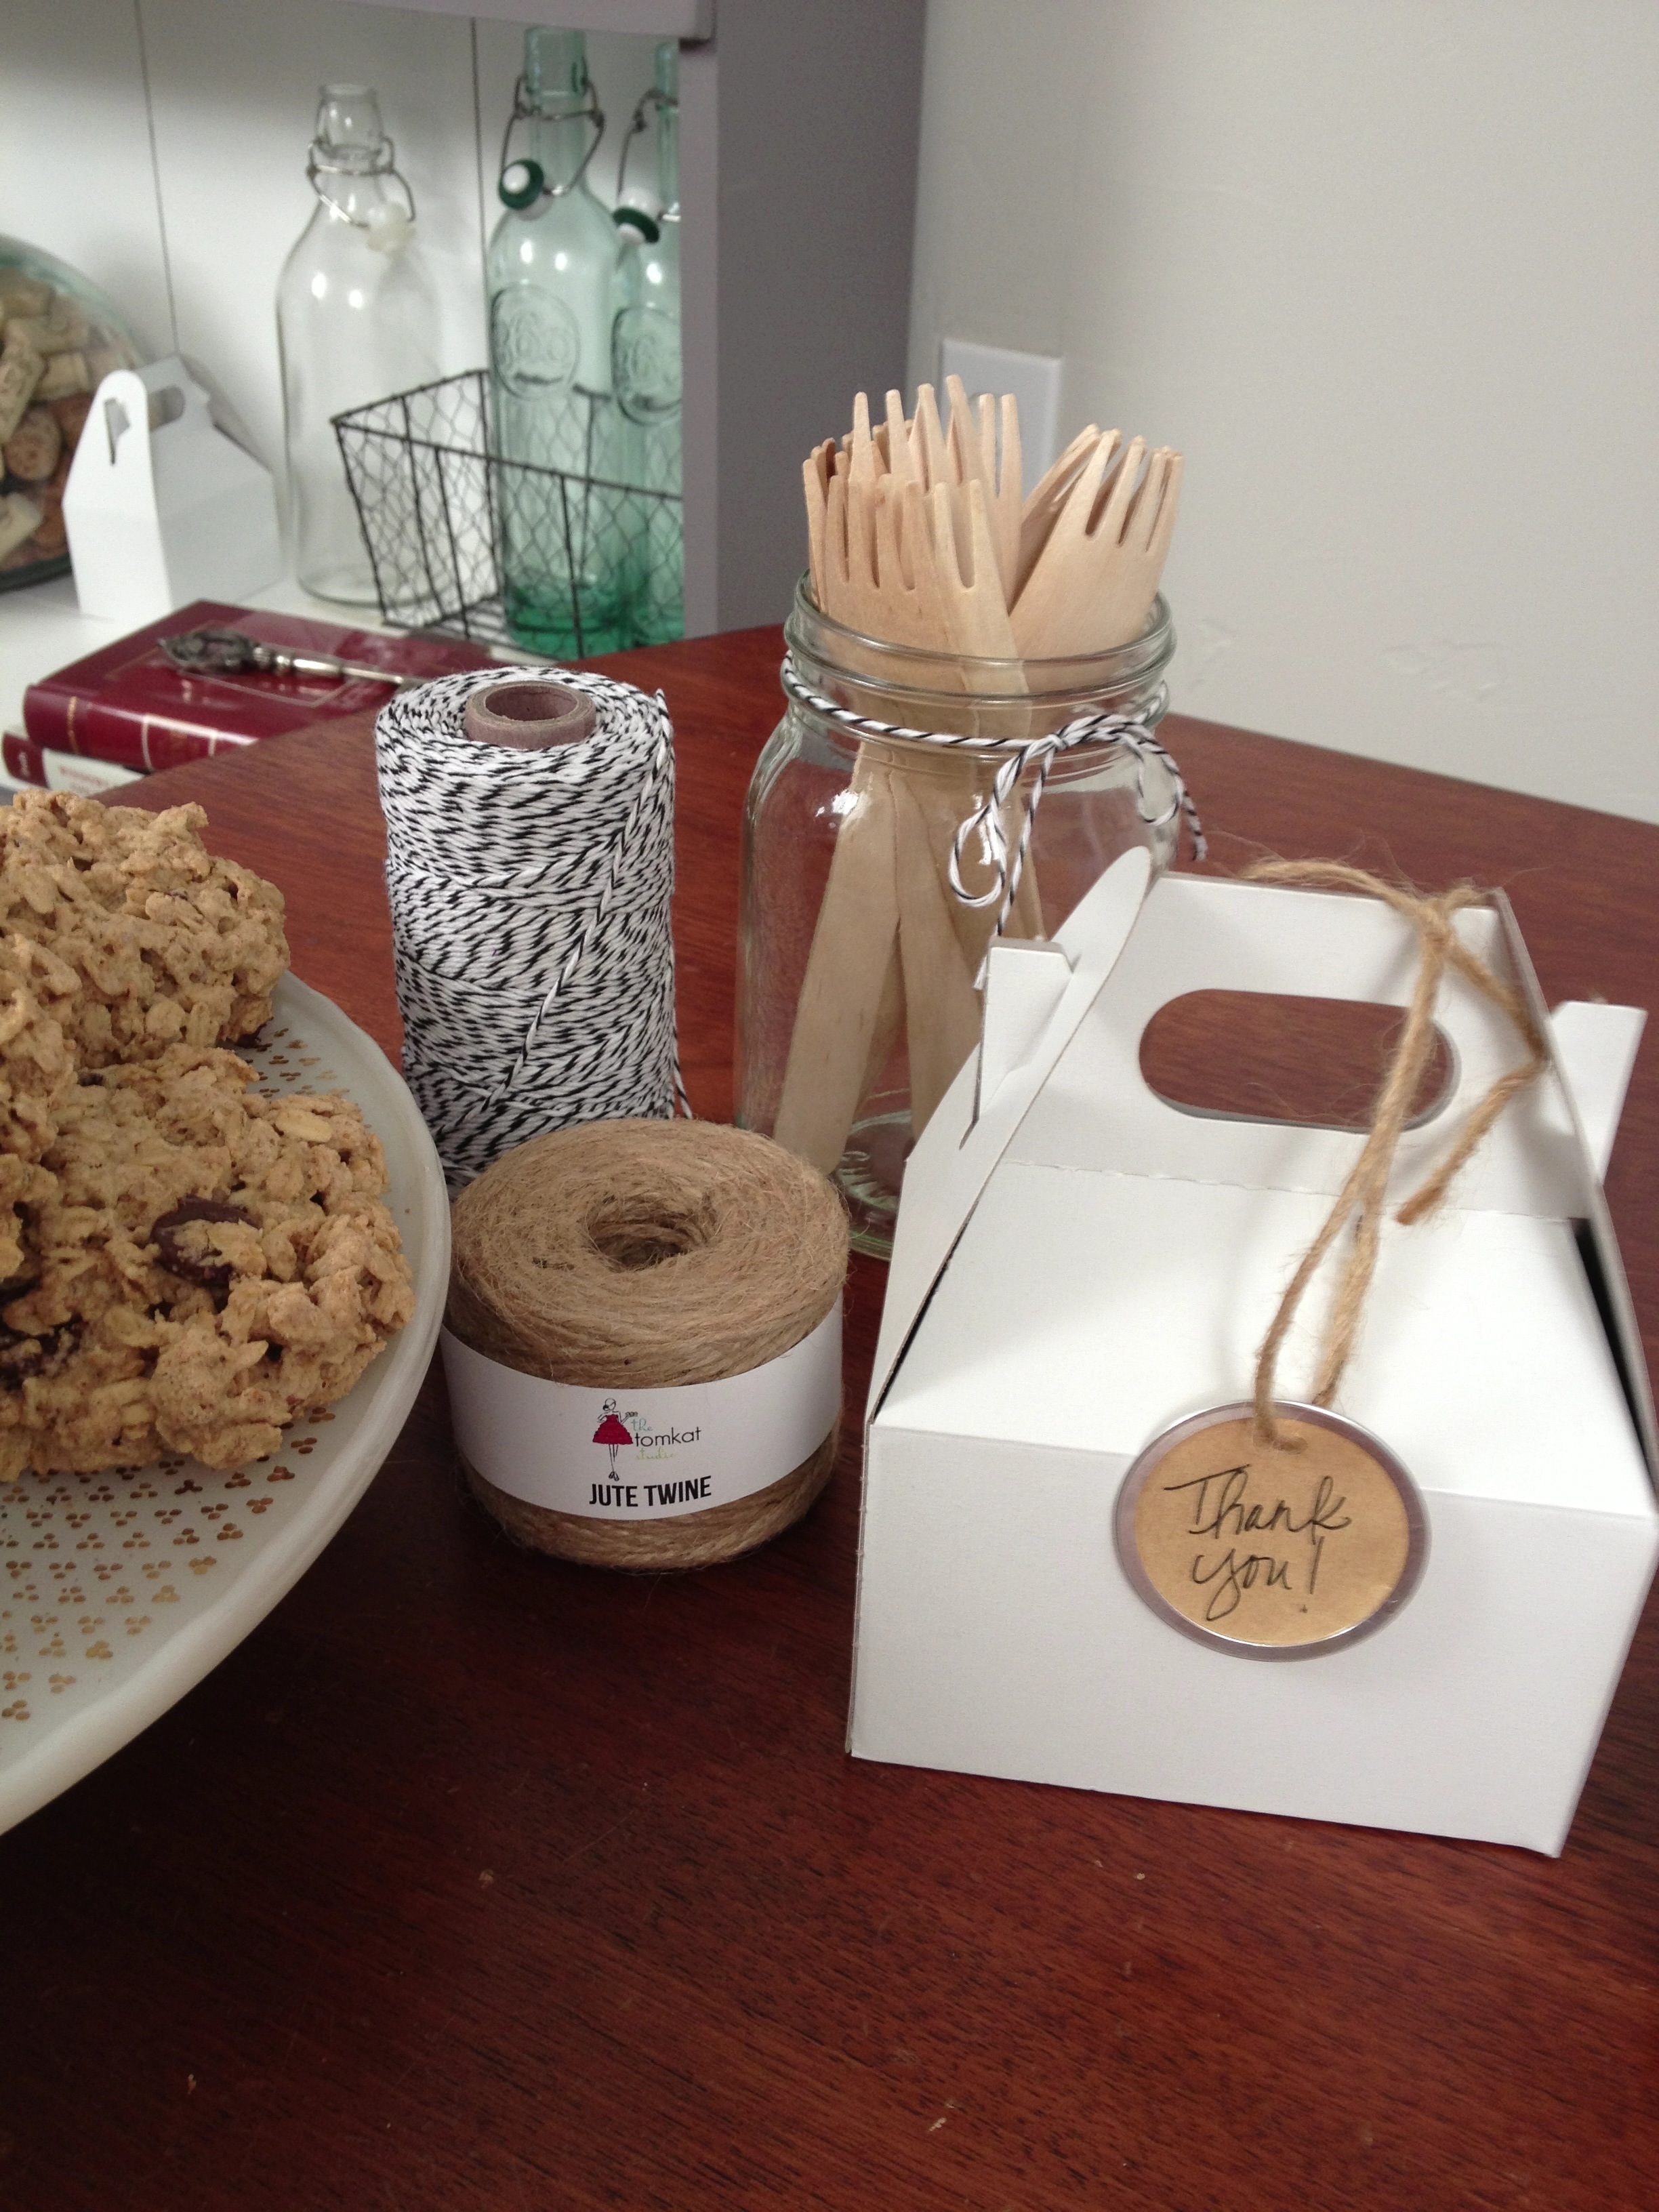
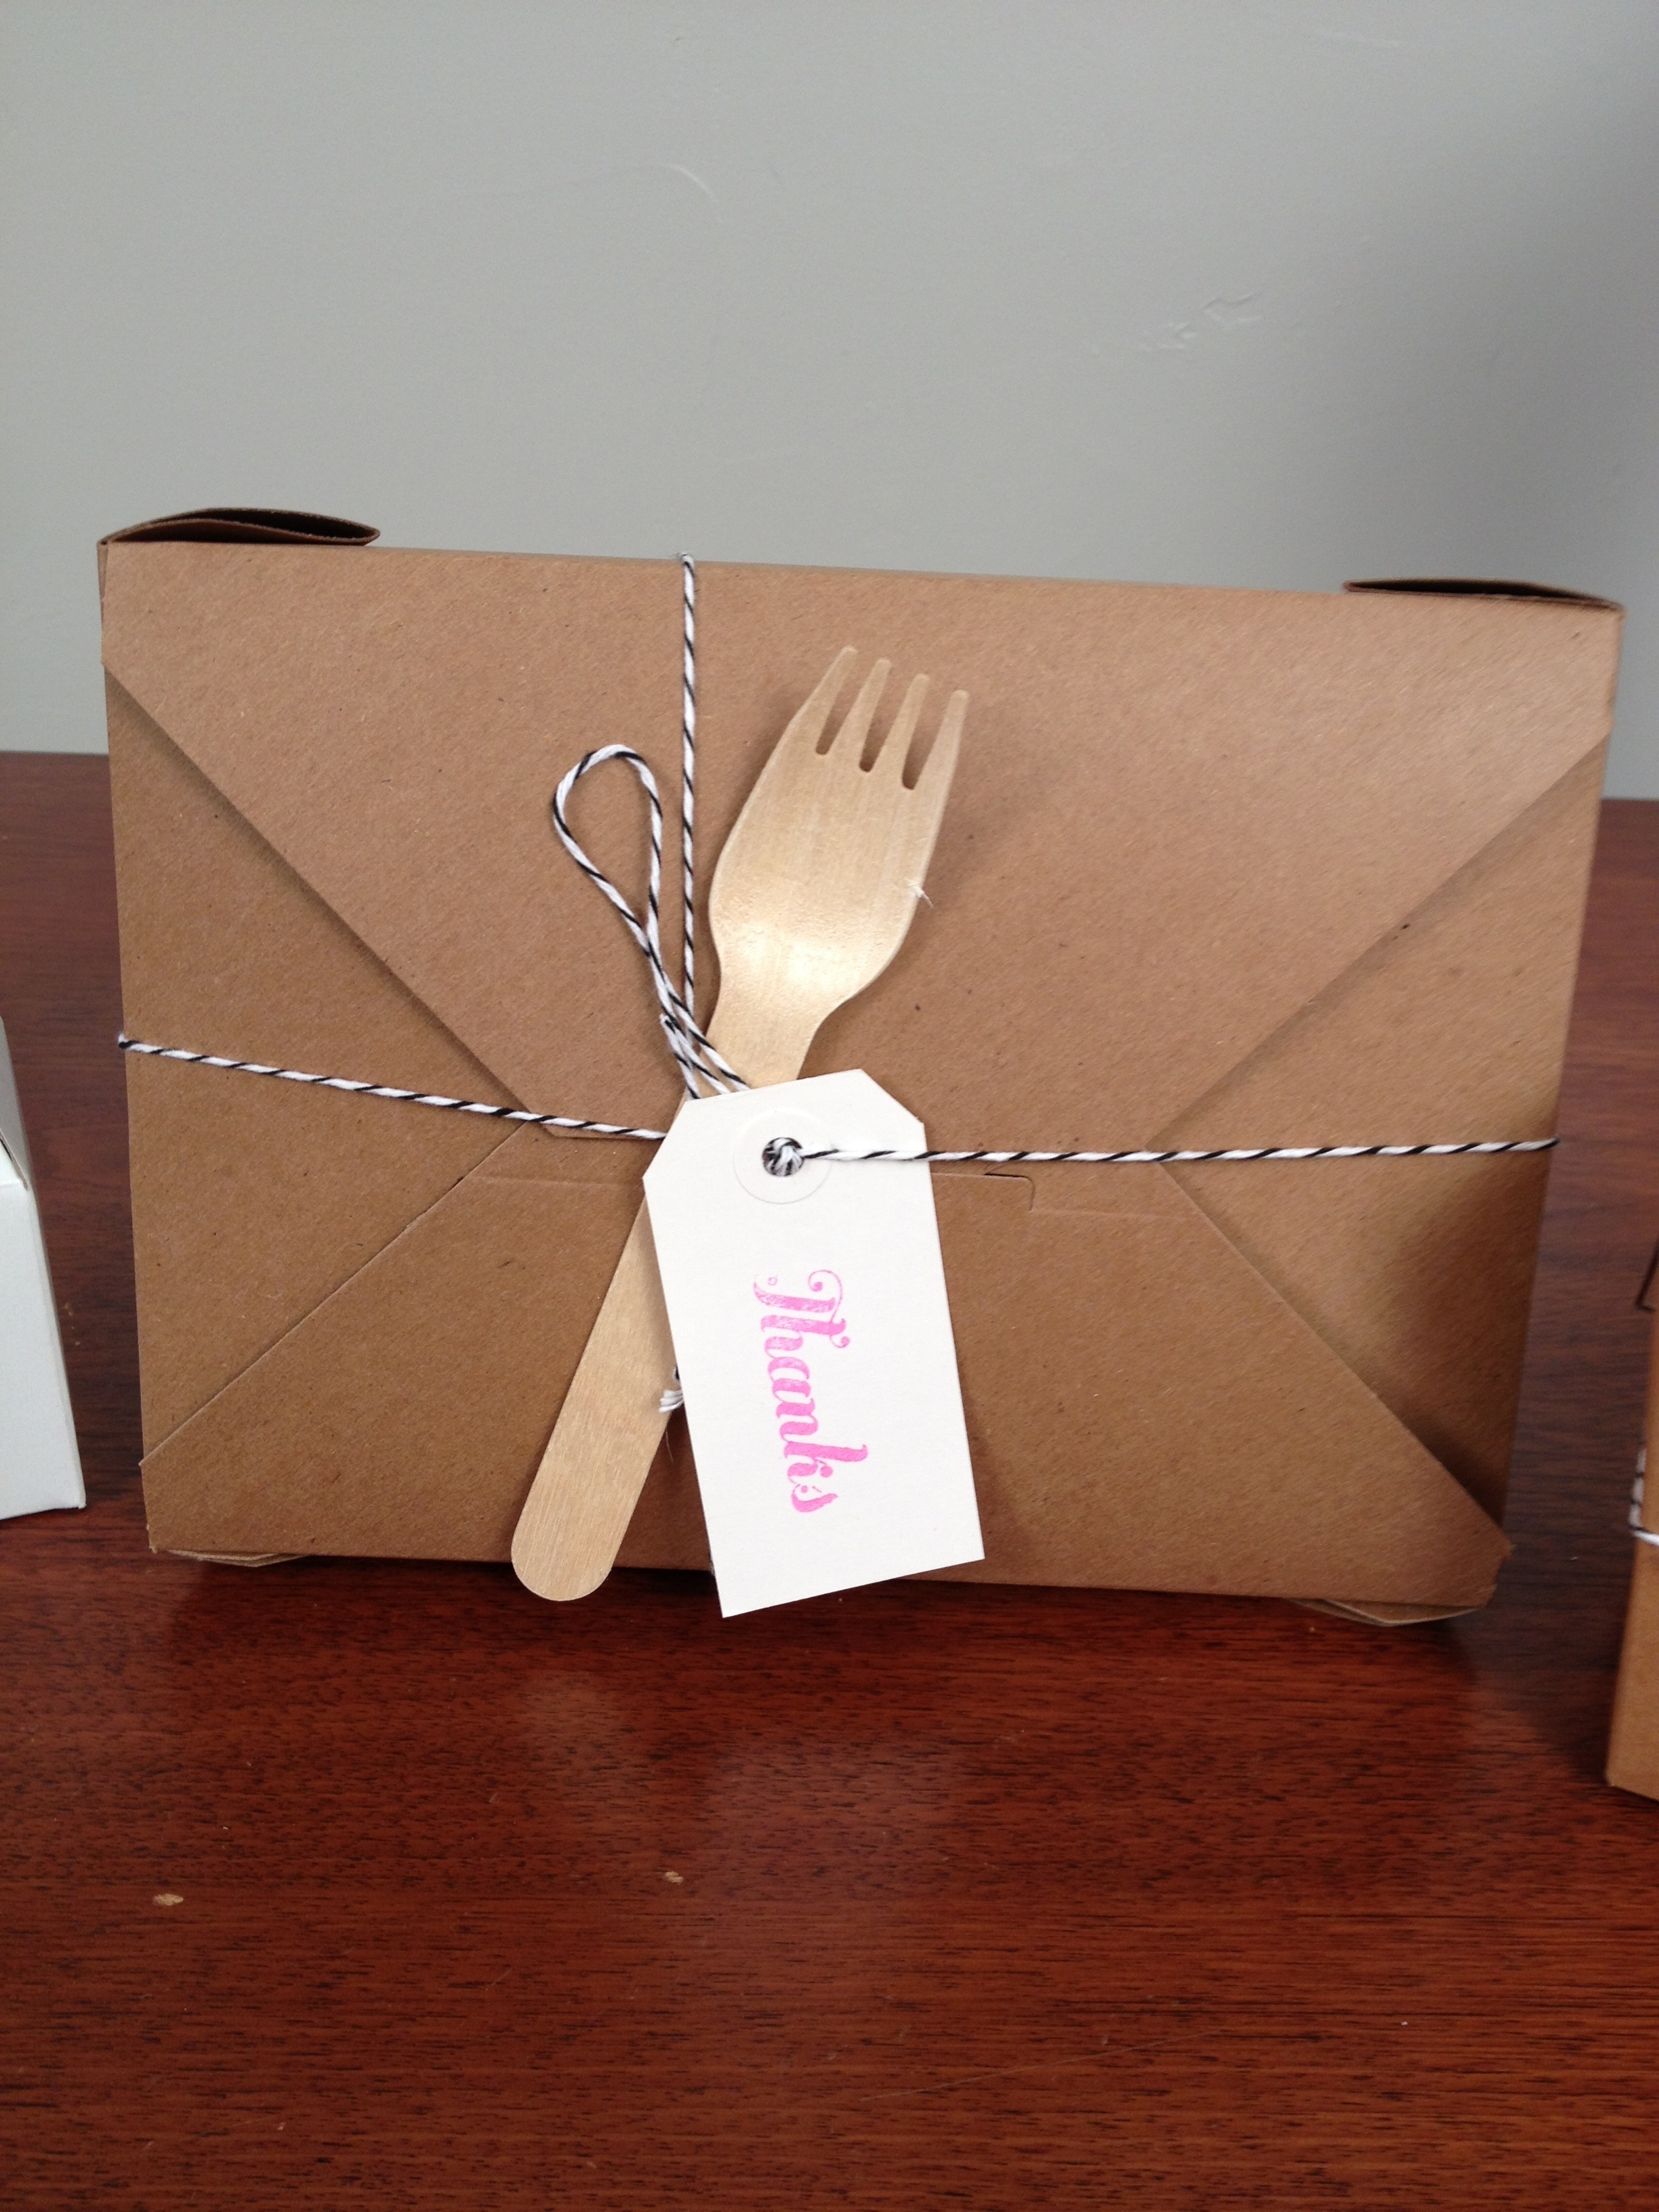
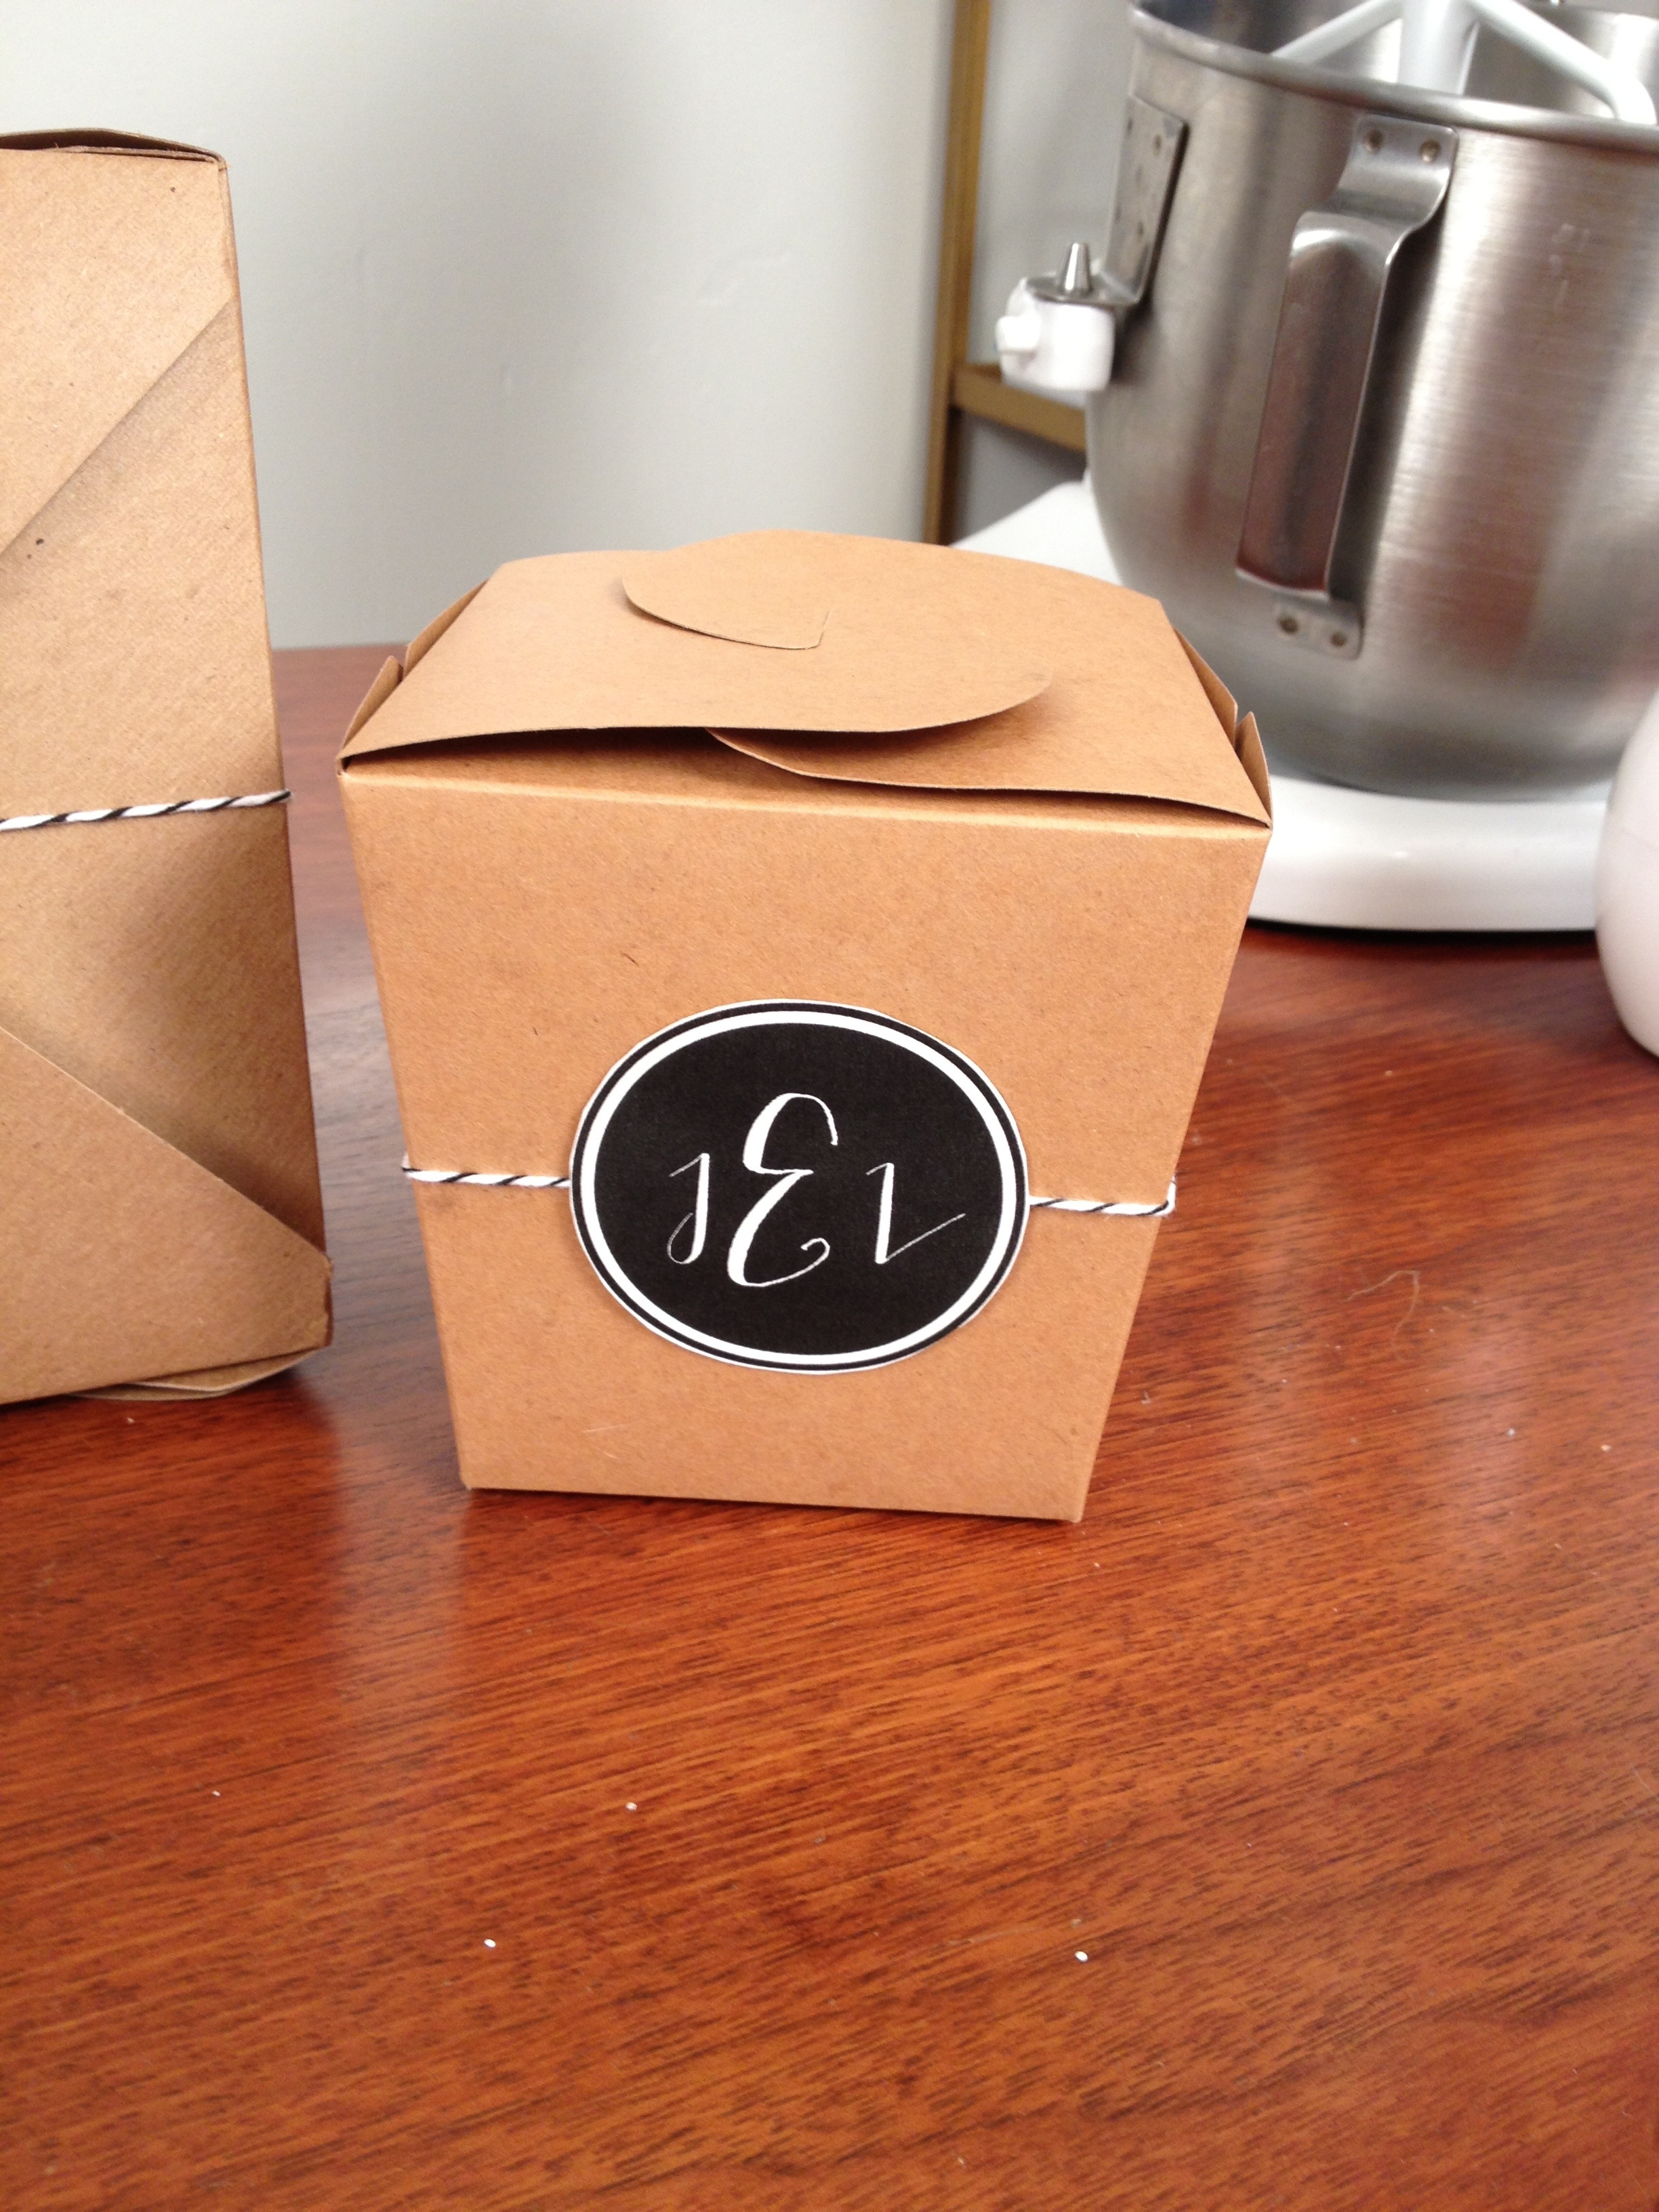
I’m a big advocate on trying to make weddings greener and not have as much waste. For this week’s video, I saw these biodegradable kraft takeout boxes and thought they were a great way to send guests home with leftover wedding cake. How many times have you seen uneaten slices just sitting on the tables!?!
These takeout boxes are not only for weddings, use them at dinner parties to send guests home with leftovers so that you never have to worry about getting your Tupperware returned to you.
I’ve also included a recipe for my signature Gluten Free Oatmeal Cookies that you can use to fill your boxes and turn them into wedding favors.
Don’t forget to SUBSCRIBE to the YouTube channel, so close to the 1,000 goal!
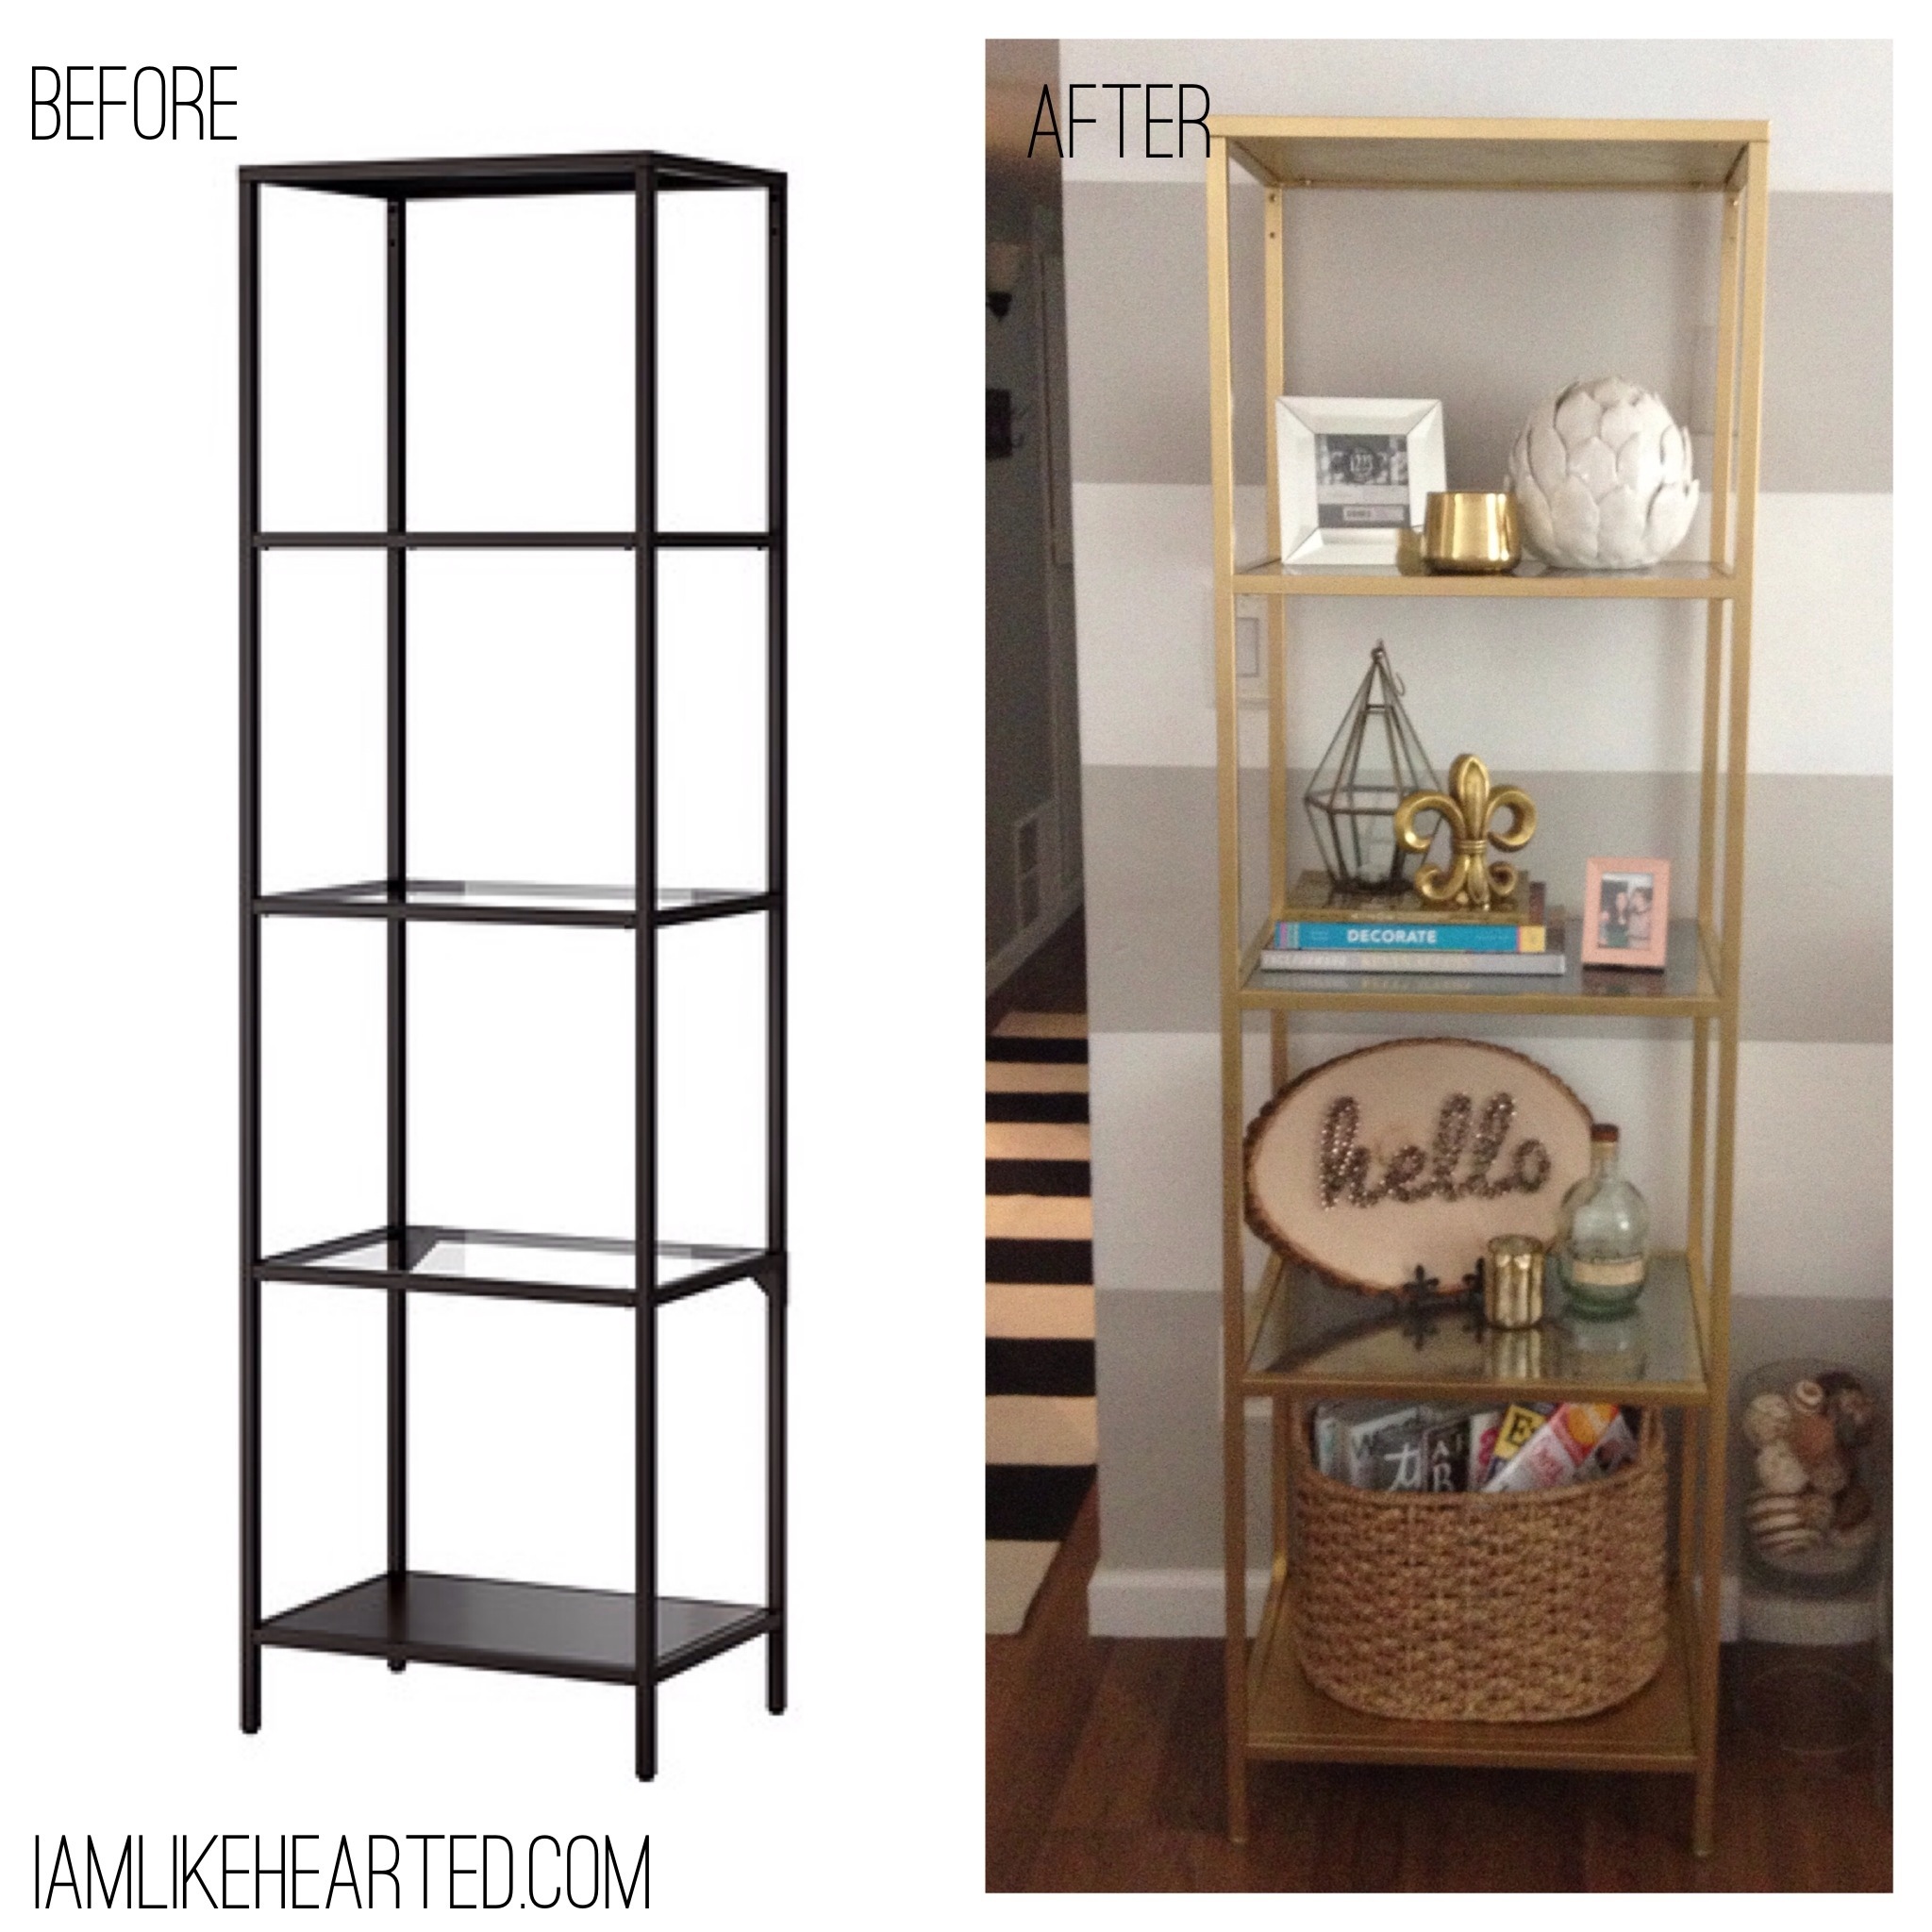
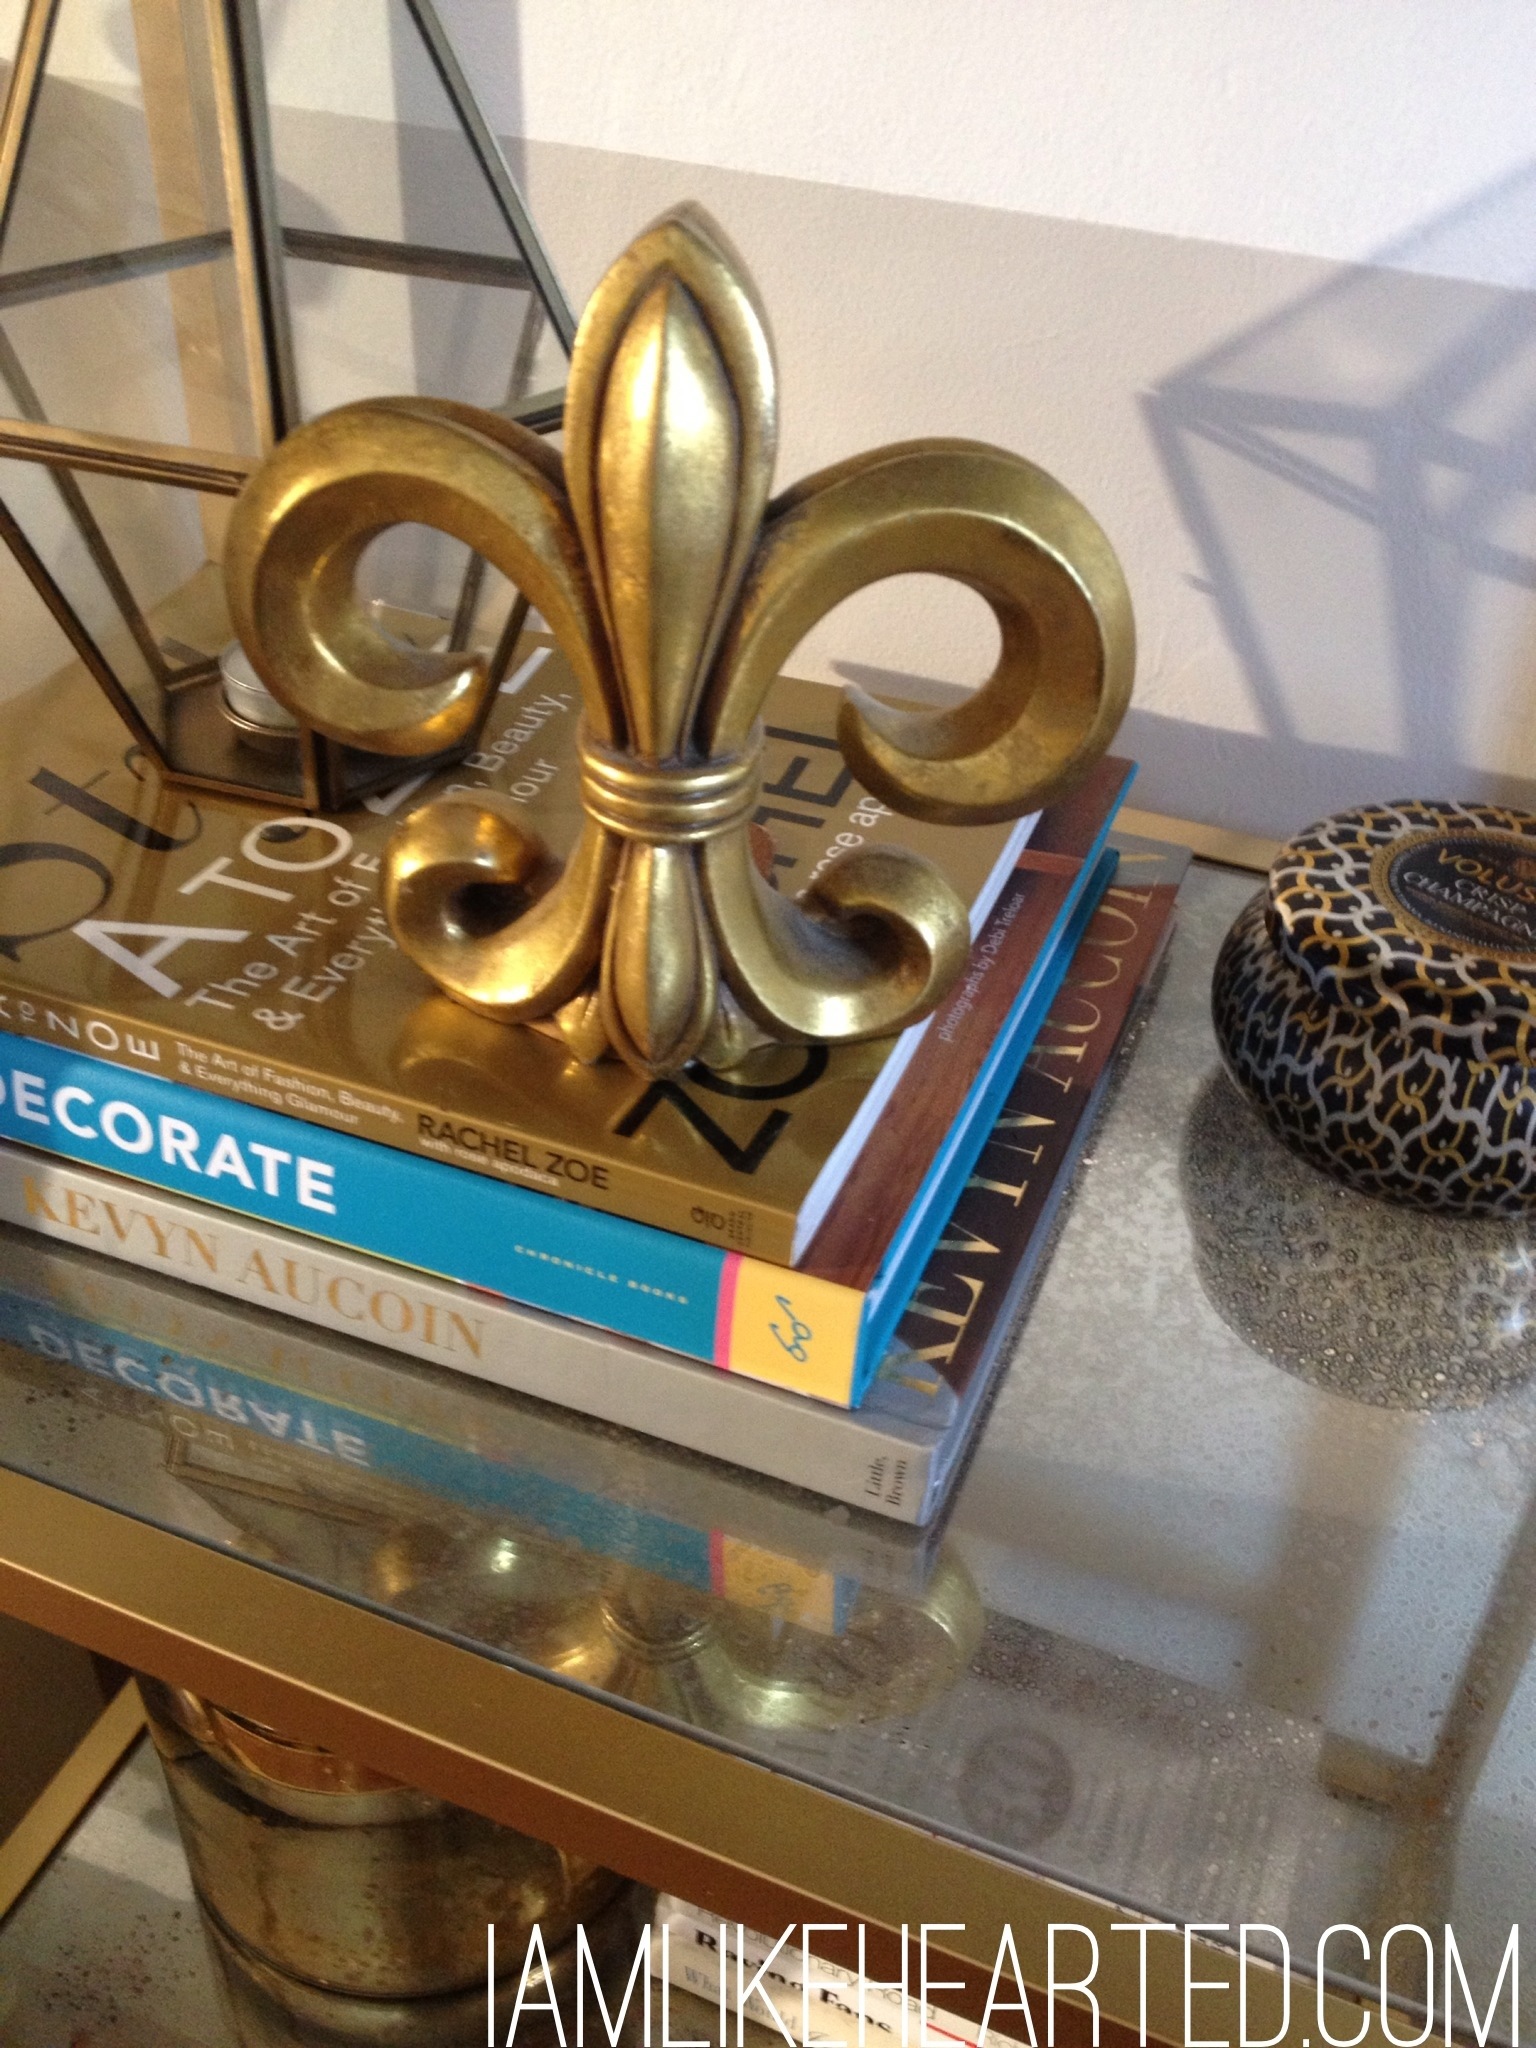
I have a confession…a lot of the tutorials I do are because I need something done around the house. Being a homeowner means the project list never ends. Case in point, I needed a bookcase for my guest room and wanted to recreate the look of a vintage one I already own. In this tutorial learn how to master an Ikea hack and create mercury glass for the shelves. The best part about learning the mercury glass technique is that you can also use it on vases, candlesticks and much more to create additional accents for your home.
Also, I found this post from Brittany Makes extremely helpful when deciding what gold spray paint to use.
Don’t forget to post an Instagram photo of tutorials you have tried and tag me @likehearted. I want to see what you all have been making!
Black Spray Paint (Left over from another project)
Tools:
Damp rag
Spray Bottle filled with water
Mercury Glass Steps:
Make sure you are in a well ventilated area.
Make sure the glass is clean and dry. The paint is going to go on the reserve side of whatever you are painting. In this case, the bottom of the shelf.
Lightly spray the glass with water.
Spray a layer of mirror paint. Let it dry for a few seconds.
Depending on your desired look, you can incorporate other colors, here I add gold and black for a more antiqued look. Spray the colors and dab with a damp cloth top get your desired effect.
Let it dry completely, if it is too transparent add another layer of mirror paint.
It’s March Madness, perfect time for snacking on chips and dips. Honestly, if I could live off of chips & dips I would, but I can’t…This dip is perfect for a party and works well served with potato chips. I made slight variations to the original recipe, adding in more fresh herbs and using Vegan mayo, but regular mayo will would perfectly. Also, any recipes lately that ask for sour cream I’ve been substituting with greek yogurt as a healthier alternative. Sorry, I don’t have photos to post!
Ingredients:
2 Tablespoons of Olive Oil
1 1/2 cups Yellow Onions, diced
1/4 teaspoon Sea Salt
1 1/2 cups Sour Cream (or Greek Yogurt)
3/4 cup Vegan Mayo
2 Tablespoons fresh Parsely, finely chopped
2 Tablespoons fresh Chives, finely chopped
2 Tablespoons fresh Dill, finely chopped
1/4 teaspoon Garlic Powder
1/4 teaspoon Black Pepper
1/2 teaspoon Sea Salt
Directions:
Add oil in a saute pan over medium heat, add onions and salt. Cook the onions until they are caramelized, about 20 minutes. Remove from heat and set aside to cool.
In a bowl, mix the rest of the ingredients, and then add the cooled onions.
Put dip in refrigerator to chill for an hour or make it the night before the party. Serve with potato chips.
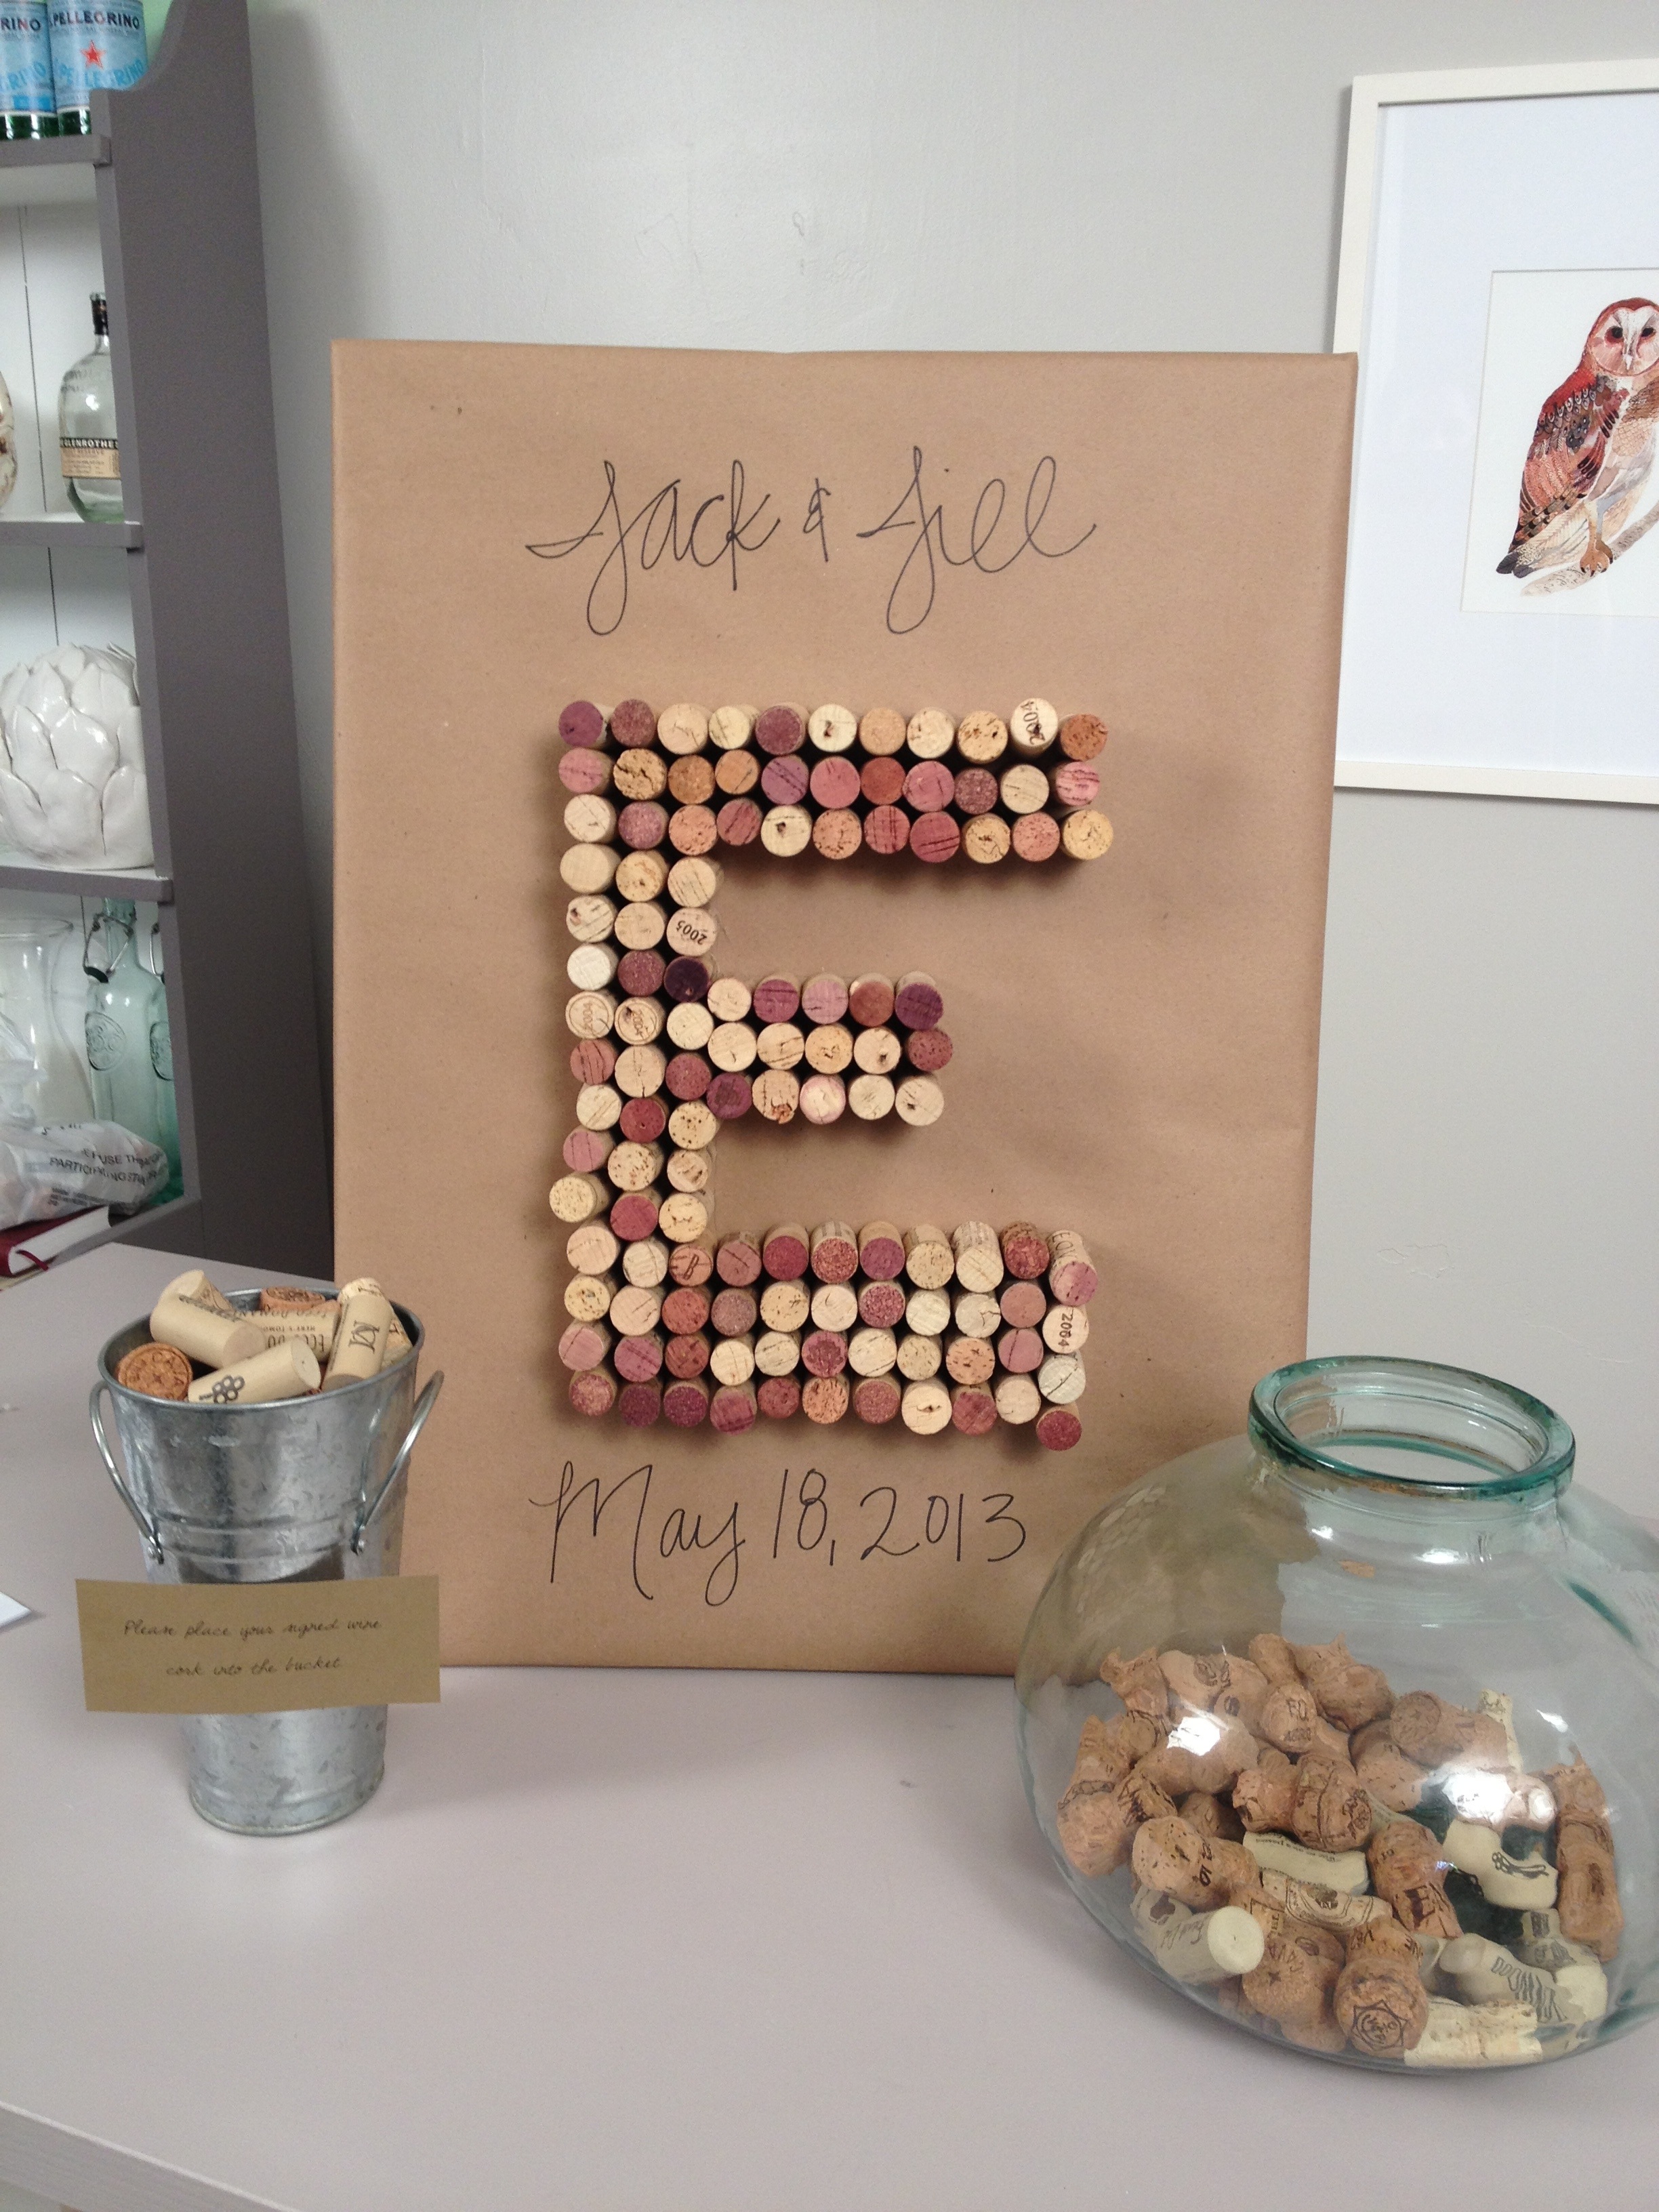
Instead of having a traditional guestbook that is going to sit on a bookshelf and collect dust, my theory is to turn it into something that can be on display and viewed daily. Hopefully these ideas will inspire you to do something unique for your big day.
Option 1: Lip & Mustache Silhouettes
Check out the photo booth tutorial on how to make the lip and mustache silhouettes, you can do any shape that matches the wedding theme: bow ties, hearts, birds, leaves, flowers, etc. Arrange the shapes in an interesting pattern to create a piece of custom artwork for the bride and groom’s home.
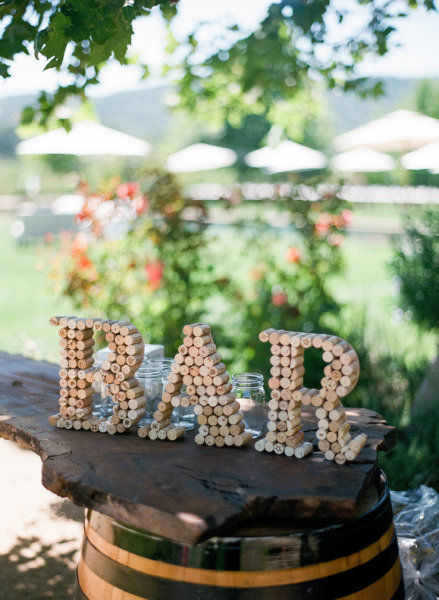
Option 2: Wine Corks
If the bride and groom are wine lovers or the wedding is taking place at a vineyard, have the guests sign wine corks. I wrapped a canvas in kraft paper and then hot glued wine corks into the first letter of the bride & groom’s last name or make free standing letters. Either way it’s a great decorative accent to the home.
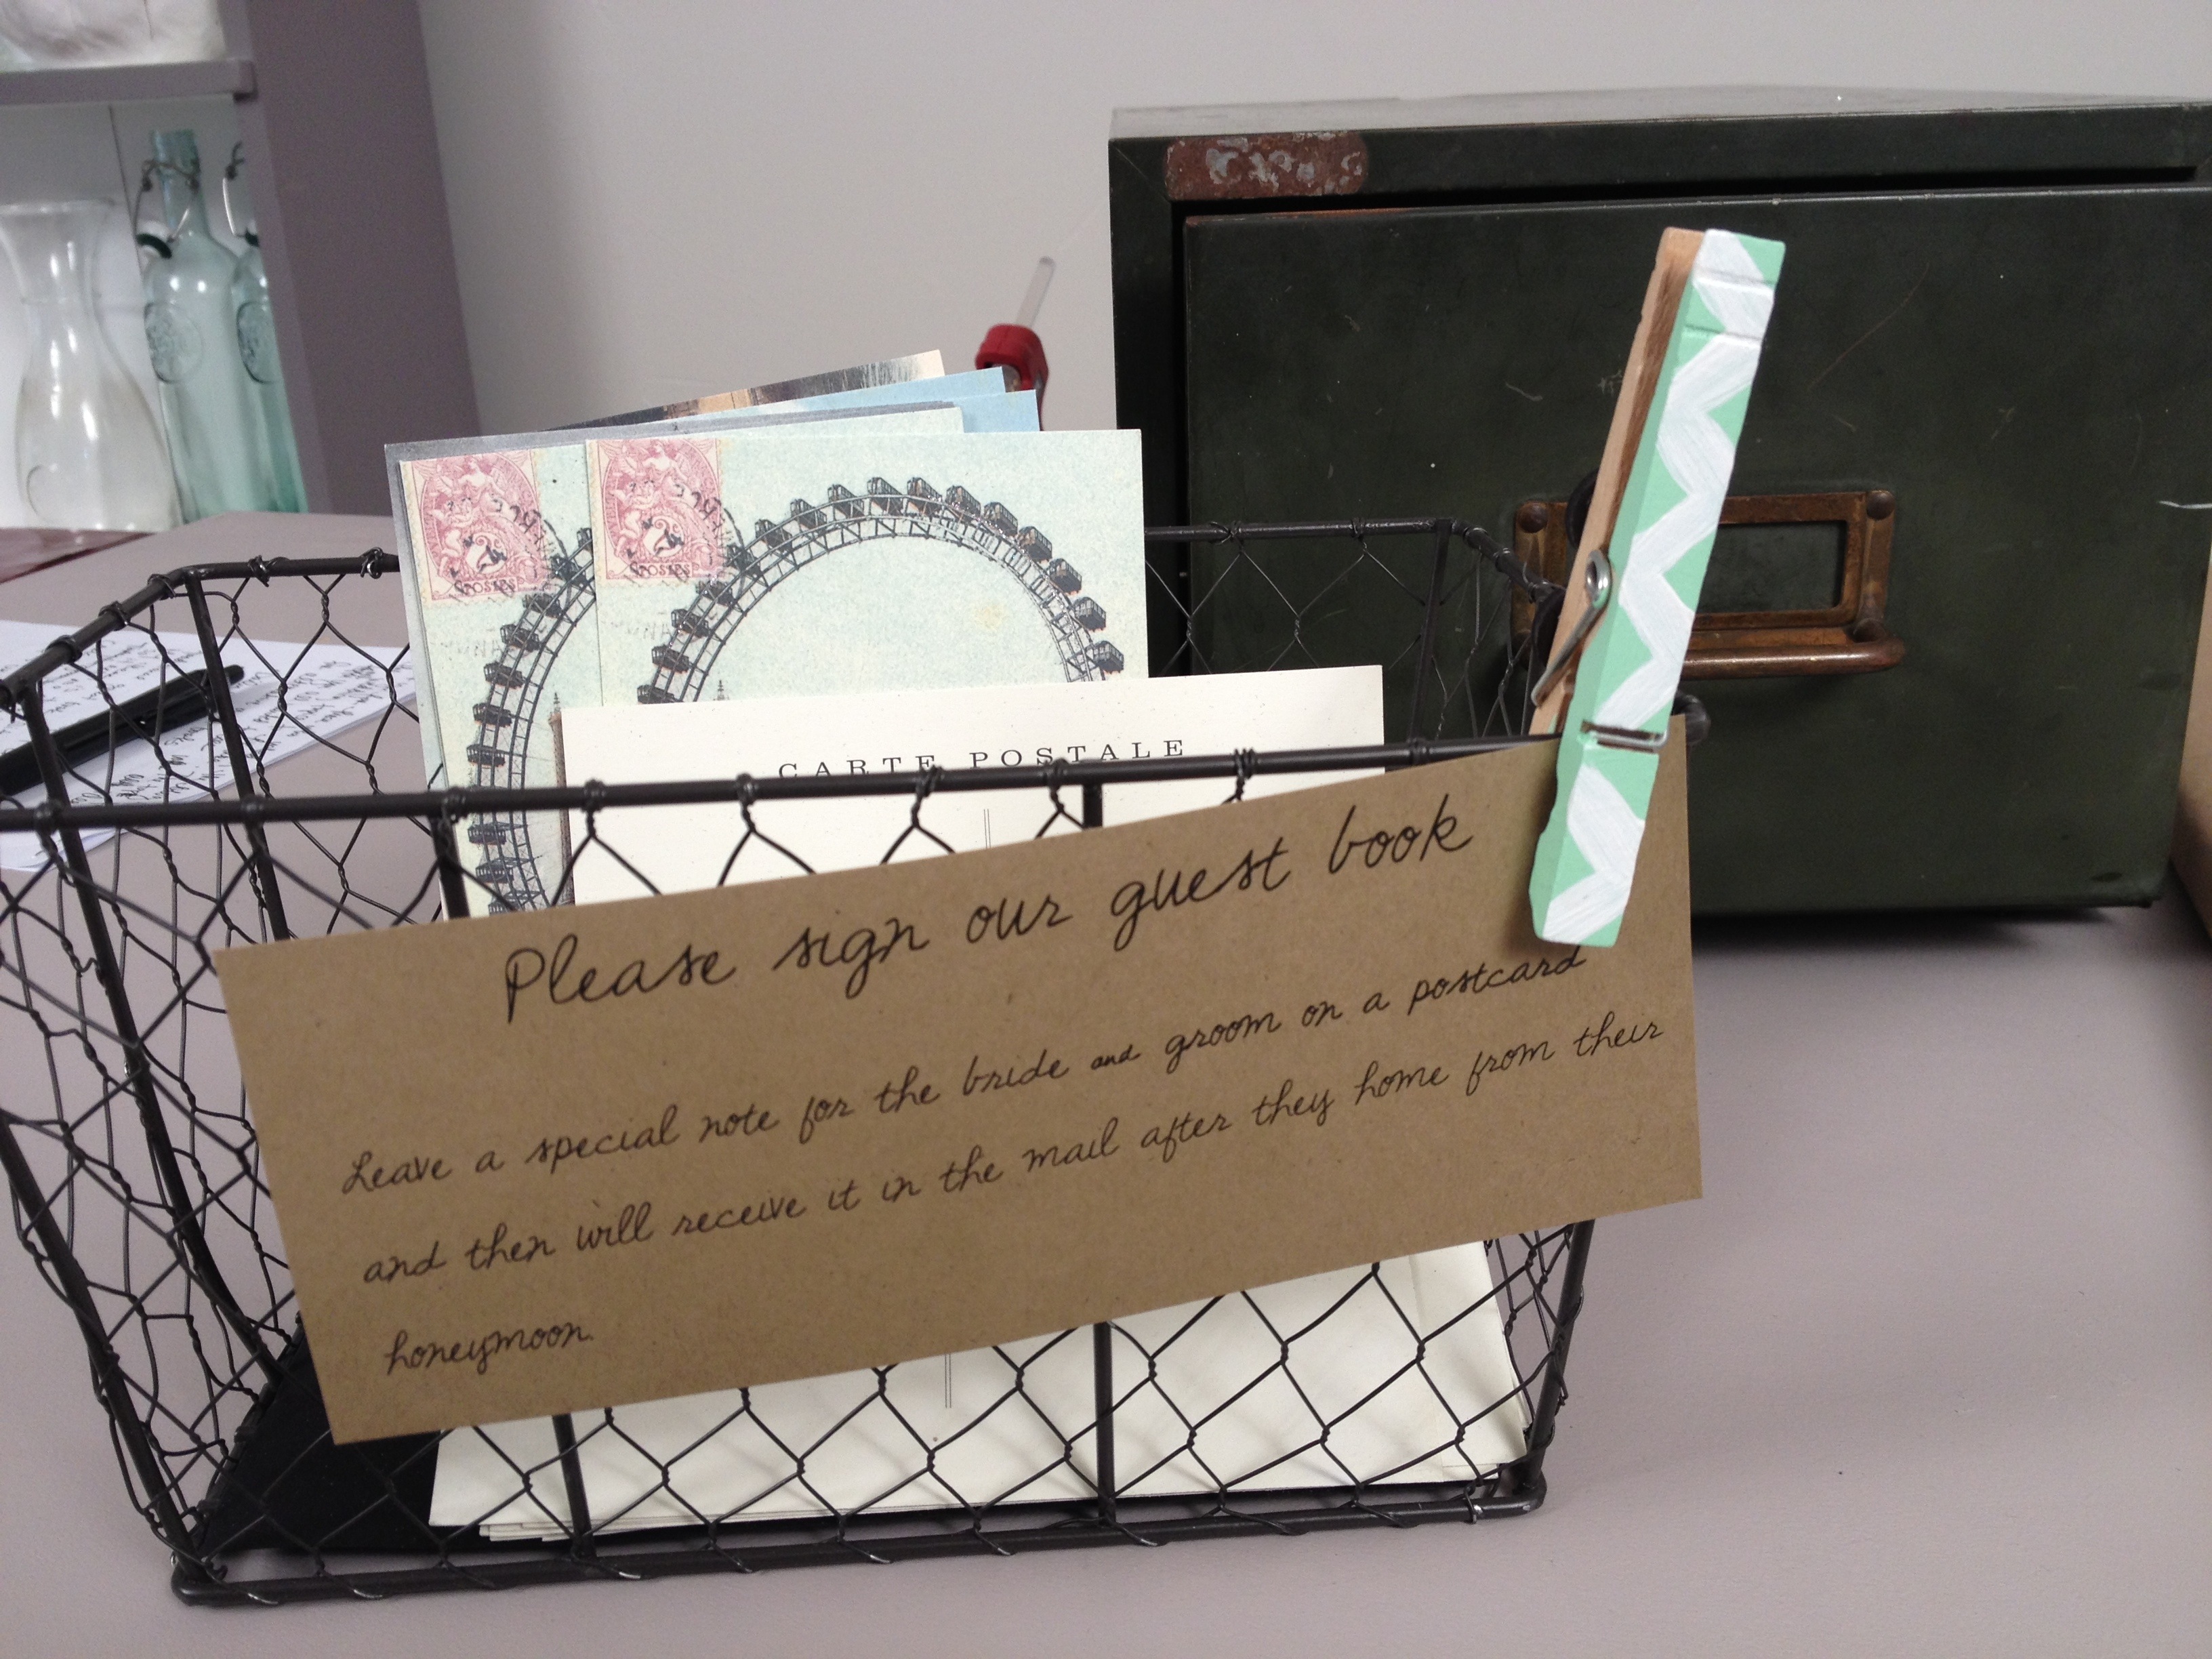
If the theme of the wedding is more rustic, consider having your guests sign vintage postcards. After the wedding have your maid-of-honor drop them off at the post office so that when the bride & groom return from the honeymoon their mailbox is filled with well wishes from the guests. Plus, who doesn’t love snail mail? If you are looking for vintage postcards then check out this awesome Etsy shop.
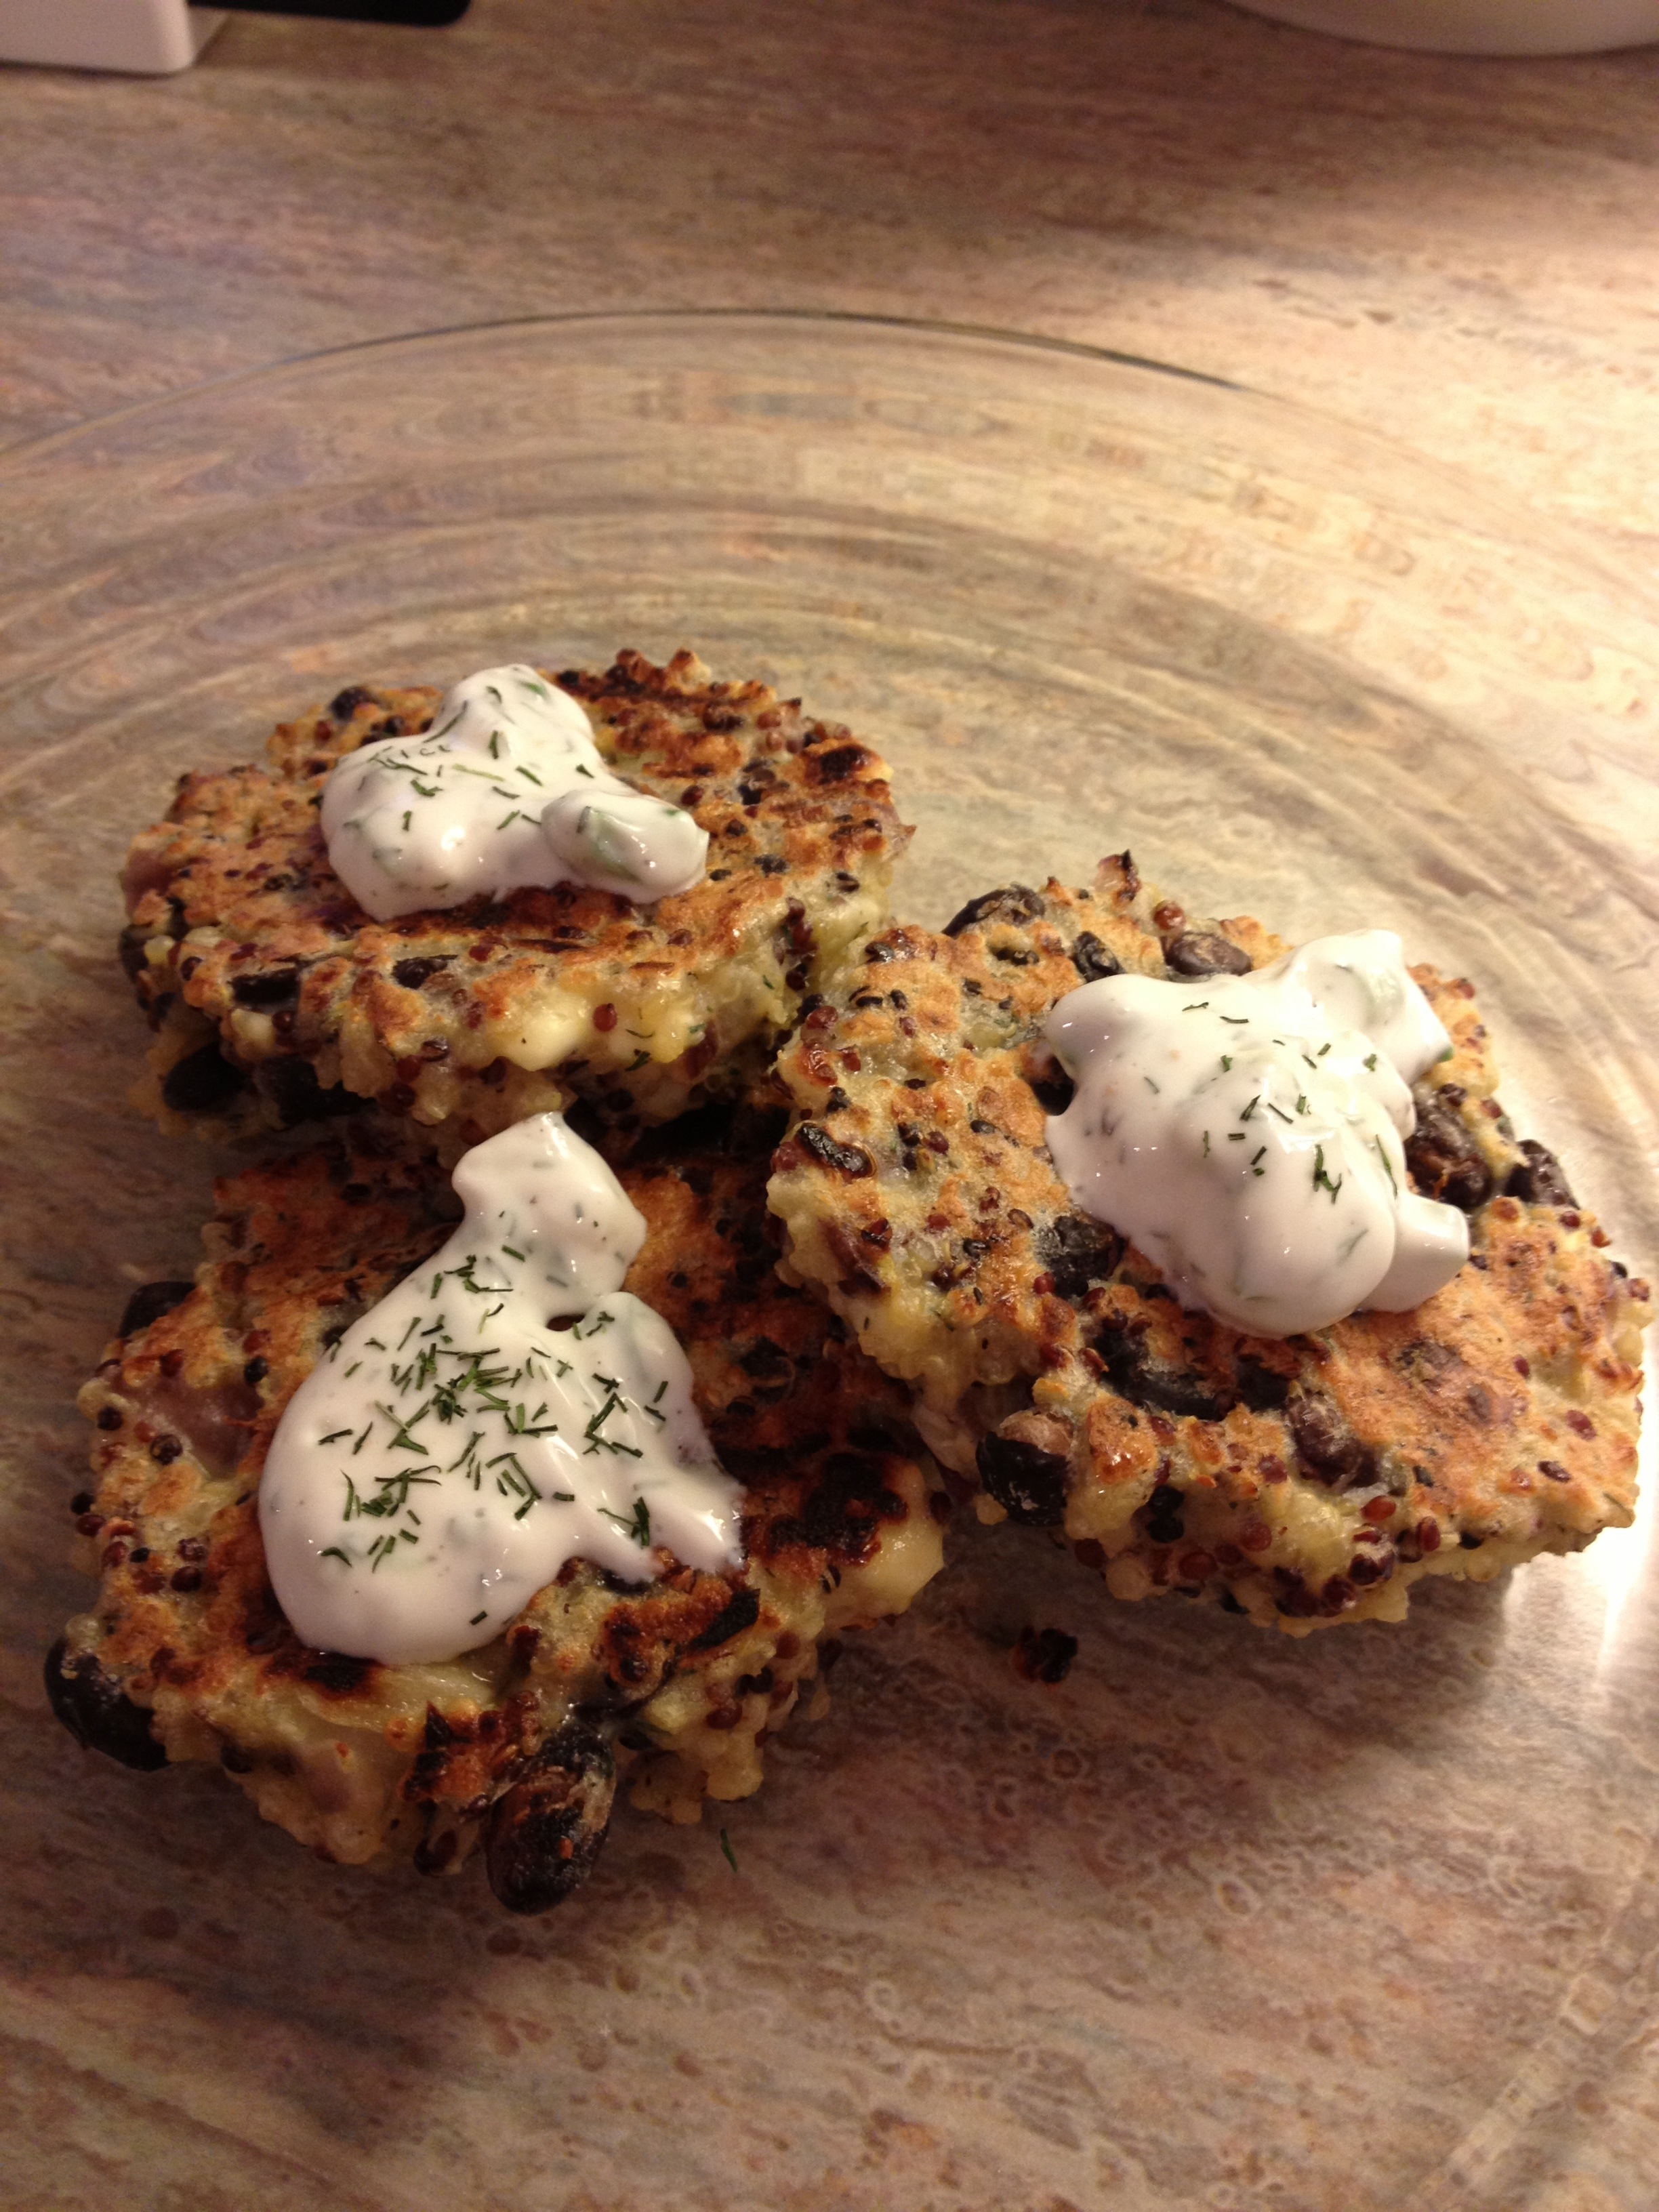
The recipe originally called for spinach, but let’s be honest I forgot to buy spinach and ended up substituting with black beans. Perfect recipe for those Meatless Mondays. Enjoy!
Ingredients:
Gluten Free Quinoa Patties:
1 tablespoon extra-virgin olive oil
1/2 cup of finely chopped red onion
2 garlic cloves, finely chopped
1/2 cup of black beans
2 eggs, beaten
1 1/4 cups of cooked quinoa (I made 1 cup of uncooked and had leftovers)
2 ounces crumbled feta cheese
1 tablespoon chopped fresh dill
1/4 teaspoon grated lemon zest
1/4 teaspoon freshly ground black pepper
1/2 cup gluten free bread crumbs
Lemon Dill Yogurt Sauce:
1/2 cup plain Non-Fat Geek Yogurt
2 tablespoons finely chopped scallions
2 teaspoons freshly squeezed lemon juice (I used half of a lemon)
2 teaspoons chopped fresh dill
Sea salt and freshly ground pepper to taste
Next time I make this I might consider adding cucumbers to the sauce to make it more like a tzatziki
Directions:
Lemon-Dill Yogurt Sauce:
Whisk together the yogurt, scallions, lemon juice, and dill in a small bowl. Season to taste with salt and pepper. Cover and refrigerate the sauce for at least 1 hour to allow the flavors to meld.
Quinoa Patties:
Heat the olive oil in a large skillet over medium heat. Add the onion and garlic and cook, stirring often, until softened, about 4 minutes. Transfer the mixture to a medium-size bowl.
Add the eggs, quinoa, black beans, feta, dill, lemon zest, and black pepper and mix well. Mix in the bread crumbs and let the mixture sit for a few minutes to allow the bread crumbs to absorb some of the moisture.
Add a little olive to a grill pan and heat to medium-high tempature.
Form quinoa patties about 2 1/2 inches in diameter and 1/2 inch thick. Grill the patties until they’re cooked through and browned on the outside, 4 to 5 minutes. Serve warm with lemon-dill yogurt sauce.
Last Saturday marked the start of wedding season for me, 5 more to go! I’m so looking forward to see my beautiful friends get hitched this year, and with all the wedding buzz around I decided the next set of DIY tutorials are crafts to help personalize the big day. The videos should be up in the next week or so, stay tuned…I can’t believe in only 2 weeks the channel has over 5,000 views, crazy! Thank you for all the support!
Here is the last video from the first set of DIY entertaining tutorials – check out the many uses for a chalkboard platter. Warning: this was the very first one that we shot, so clearly I had some warming up to do! It got a little easier the second time around, I just reviewed the rough cuts of the wedding tutorials and can’t wait for you all to see them.
Paint the inner edge of the plate. Be sure to follow the directions of the chalkboard paint you are using, The Martha Stewart chalkboard paint requires you to wait at least 1 hour before doing the second coat.
Write with the chalk to describe what you are displaying.
Various uses for the chalkboard platter:
Cheese Serving Plate
Beer (or your alcohol of choice) Tasting Platter
Perfume Display
Tip:
Turn it into a housewarming gift by including cheese knives, a monogrammed dish towel and a chalkboard pen. I also like the idea of writing the last name of the new home owner on the bottom of the platter, for example “The Brown House Est. 2013.”
I love hosting dinner parties but with food allergies on the rise it can often create a challenge for the host and the guest (I know from experience). If you are unsure, it’s not uncommon to ask your guests ahead of time if their diets have changed. Your guests will appreciate you going the extra mile to make them feel welcomed in your home. Check out my tutorial video on ways you can easily label the food for guests who have allergies. For more entertaining tips, subscribe to the Likeheared channel: http://www.youtube.com/iamlikehearted
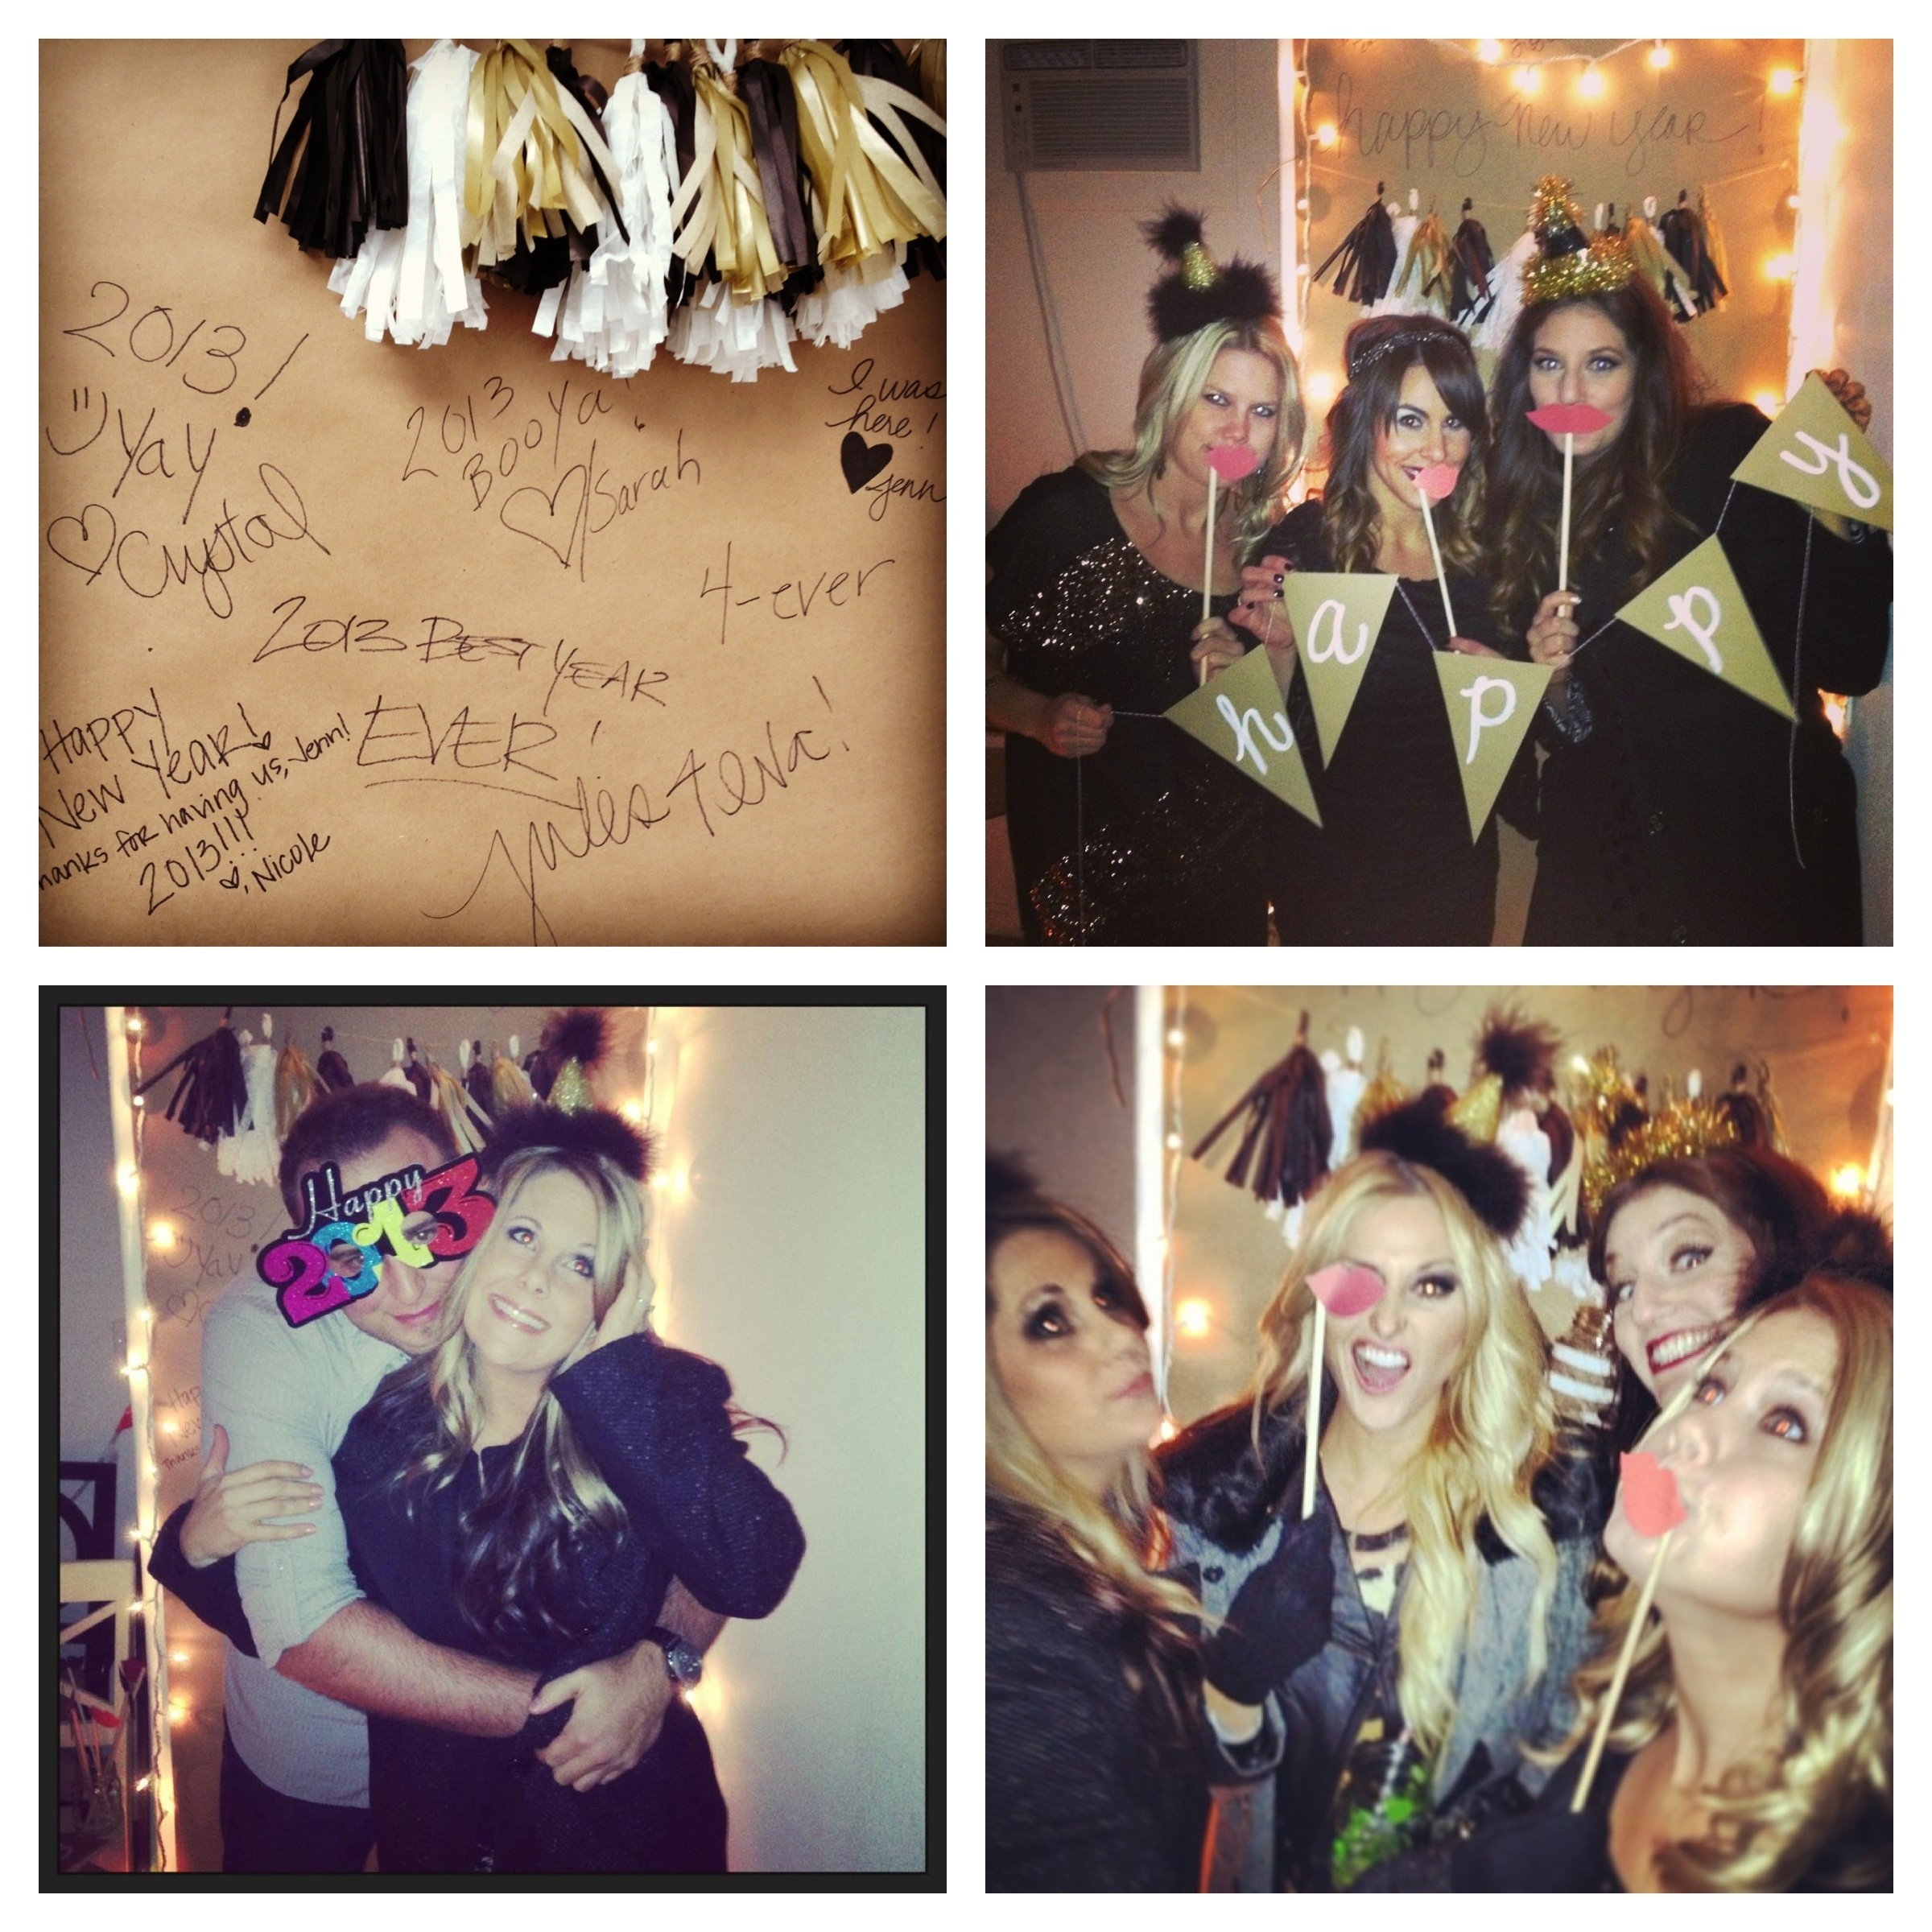
I hosted New Year’s Eve and decided to do a photo booth as a way to capture the night’s moments. Watch the video to see how to make your own and check out the photos at the bottom of the post for the final results!
Draw freehand or download a stencil online for lips & mustache silhouettes.
Trace the stencil onto the card stock.
Cut out the shapes.
Secure the shape to wooden dowel with a dot of hot glue.
Steps for Photo Booth:
Find an area in your home that will function as your photo booth.
Take the kraft paper and hang on wall with clear push pins.
Decorate with tassel garland, white lights and/or other decor to match your theme.
Tips:
Use the backdrop as a guest book and have party goers sign it.
Write a hashtag (#newyearseve) on the backdrop as a reminder to guests to tag their instagram & twitter photos.
If you have an old Polaroid camera feel free to bust it out or have your guests download the photo sharing app Flock onto their smartphones (you can send an invite to your friends to download the app before the day of the event).