Heidi Style

Thank you pinterest for the hair inspiration this weekend.

20121022-131314.jpg

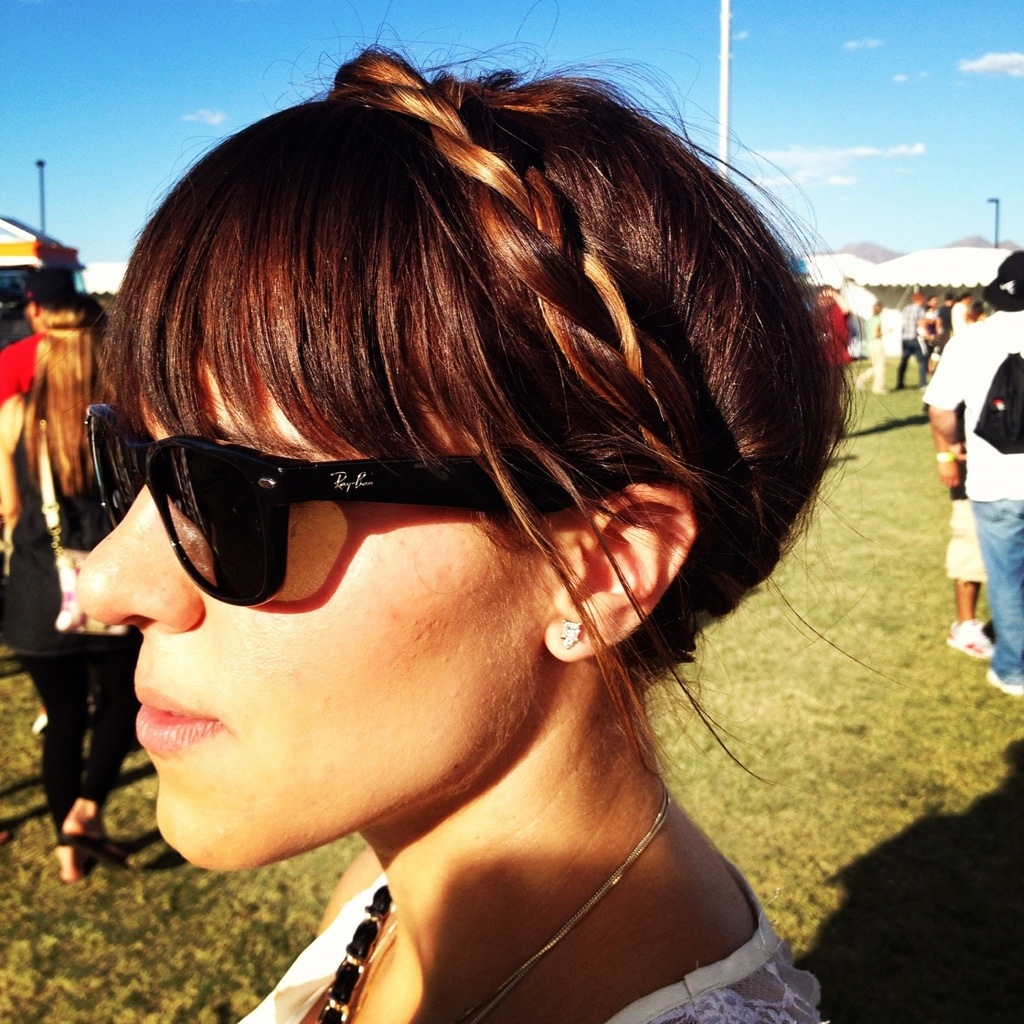
1. Divide hair into 4 sections, separating the front from the back on either side.

2. Braid each section starting, 4 braids total. Note: the braid that will be across the top, start the braid higher up, closer to the roots. 

3. Pull the end of one braid to the beginning of the next braid, going in the same direction all around the head

4. Bobby pin the end of each braid into the start of the braid beside it. Be sure to hide those bobby pins so that it looks like one braid all the way around!!

Originally pinned by: http://treasuresandtravels.squarespace.com/blog/2012/6/21/tutorial-braided-crown.html

Weekend Warrior Project # 3 – Side Chairs

The “before” photo pretty much sums up this project. I instantly saw these diamonds in the rough and knew I had to have them. At $30 a piece it would be hard to pass them up.

BEFORE: Let me repeat, I got these for $30 A PIECE!!

20120430-182347.jpg

AFTER:

Here is how I did it:

  • The fabric I found at Joann – the week they had 40% off of designer fabric. For about 3 yards it costed  around $90.
  • I was lucky enough to have a family friend recover the cushions (all it cost me was a good bottle of white wine!).
  • I primed and painted the chairs with Rust-Oleum Painter’s Touch Ultra Cover 2x Coverage Primer/Paint in Dark Walnut (satin finish). Each chair took a can and a half, 3 cans needed in total.
  • Total cost of the project: about $170

A new favorite…

Whenever I see the Martha Stewart’s name on anything, I’m drawn in like a moth to the flame…so while shopping at Home Depot I spotted Martha’s new line of special finish paints and immediately had to figure out what to use the paint on. Good thing I’m knees deep in DIY projects since buying the house.  The paint comes in a variety of finishes  including metallic glaze, glitter, textured metallic, terra cotta, crackle, etc. Available at The Home Depot, $5.48-8.98 for a 10oz. I used the Metallic Paint in Vintage Gold.

20120314-225955.jpg

20120314-230004.jpg

Weekend Warrior Project # 2 – Mirror

I’m working on decorating my guest bedroom and decided to make a vanity out of my current desk (making a new desk for my office will be another weekend project). I needed a mirror and scored another great find at my favorite antique store. Purchased this mirror for only $40!

BEFORE: Sorry I didn’t take a better before shot!


AFTER: I wasn’t in love with the oak finish so I decided it needed a face lift.

20120314-225817.jpg


Here is how I did it:

  • I used painter’s tape (the blue colored kind) and kraft paper to cover the mirror edges.
  • I primed the entire mirror with Rust-Oleum Painter’s Touch Ultra Cover 2x Coverage Primer. Again let me stress, if you haven’t been using this paint to refinish things then I highly suggest you start using it. It’s a spray can, paint and primer in one so it cuts your project time in half!
  • The color is Martha Stewart Specialty Paint in Vintage Gold, which I painted on using a regular paint brush. This needed about 3 coats of paint.
  • Total cost of the project: $46


Weekend Warrior Project #1 – Hutch

BEFORE: Got this lovely hutch at my favorite antique store here in Phoenix for $60.

AFTER:

20120222-212856.jpg

I couldn’t be helper with the way this turned out! Here is how I did it:

  • I primed the entire hutch with Rust-Oleum Painter’s Touch Ultra Cover 2x Coverage in white. If you haven’t been using this paint to refinish things then I highly suggest you start using it. It’s a spray can, paint and primer in one so it cuts your project time in half!
  • The gray color is Benjamin Moore’s Stone 2112-40. I find that the small sponge rollers work best in the paint application for these type of projects.
  • Added a new crystal knob from Joan’s for $2.50 on sale.
  • Total cost of the project: $35