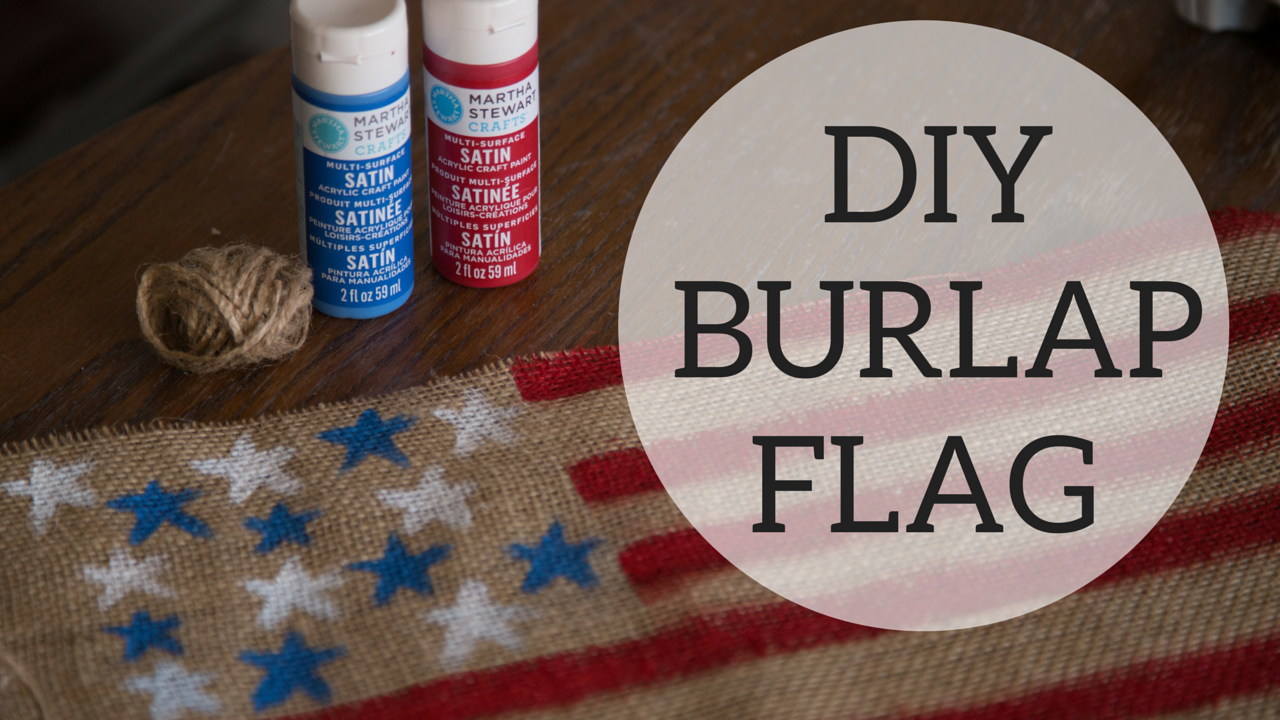
First off, I can’t believe it is already July! Where is this year going? I seem to be short on time these days: juggling a full time job, trying to keep the blog going and just blocking and tackling everything else life is throwing at me. All things consider I still find so much joy in crafting, even in the simplest of things. I don’t think this burlap flag craft could be any simpler. Burlap is one of my favorite materials to work with and it is so inexpensive!
I think this is by far the easiest DIY that anyone could do. Really all you need is a little paint and a cork board! Watch the tutorial below for all the details.
Materials:
Spray Paint – The particleboard on these Ikea nightstands soaked up so much paint. I needed 3 bottles for each nightstand. I used Rust-Oleum Painters’ Touch Ultra Cover spray paint. It is primer and paint in one!
Cork board – I got a pre-painted one from Michaels but if you can’t find one, check out the my other post on how to create your own.
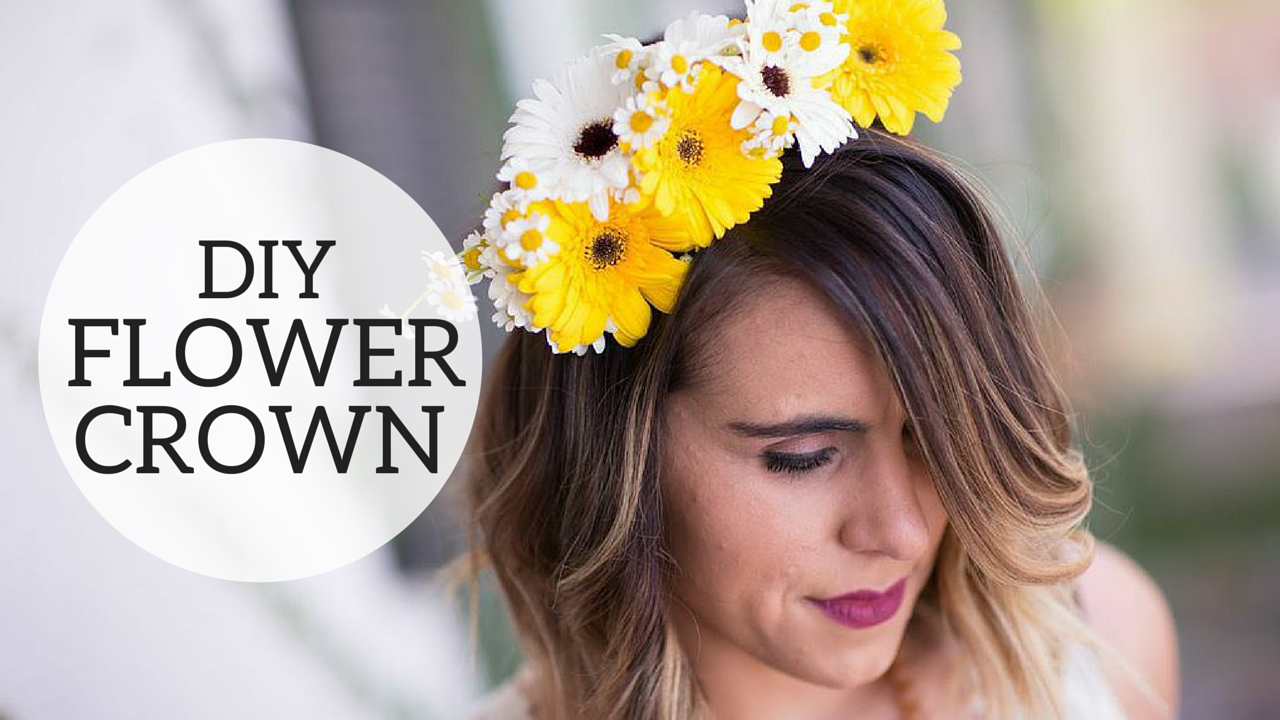
My style isn’t super girly, but there is just something about flower crowns that I love. Maybe it is the carefree vibe they give off? I think if it was acceptable I would rock it more often than not. Whether you are in a wedding or heading to a music festival check the video for all the details on how to make your own.
By the way, I love the idea of doing a flower crown bar at a bridal or baby shower. It’s a great activity that your guests can really engage in and the crown serves as your party favor! My suggestion would be to make the actual crowns ahead of time with the coiled wire, so that all your guests have to do is fill it with flowers.
Nothing can go wrong with a drink that has both bubbles and whiskey, right? If you are hosting New Year’s Eve your guests will not be disappointed. If you are attending as a guest bring the mixings (shopping list below) and be the life of the party. Check out the video for steps on how to create the perfect New Year’s Eve Cocktail!
Wishing you all a healthy and happy new year!!
Ingredients:
3-4 Blackberries (Raspberries or blueberries can be used as alternatives)
Drop of Agave Nectar
1 oz Whiskey
Prosecco (I know I ended up using Proscecco instead of Champagne but really any bubbles will do!)
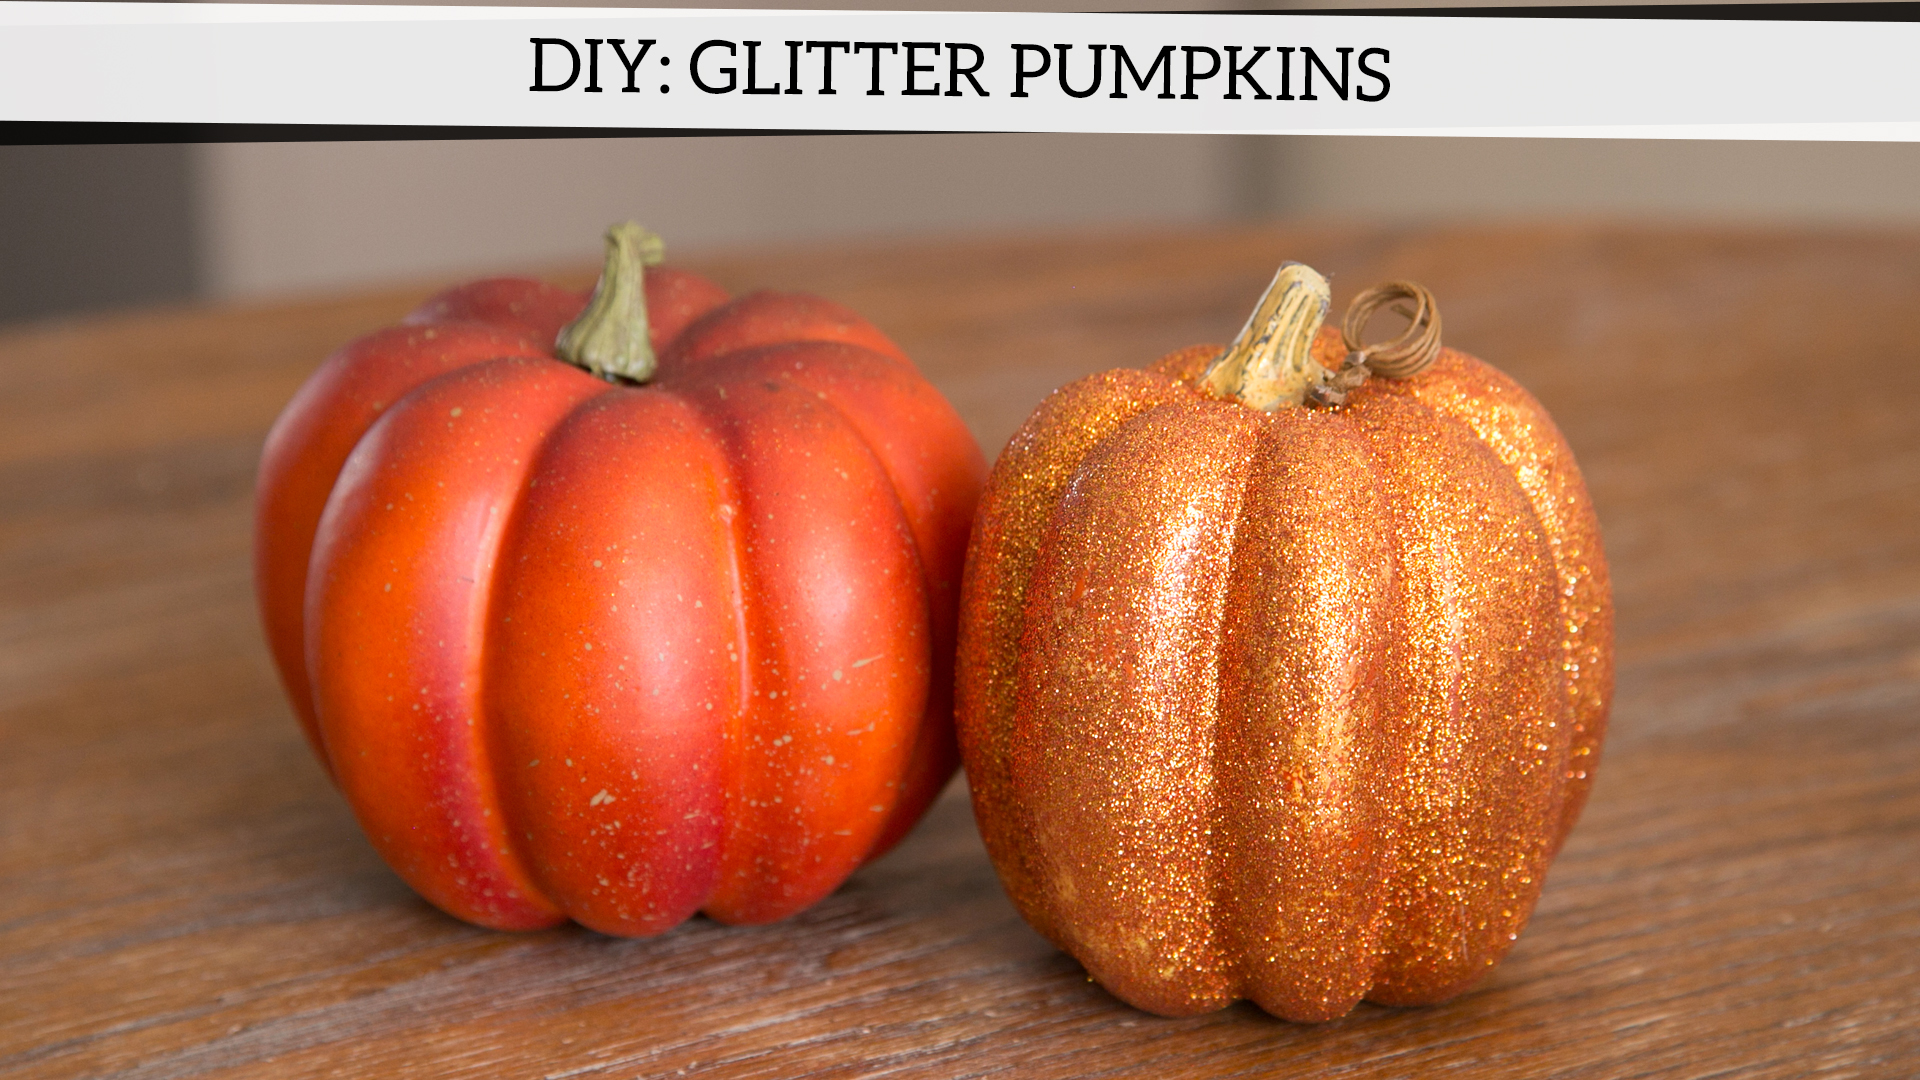
I’ve been on a bit of a hiatus but the holidays are making me jump right back into things! These glitter pumpkins are one of my favorite crafts to do for Fall. It’s a quick and easy craft for anyone who wants to add a little extra sparkle to their holiday decor. They also make for great last minute hostess gifts.
Check out the video for the tutorial!
Materials:
Mod Podge Glue
Glitter (use a fine texture one)
Mod Podge High-Gloss Sealer Spray
Paint Brush
Butcher paper or Newspaper to use for prepping the table
1.5 tablespoons canned chipotle peppers in adobo sauce
4 cups chicken broth
1 cup of cooked and shredded chicken (I used a rotisserie chicken to make it real easy)
Toppings:
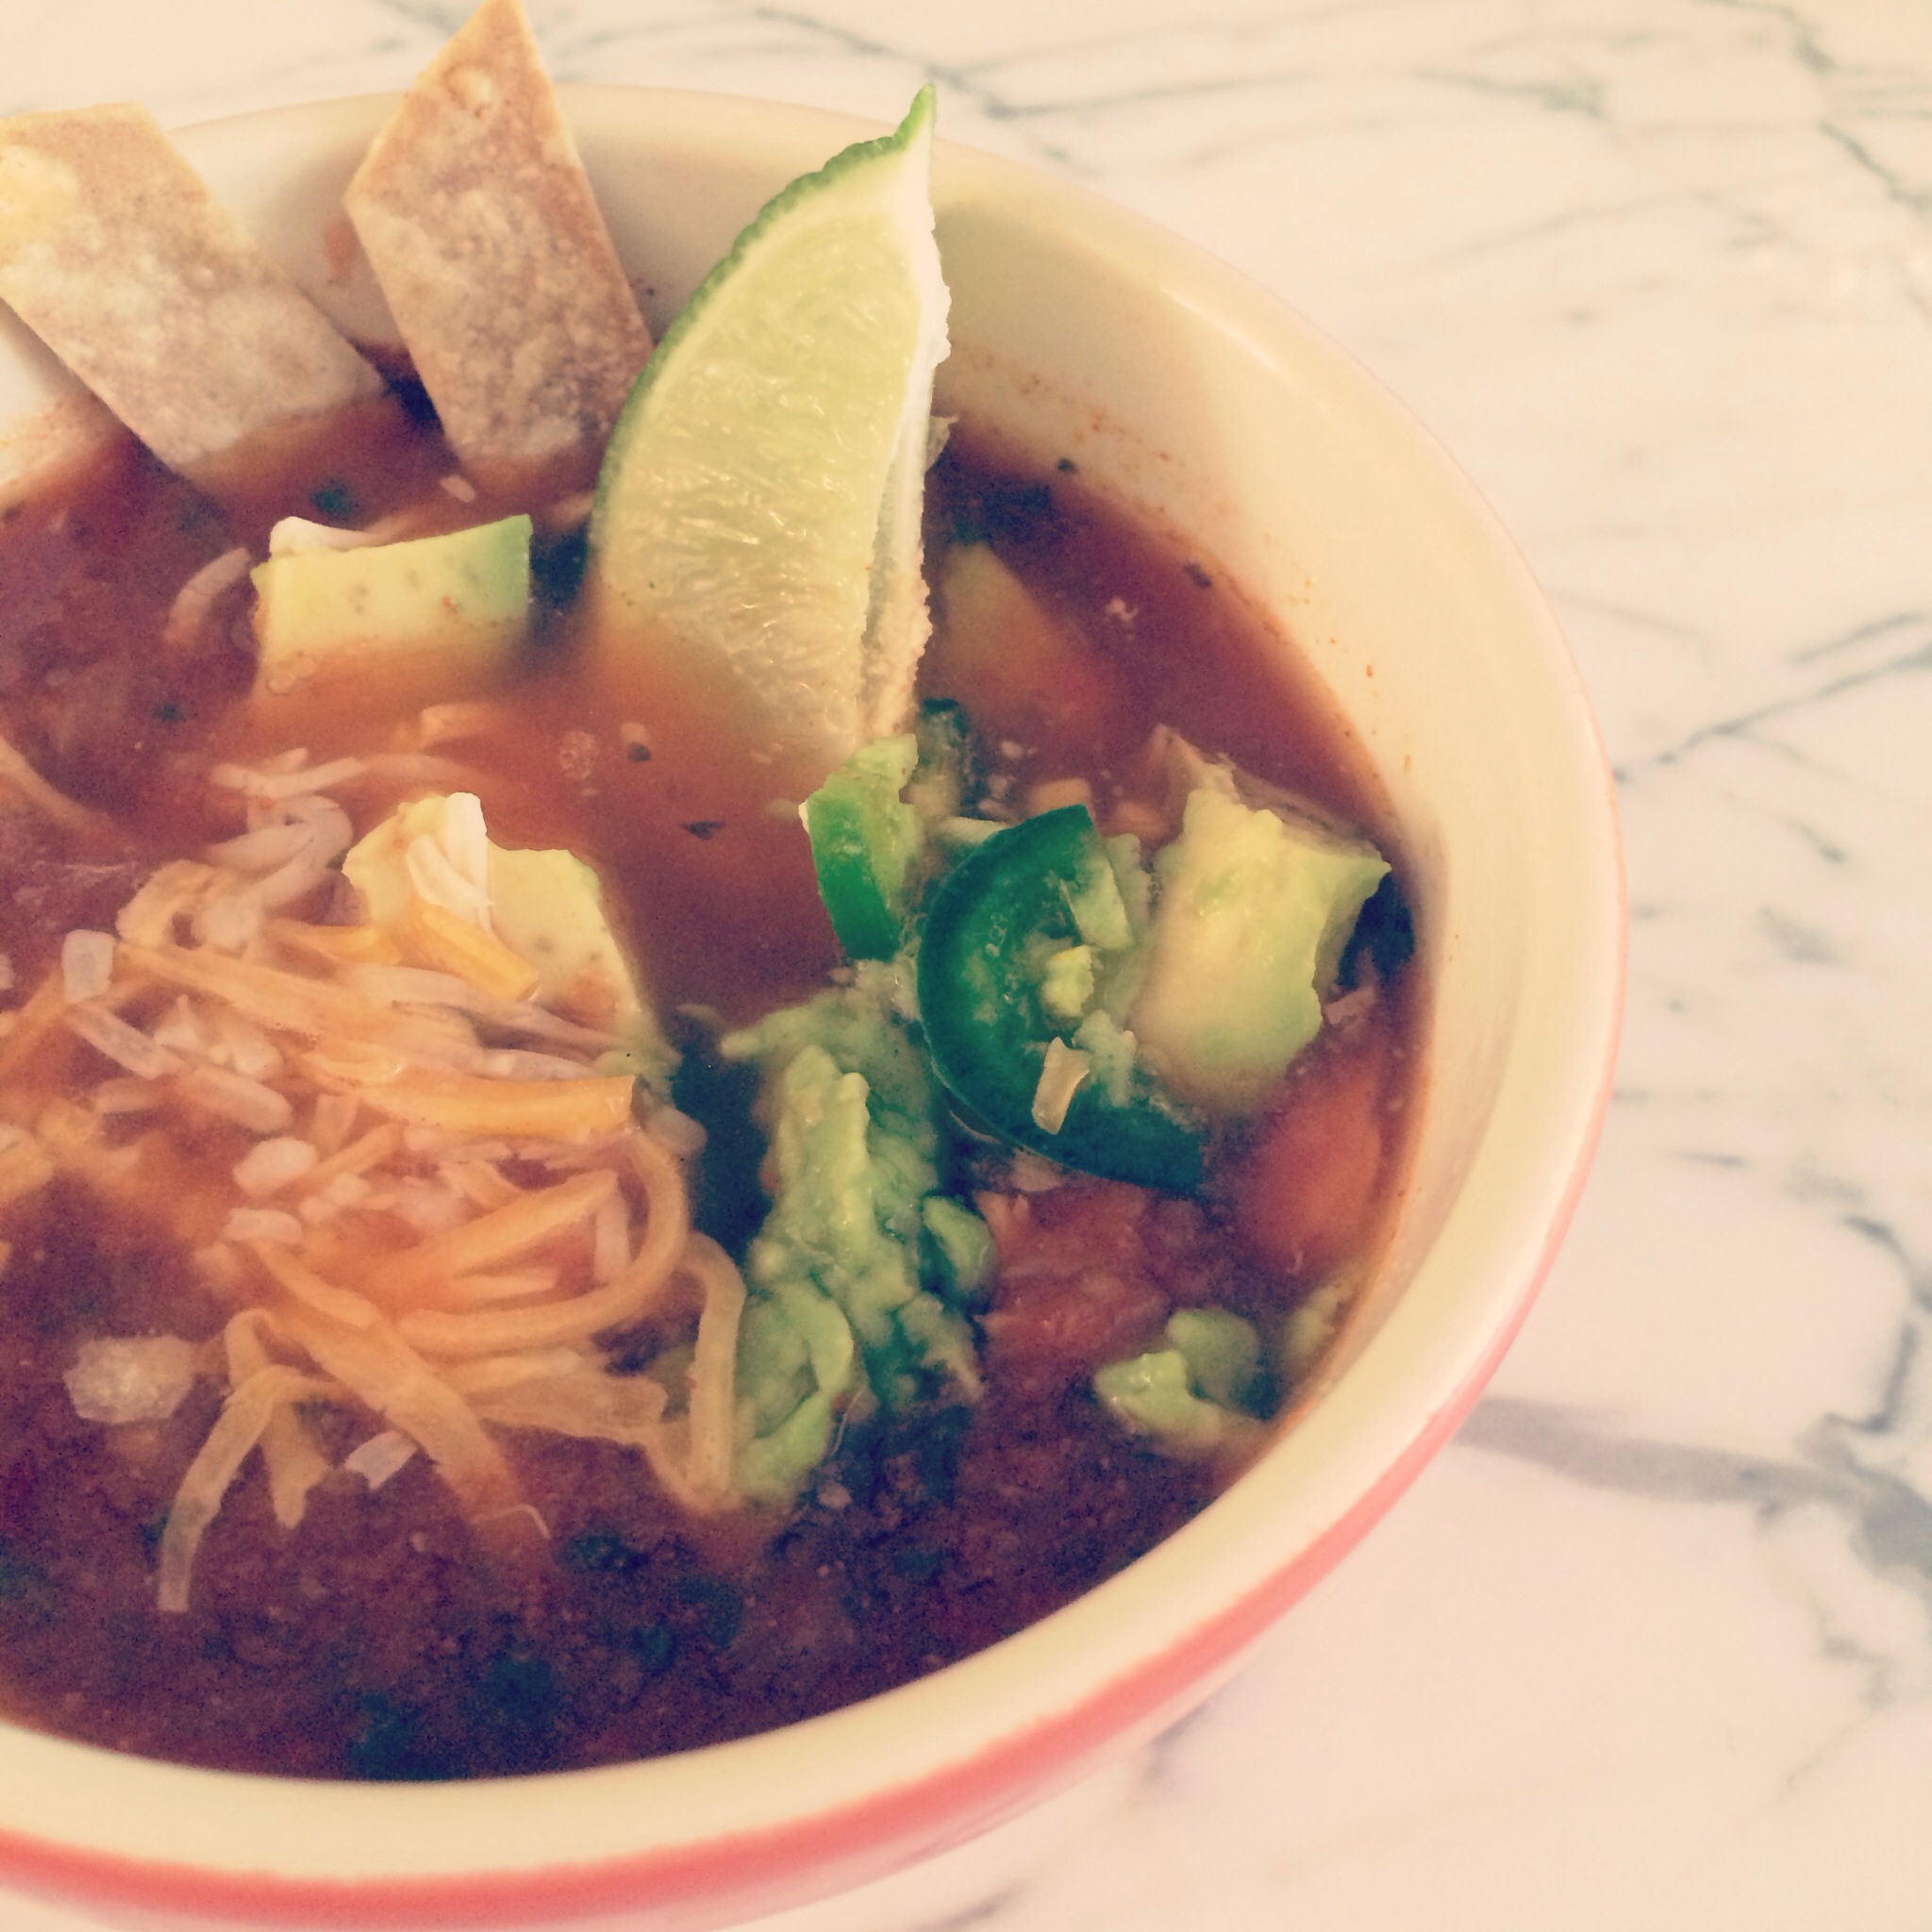
1 lime
1 avocado
1 jalapeño
Shredded Mexican Blend Cheese
Tortilla Strips or Chips
Directions:
Blend the tomatoes, red onion, cilantro and chipotle peppers together in a blender or food processor. Add a 1/4 cup of chicken broth and blend until smooth. Transfer to a saucepan and stir in the remaining chicken broth. Bring to a boil over medium-high heat.
Add in the chicken breast and continue to simmer for 5 to 7 minutes.
To serve, ladle the soup into bowl and top with a squeeze of fresh lime juice, avocado chunks, jalapeño slices, tortilla strips and shredded cheese.
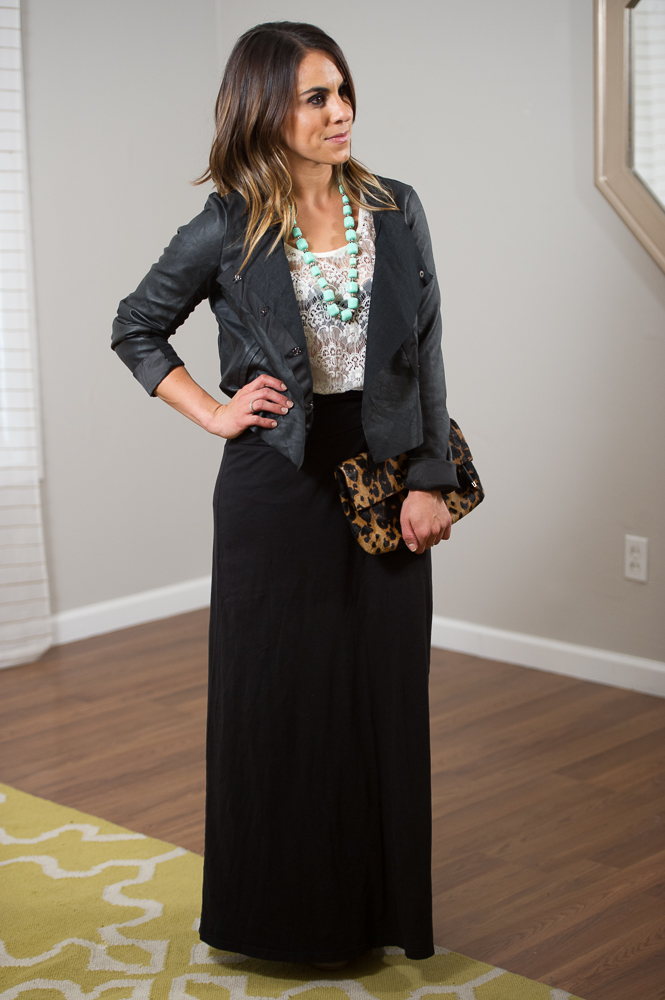
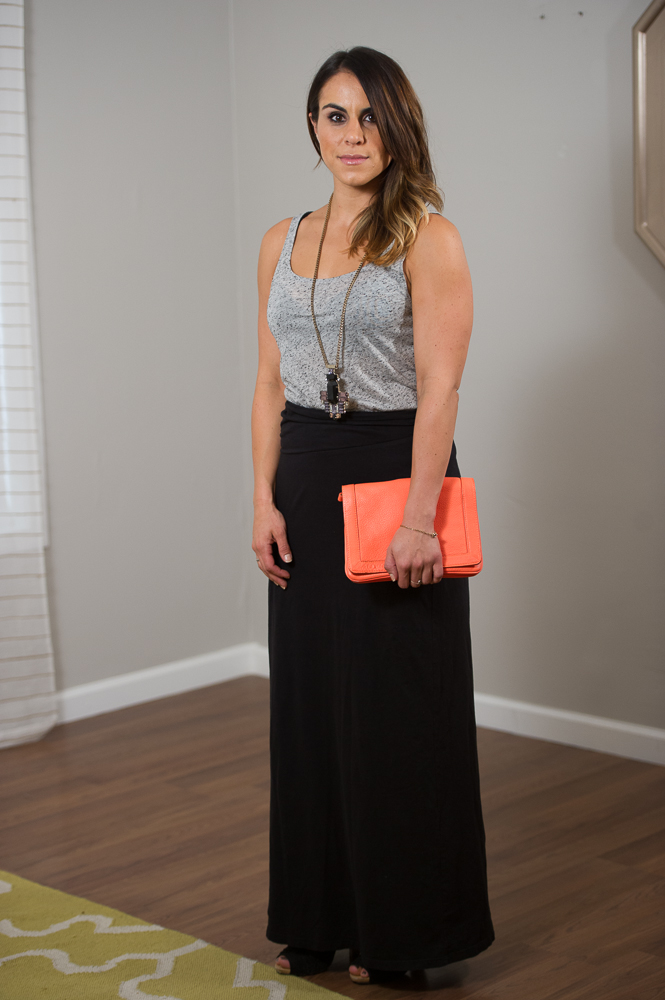
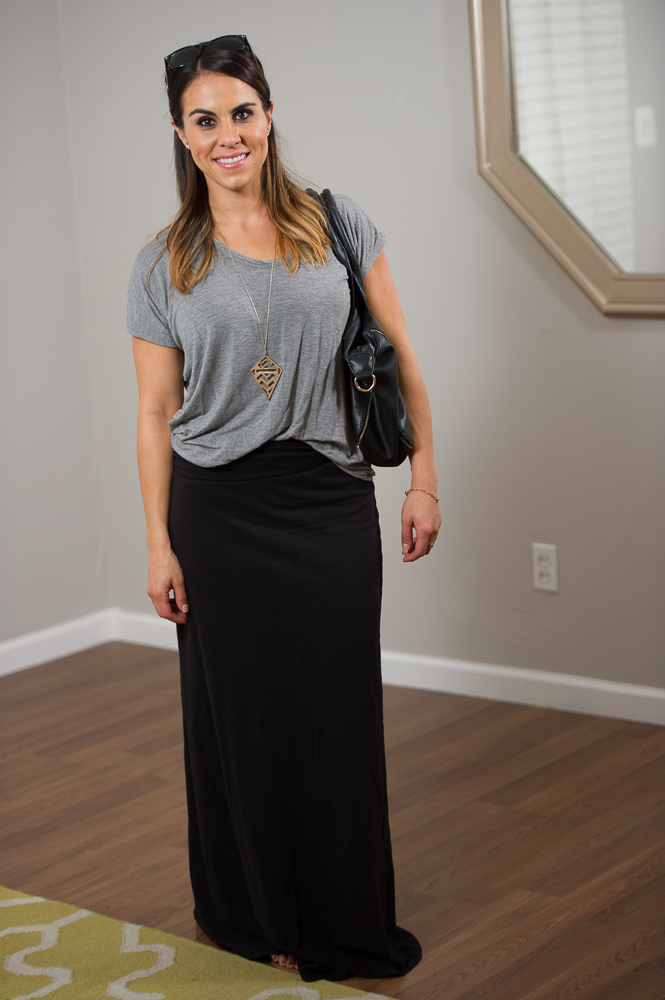
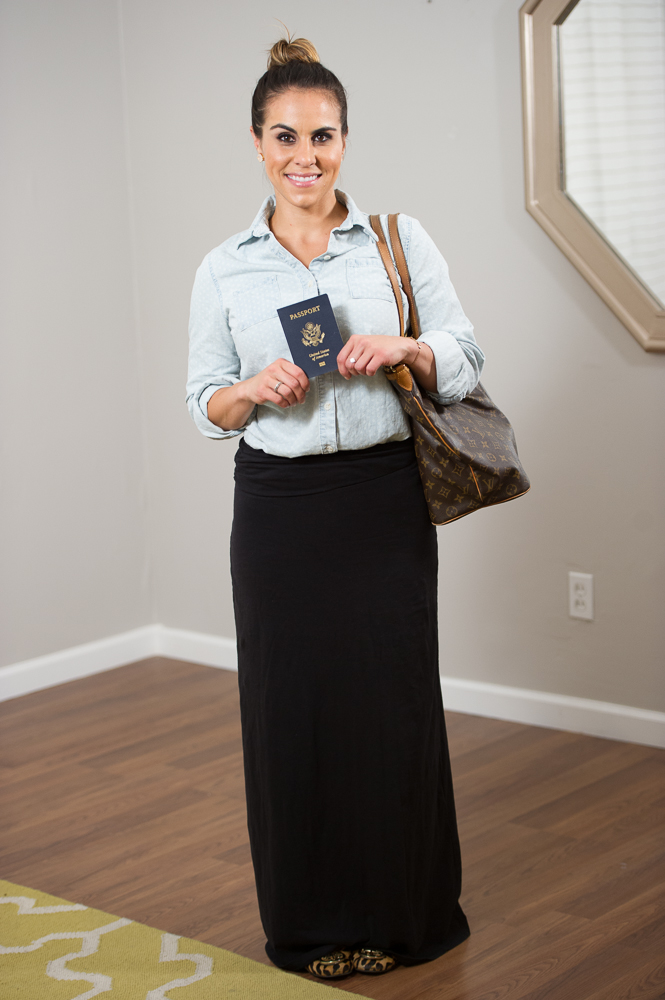
There was a lot of interest on the original post I did for multi-ways to wear a maxi skirt, so I decided to get a little creative and turn it into a fun video for you all. I mentioned that this skirt is great when traveling light but not until I was putting together the outfits for the video did I realize how great it really is! You can create (at least) 6 completely different looks with just a handful of items.
On a side note, I feel like I’ve been MIA from the blog lately, but the plan is to get back on the bandwagon next week. Things have been extremely busy the last month, so I’m taking a break and ending work a little early today to head to LA to celebrate my 30th birthday with some of my favorites. I promise to come back refreshed and with a bunch of new content (and a little older…)! Happy Friday!
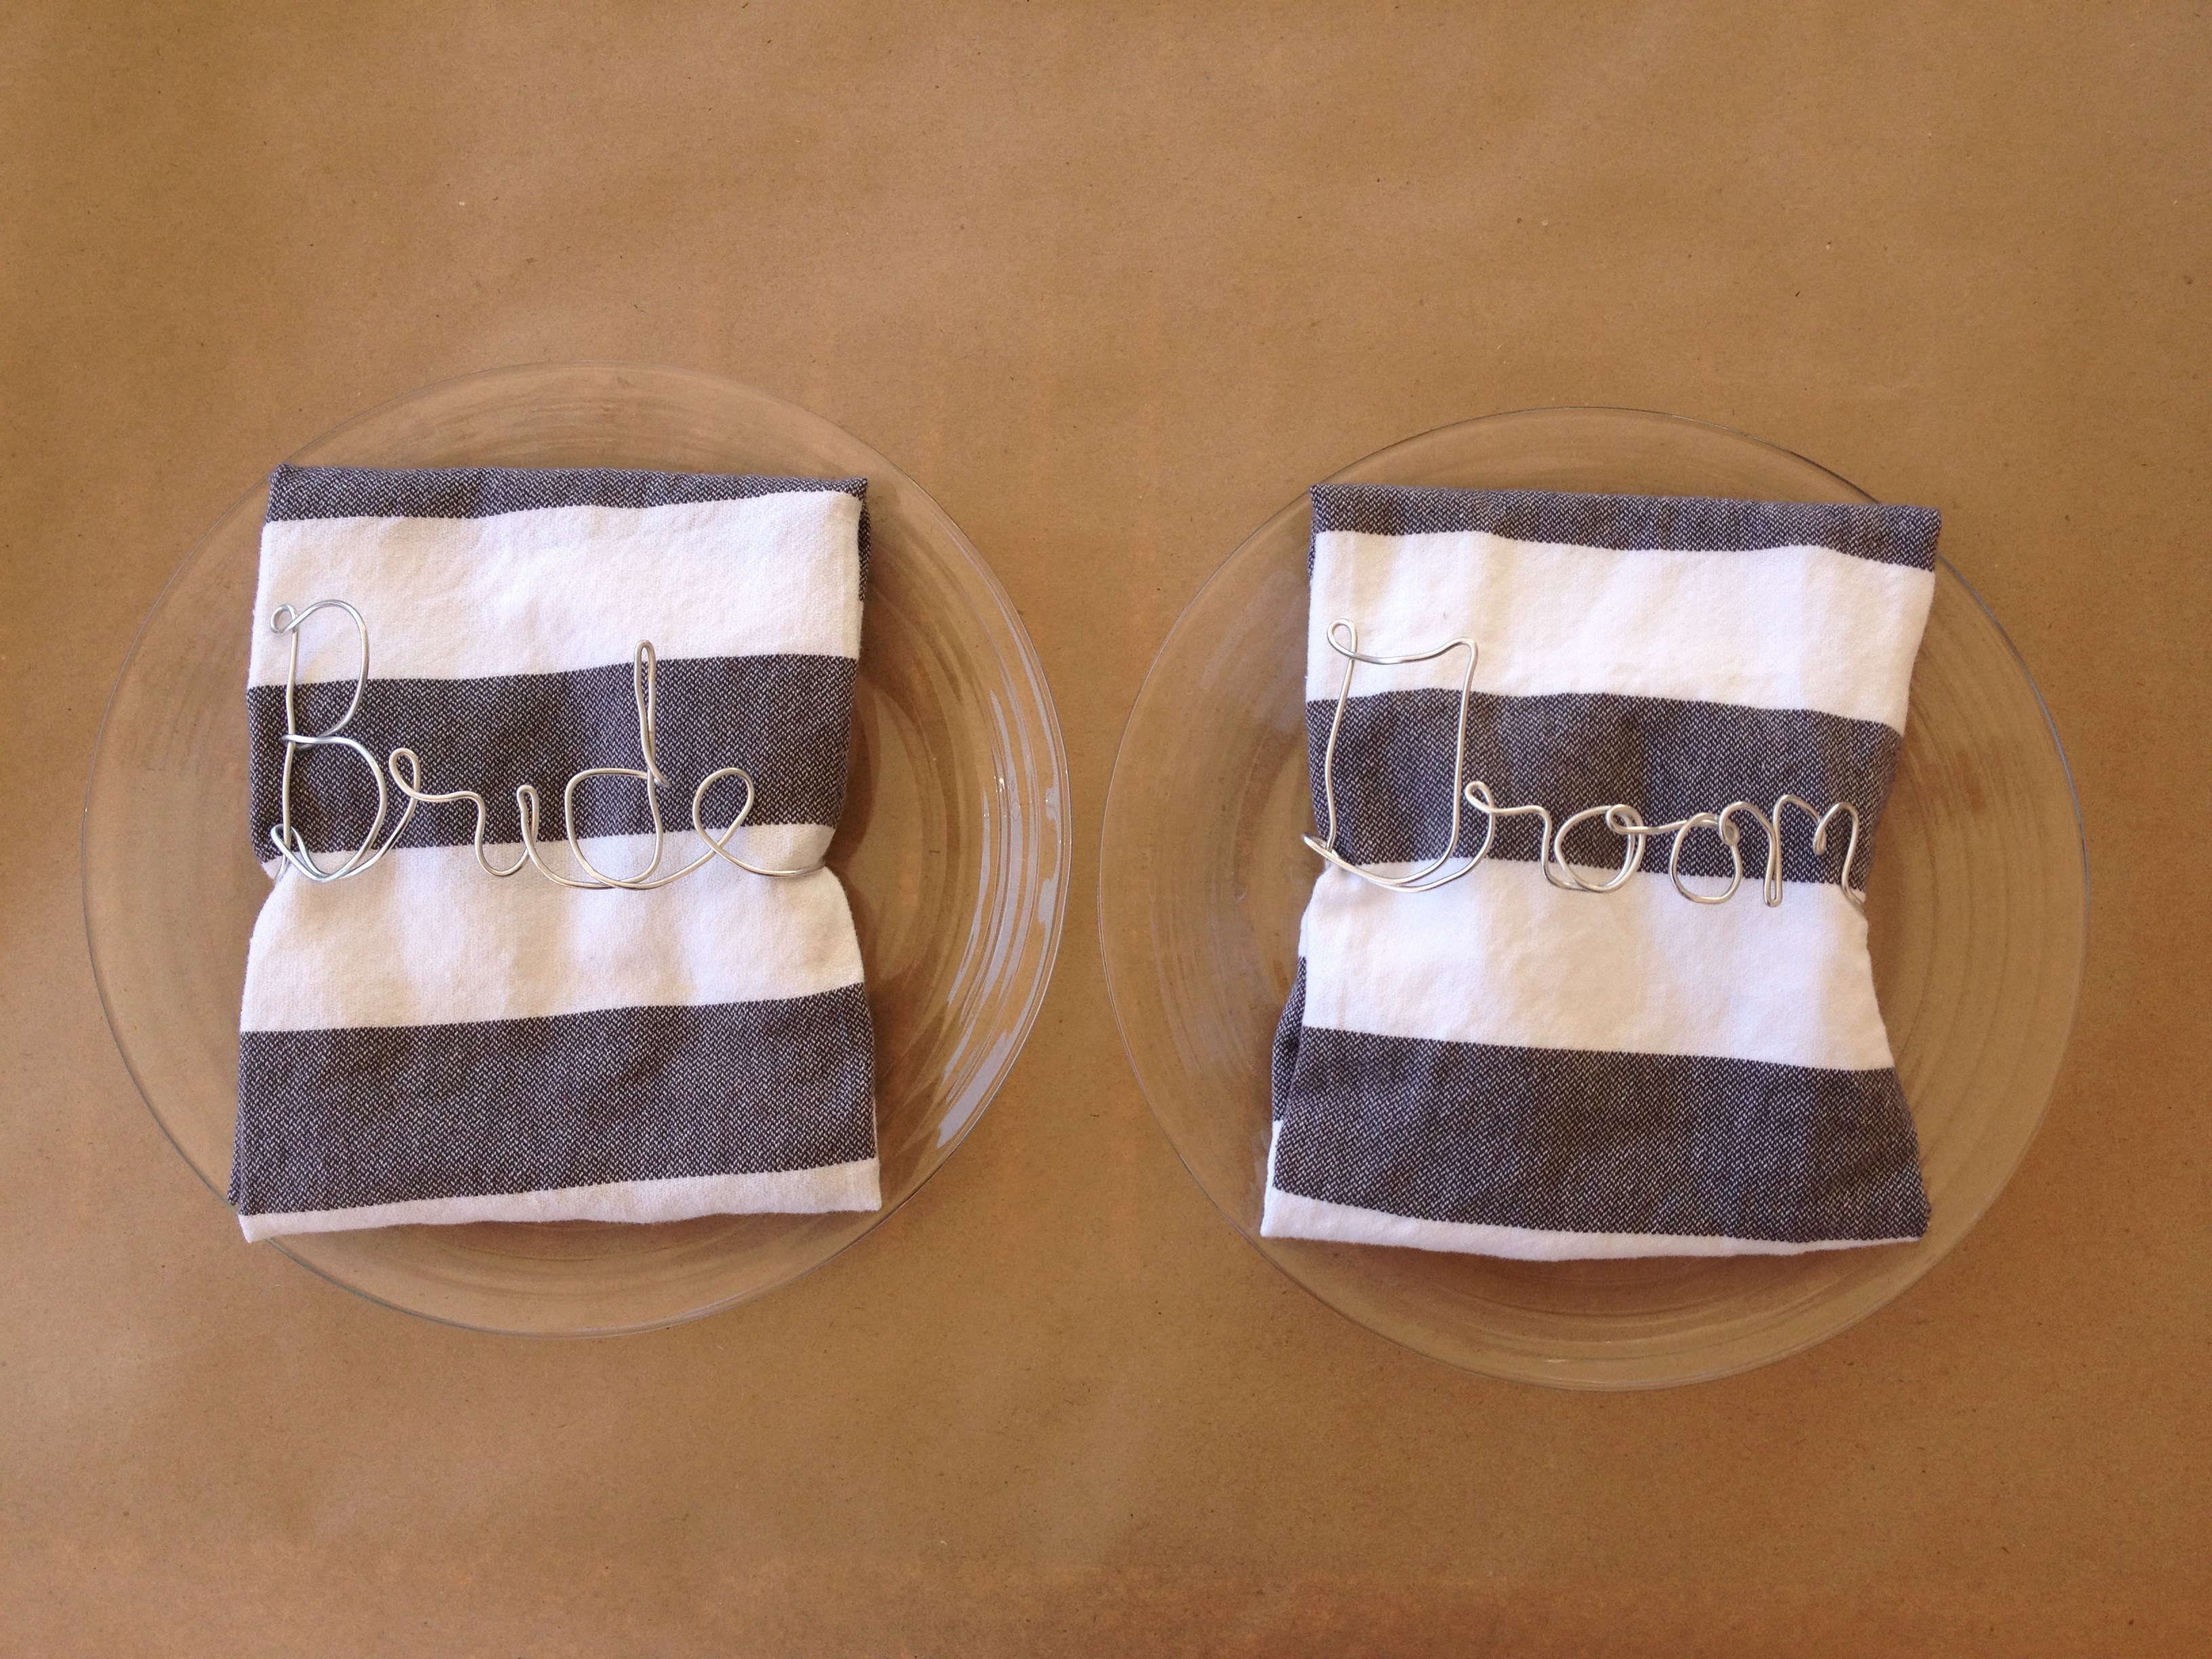
I’ve seen so many brides purchase these personalized hangers lately, so I decided to take a stab at creating my own. The craft is easier then you think, check out the tutorial and let me know how yours turns out. Thank you to my bride-to-be friends for letting me use their names for the hangers! Oh, don’t forget to subscribe to the YouTube Channel, the goal is to get to 1,000 subscribers!
Create a template. Measure out the length of the hanger and then leave 2.0 inches of space on each end. This will act as your guide as you create the name when wrapping the wire.
Take you wire and measure out 2.5 inches on the start end.
Start to shape the letters. This wire is really flexible so you can just use your hands. If additional help is needed, then use the pliers. I suggest using lowercase script for beginners.
Drill hold bout 1 inch from each end of the hanger.
Trim access wire, add glue to hole in hanger and secure wire into place.
Tips:
Your first time trying this craft will take you about 1 hour. Once you get the hang of shaping the wire, you will cut down on your time tremendously. It’s okay if they craft has a more rustic/handmade feel, it doesn’t have to be perfect!
Paint the hanger (before you start the craft) to match the wedding colors.
Other Uses:
There was wire left over so I used it to make “place cards” for the bride and groom. Leave a comment and let me know if you have any other ideas for how to use the wire to personalize your big day.
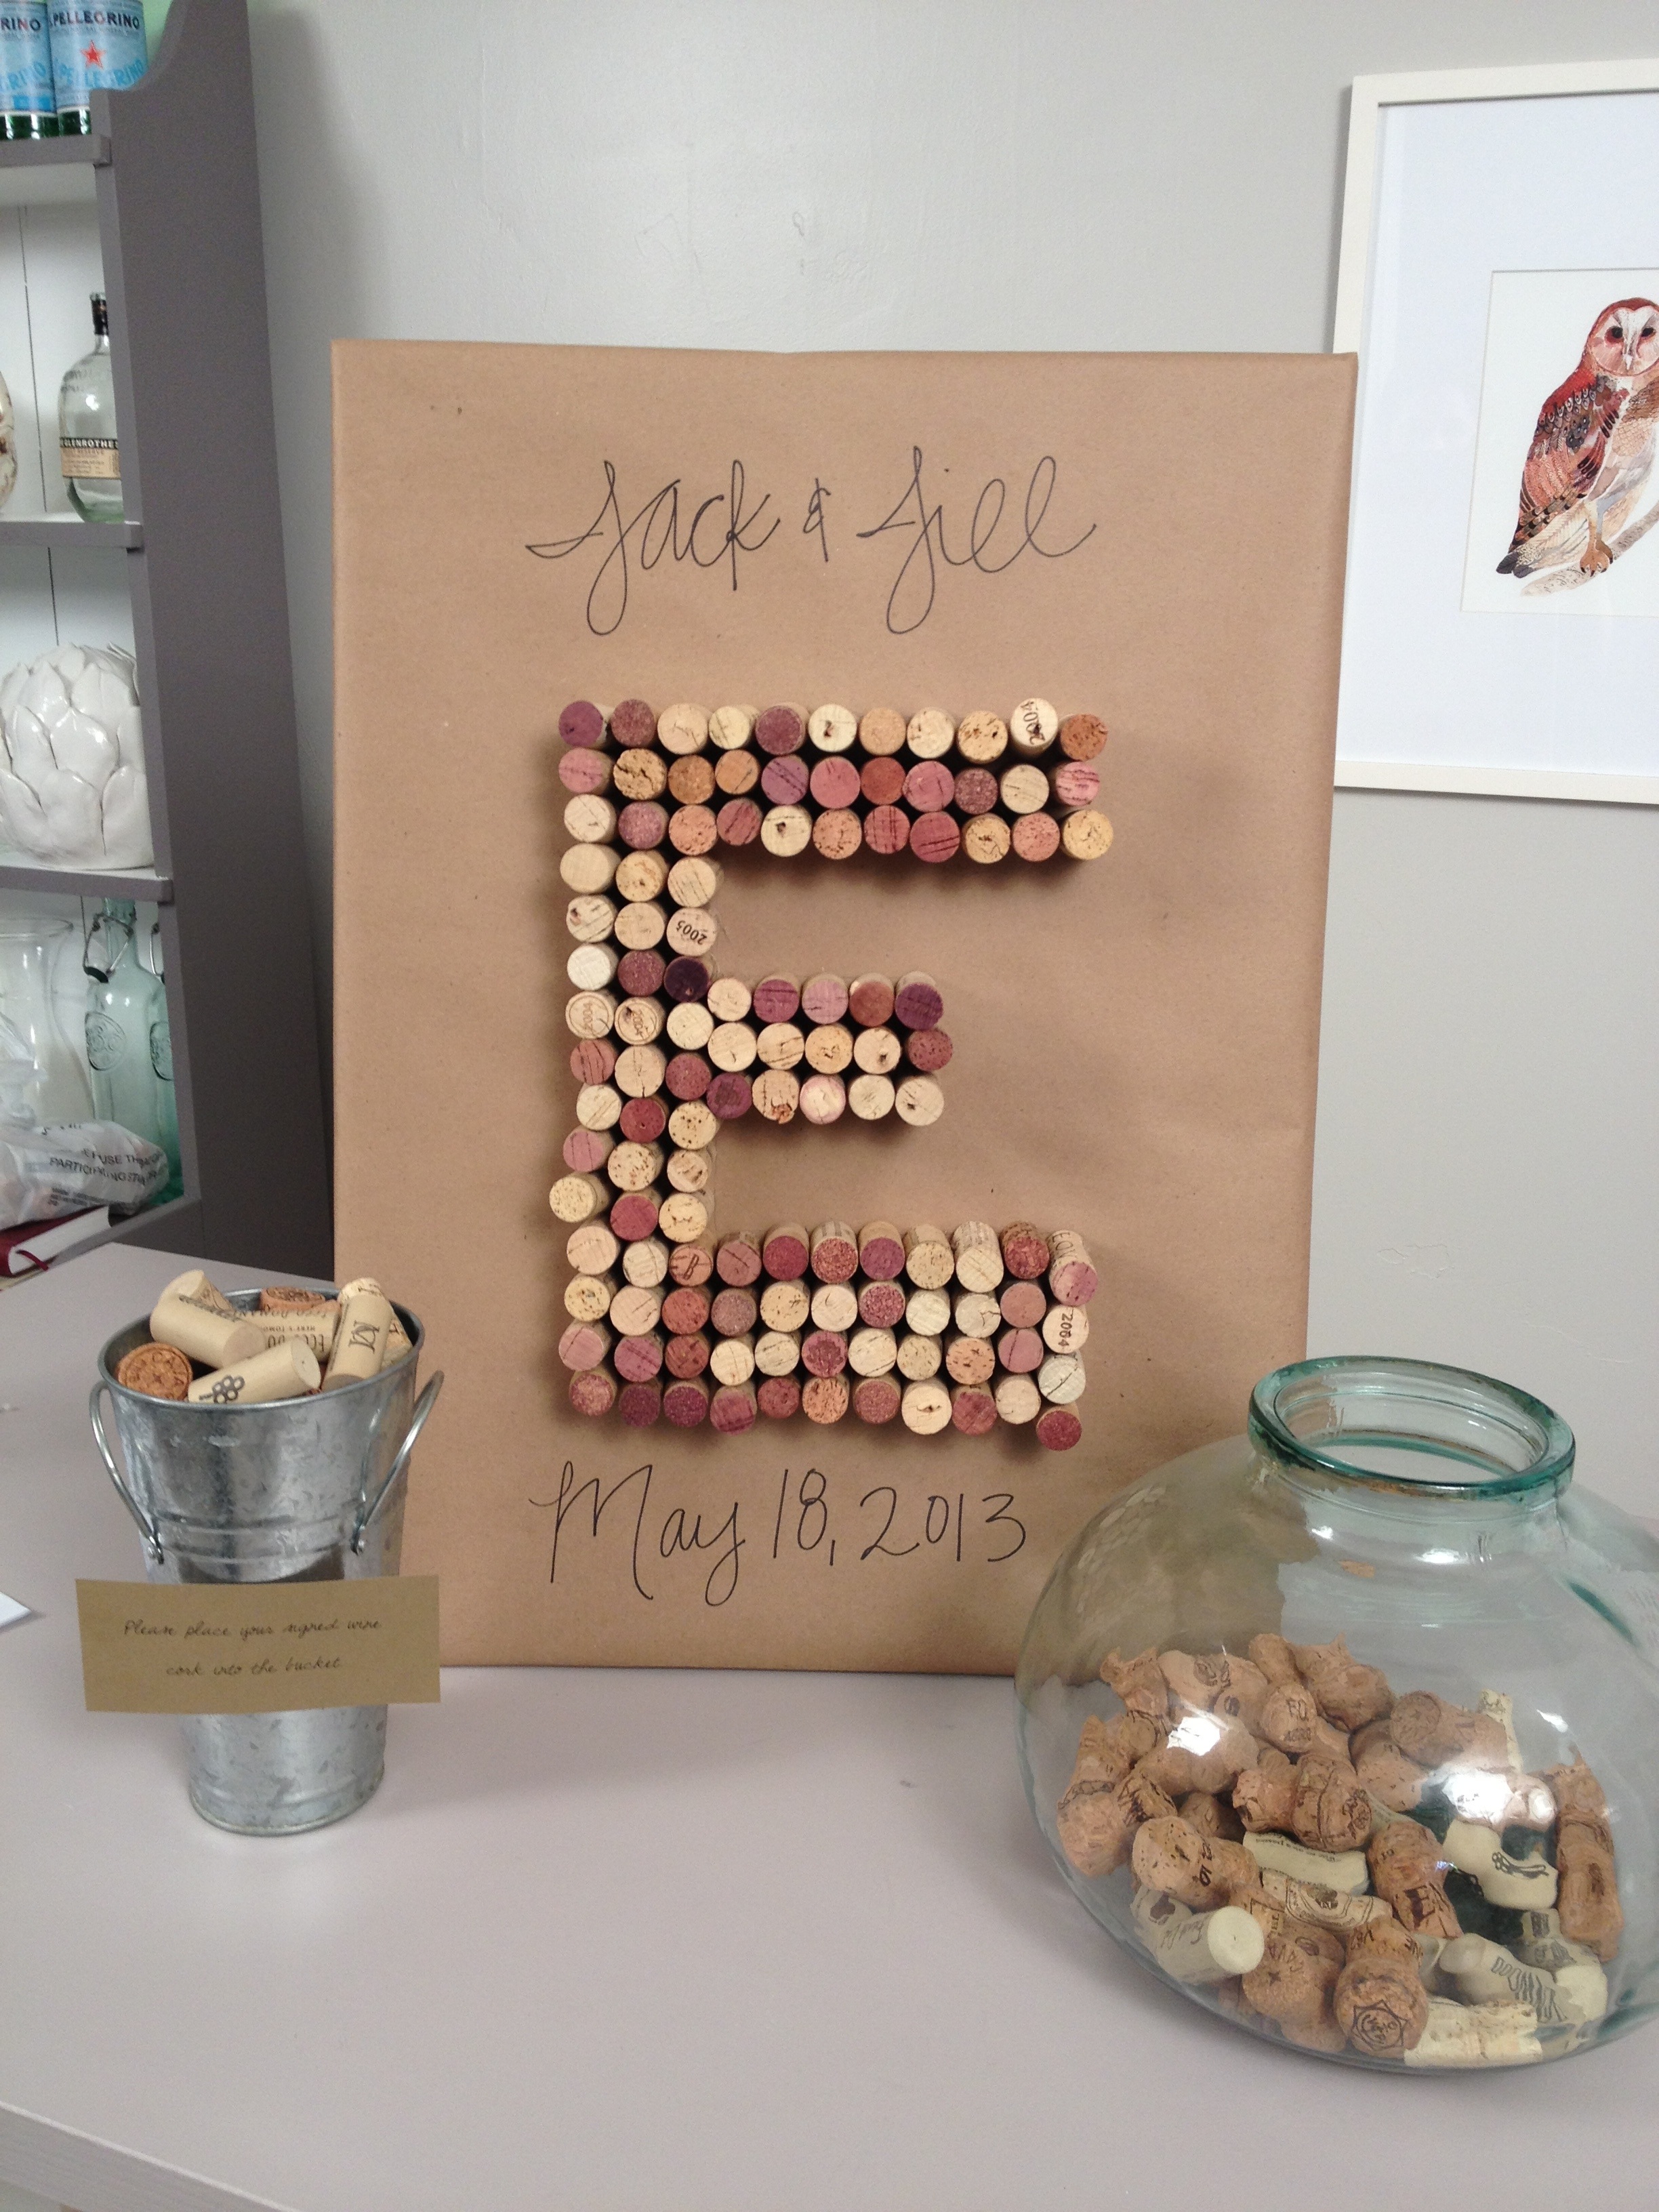
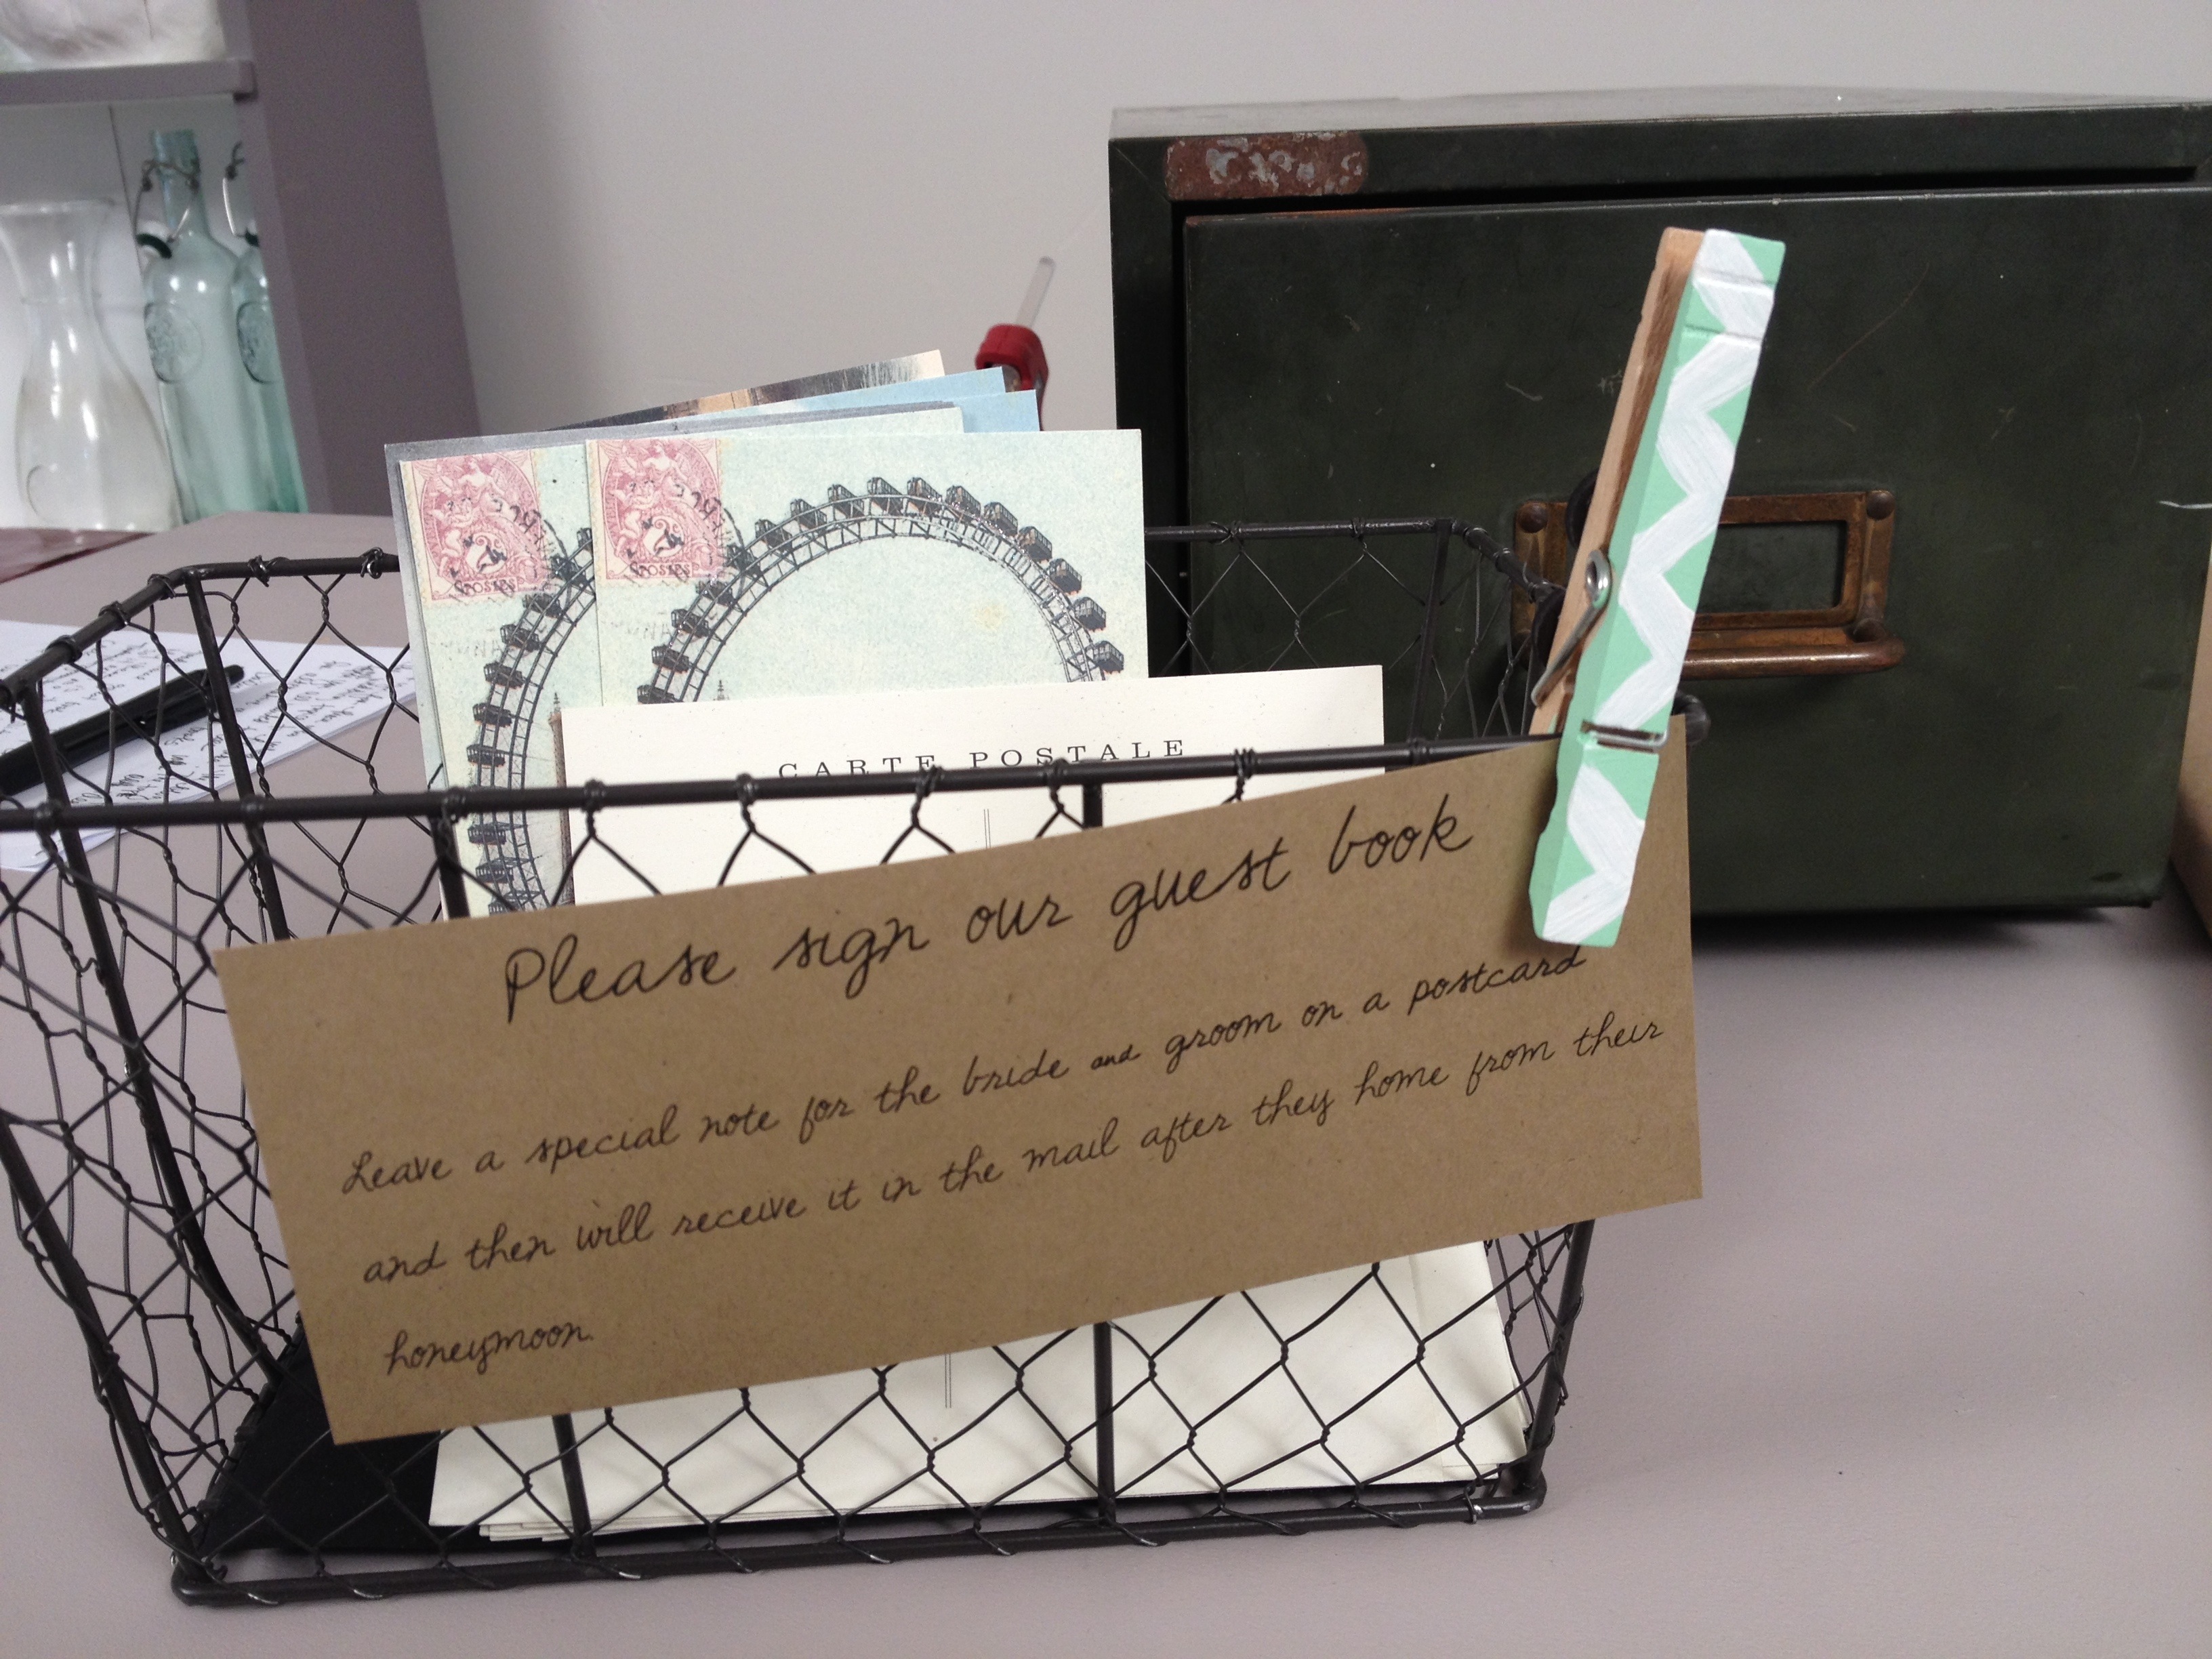
Instead of having a traditional guestbook that is going to sit on a bookshelf and collect dust, my theory is to turn it into something that can be on display and viewed daily. Hopefully these ideas will inspire you to do something unique for your big day.
Option 1: Lip & Mustache Silhouettes
Check out the photo booth tutorial on how to make the lip and mustache silhouettes, you can do any shape that matches the wedding theme: bow ties, hearts, birds, leaves, flowers, etc. Arrange the shapes in an interesting pattern to create a piece of custom artwork for the bride and groom’s home.
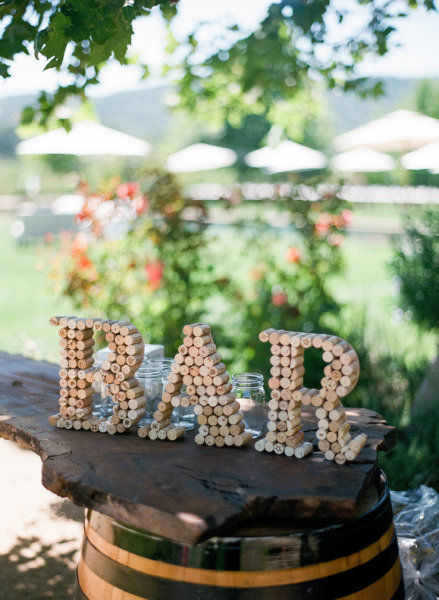
Option 2: Wine Corks
If the bride and groom are wine lovers or the wedding is taking place at a vineyard, have the guests sign wine corks. I wrapped a canvas in kraft paper and then hot glued wine corks into the first letter of the bride & groom’s last name or make free standing letters. Either way it’s a great decorative accent to the home.
If the theme of the wedding is more rustic, consider having your guests sign vintage postcards. After the wedding have your maid-of-honor drop them off at the post office so that when the bride & groom return from the honeymoon their mailbox is filled with well wishes from the guests. Plus, who doesn’t love snail mail? If you are looking for vintage postcards then check out this awesome Etsy shop.