I have a ranch style house and the decor can be described as modern rustic, with the primary colors being gray and white. I love Restoration Hardware, but it is totally out of my budget, so I mostly refer to the store for just inspiration. A lot of their living and dining pieces come in a Grey Acacia Finish (pictured below) and since I enjoy refinishing furniture I tried to take a stab at recreating the RH look. I think it is a handy painting technique to know how to do if you like rustic, shabby chic, vintage styles.
Restoration Hardware Inspiration


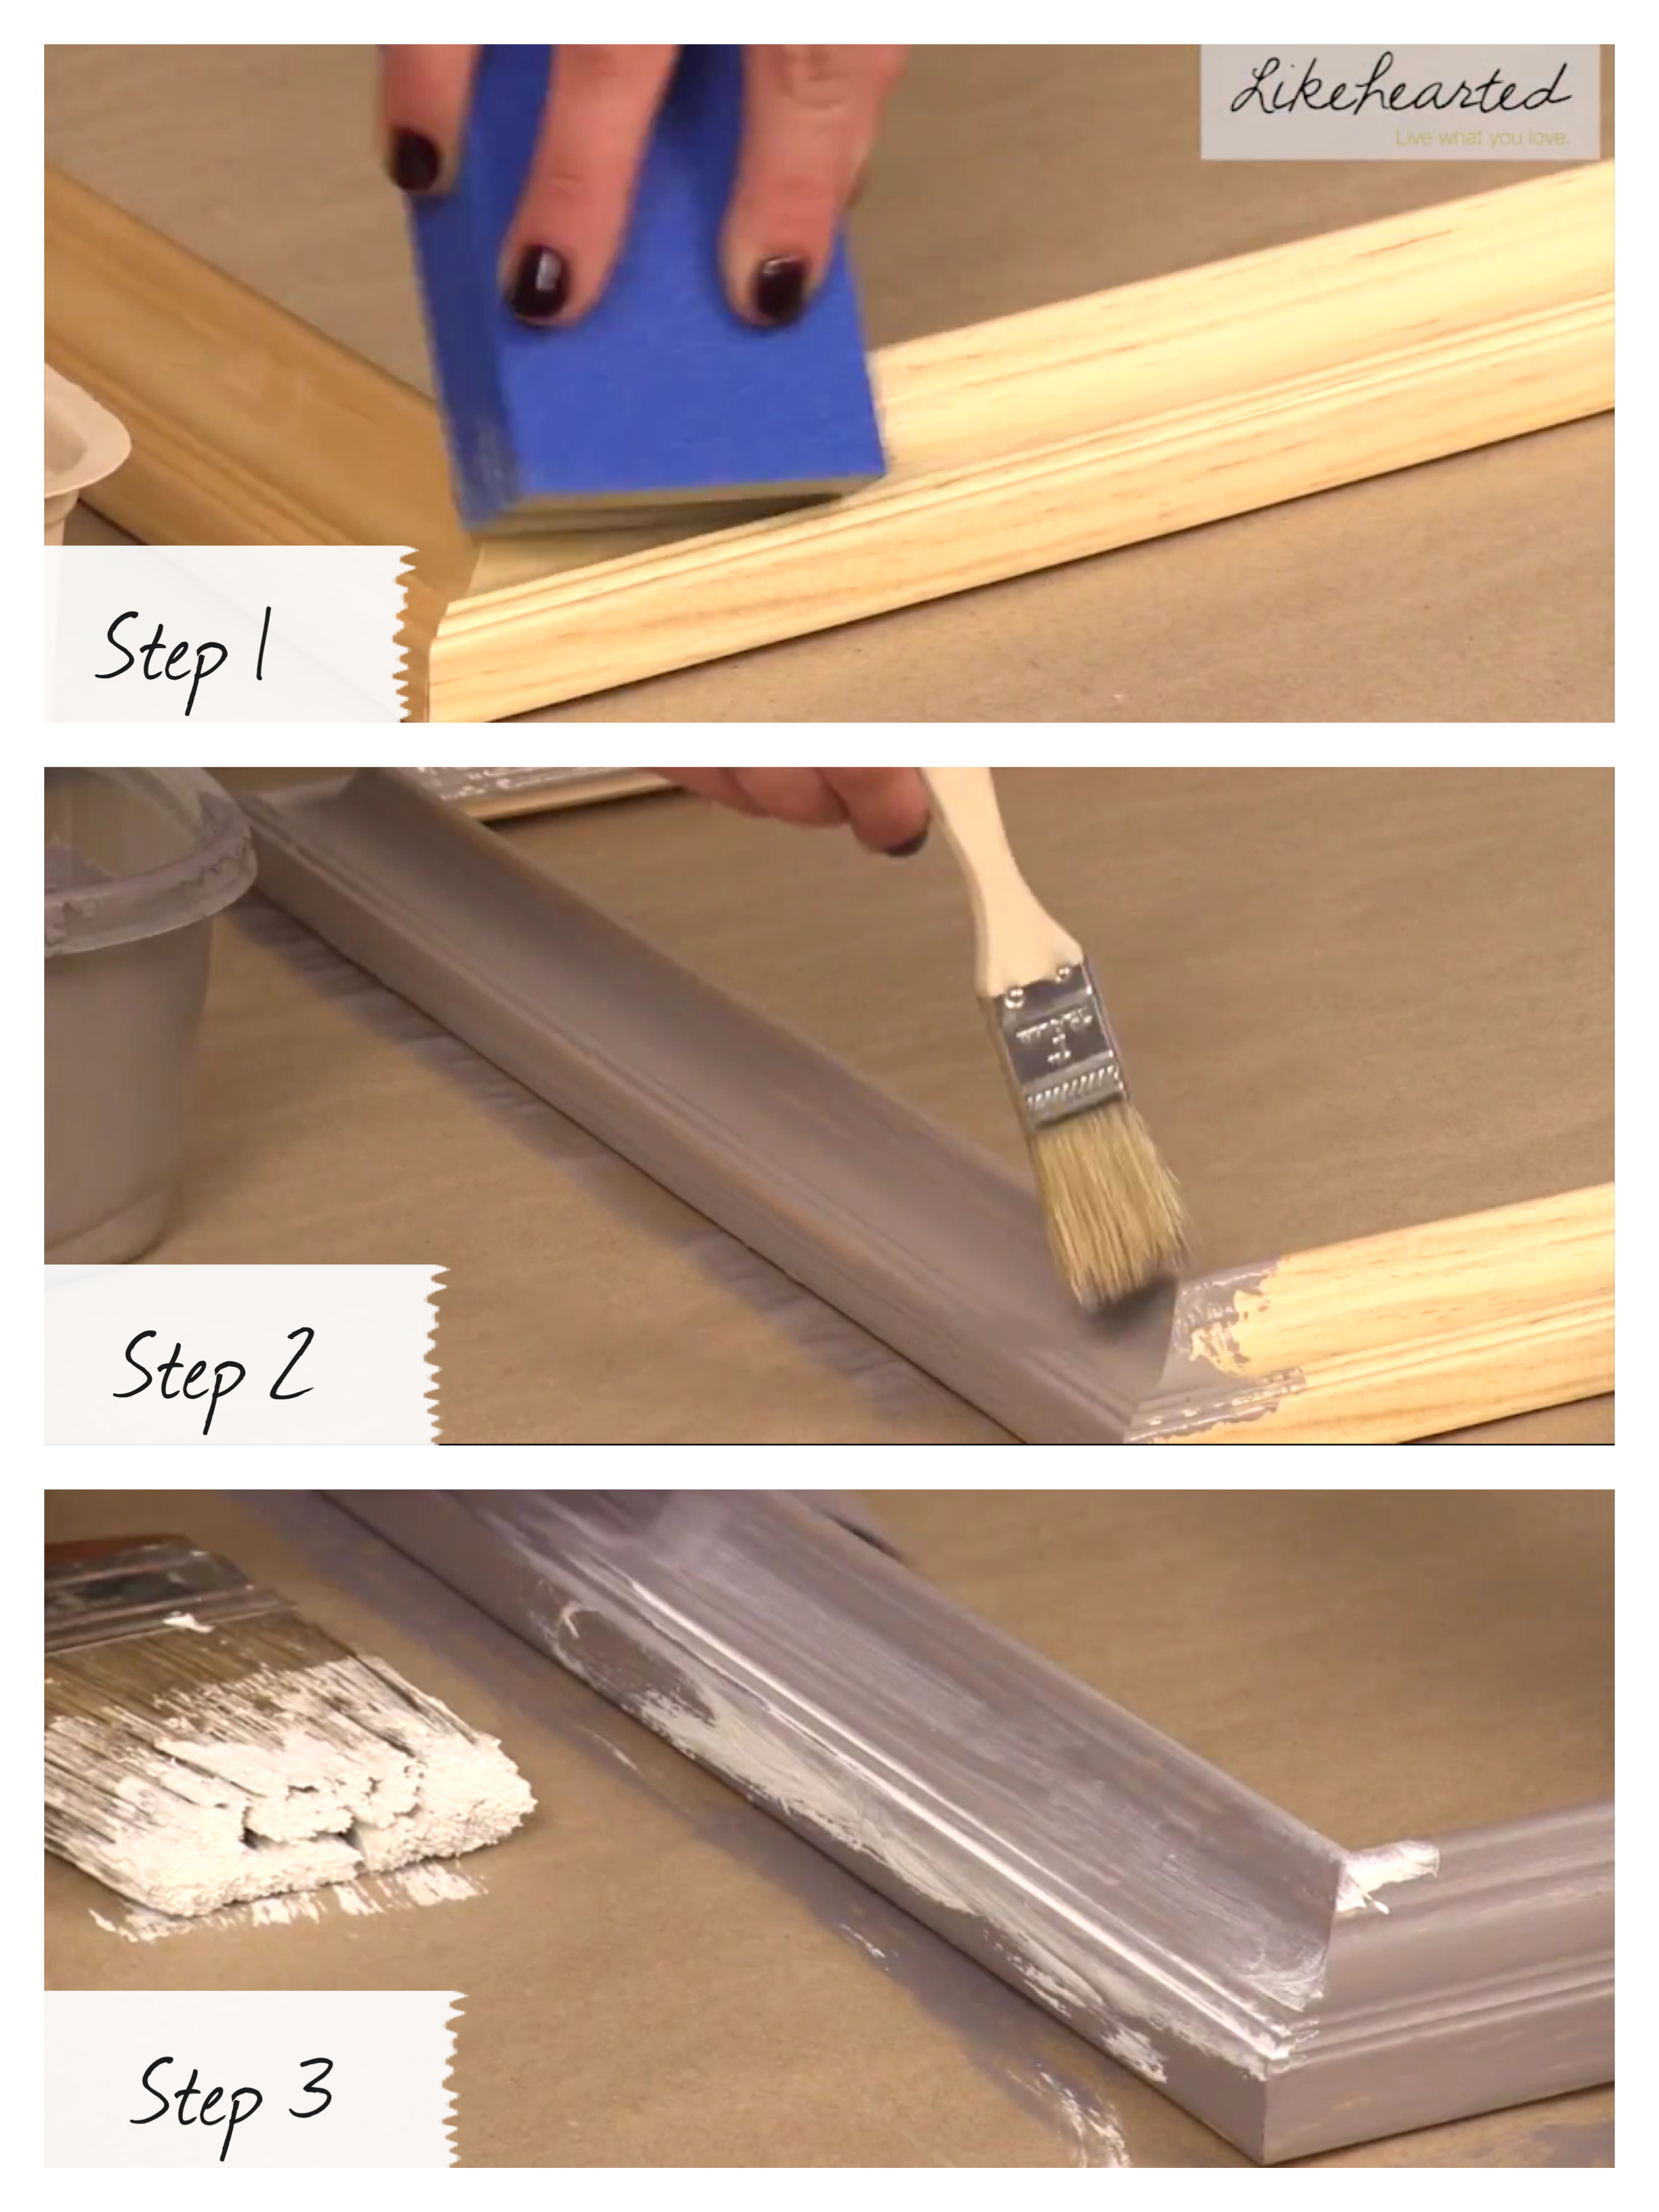
The best part about the graywash technique is that it can be used on any type of wood furniture. In the video I did it on a frame to create accessory displays. I’ll do another post of how to create the accessory displays with chicken wire or twine.
Materials:
-
Gray paint – I had paint leftover from my hutch redo, Benjamin Moore’s Stone 2112-40
-
White Paint – I used leftover paint, in the video I said Benjamin Moore but it was actually Dunn Edwards White 380
Tools:
-
Sandblock
-
Damp Rag – I used an old t-shirt
-
Regular Paint Brush
Steps:
-
If needed sand the frame to take away any varnish.
-
To create the graywash – mix together 1 part gray paint and 1 part glaze.
-
Use a bristle (chip) brush apply the gray paint to the frame. Use a different dry bristle (chip) brush to remove excess paint. Keeping with the rustic look the paint doesn’t need to fully cover the frame, just depends on how much of the oak wood you want to show through. Personally, I didn’t want much of the light wood to show through. Let is dry and apply second layer if needed.
-
To really create the weathered look add a white glaze mixture: mix 1 part white paint to 1/4 part glaze. Using your regular paint brush paint on the white glaze mixture then remove excess with a damp rag. Continue this process until you achieve your desired look.