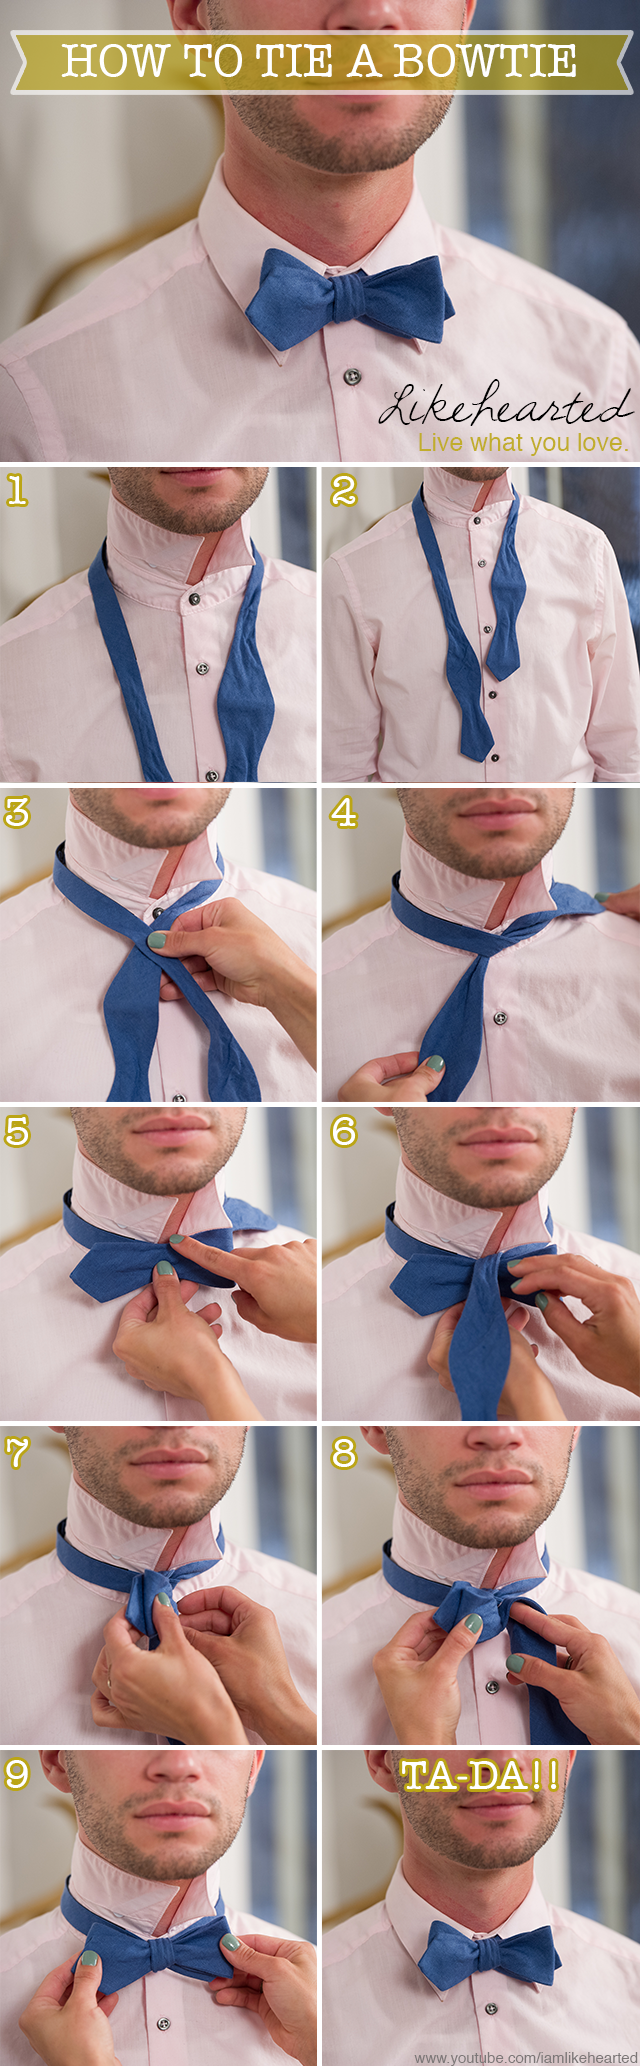
Ladies, who can resist a guy in a suit, especially one in a tux? Maybe its Justin Timberlake bringing the classic back with his Suit & Tie song, the rise of the folk rock hipster artists like Mumford & Sons or inspiration from The Great Gatsby movie but the bow tie seems to be making a major comeback. This week’s video I’ll show you how master tying a bow tie on your significant other.
Gentlemen, finally a tutorial for you! Check out the second half of the video and learn how to tie the bow tie on yourself.
Leave a comment and let me know how your bow tie turns out.
I hope everyone had a wonderful Memorial Day! I definitely took advantage of the long weekend, soaked up some sun and did a whole lot of nothing. It was some much needed downtime and a good recharge but now it’s back to work (thank goodness it is a short week, right!?!).
As a continuation of my Summer Wedding DIY series, I’ll show you how to create a no sew bow. These are great styling accessories for your bridal party, ring bearer, flower girl or other wedding decor. You can create a no sew bow in just 6 easy steps. Head over to my Pinterest board for more ideas on how to incorporate bows into your event.
Thank you to all who helped me to reach the 1,000 subscriber goal on the YouTube channel! I’m so grateful. Please share a comment and let me know what tutorials you would like to see in the future.
How to create a no sew bow:
Cut a piece of ribbon 12.5 inches long (this will make a bow about 6 inches long).
Cut another piece of ribbon 3 inches long.
Take your 12.5 inch long piece of fabric, fold the ends together and secure with a drop of hot glue.
Take your 3 inch long piece of fabric, fold in the sides and secure with a drop of hot glue.
Pinch together the middle of the larger piece of ribbon to form the bow.
Glue the smaller piece of fabric around the middle.